This document provides a comprehensive, step-by-step guide to the Settings module on the Partner Dashboard. The Settings module allows partners to configure operational details, payments, notifications, users, roles, amenities, categories, and service fees.
1. Accessing Settings
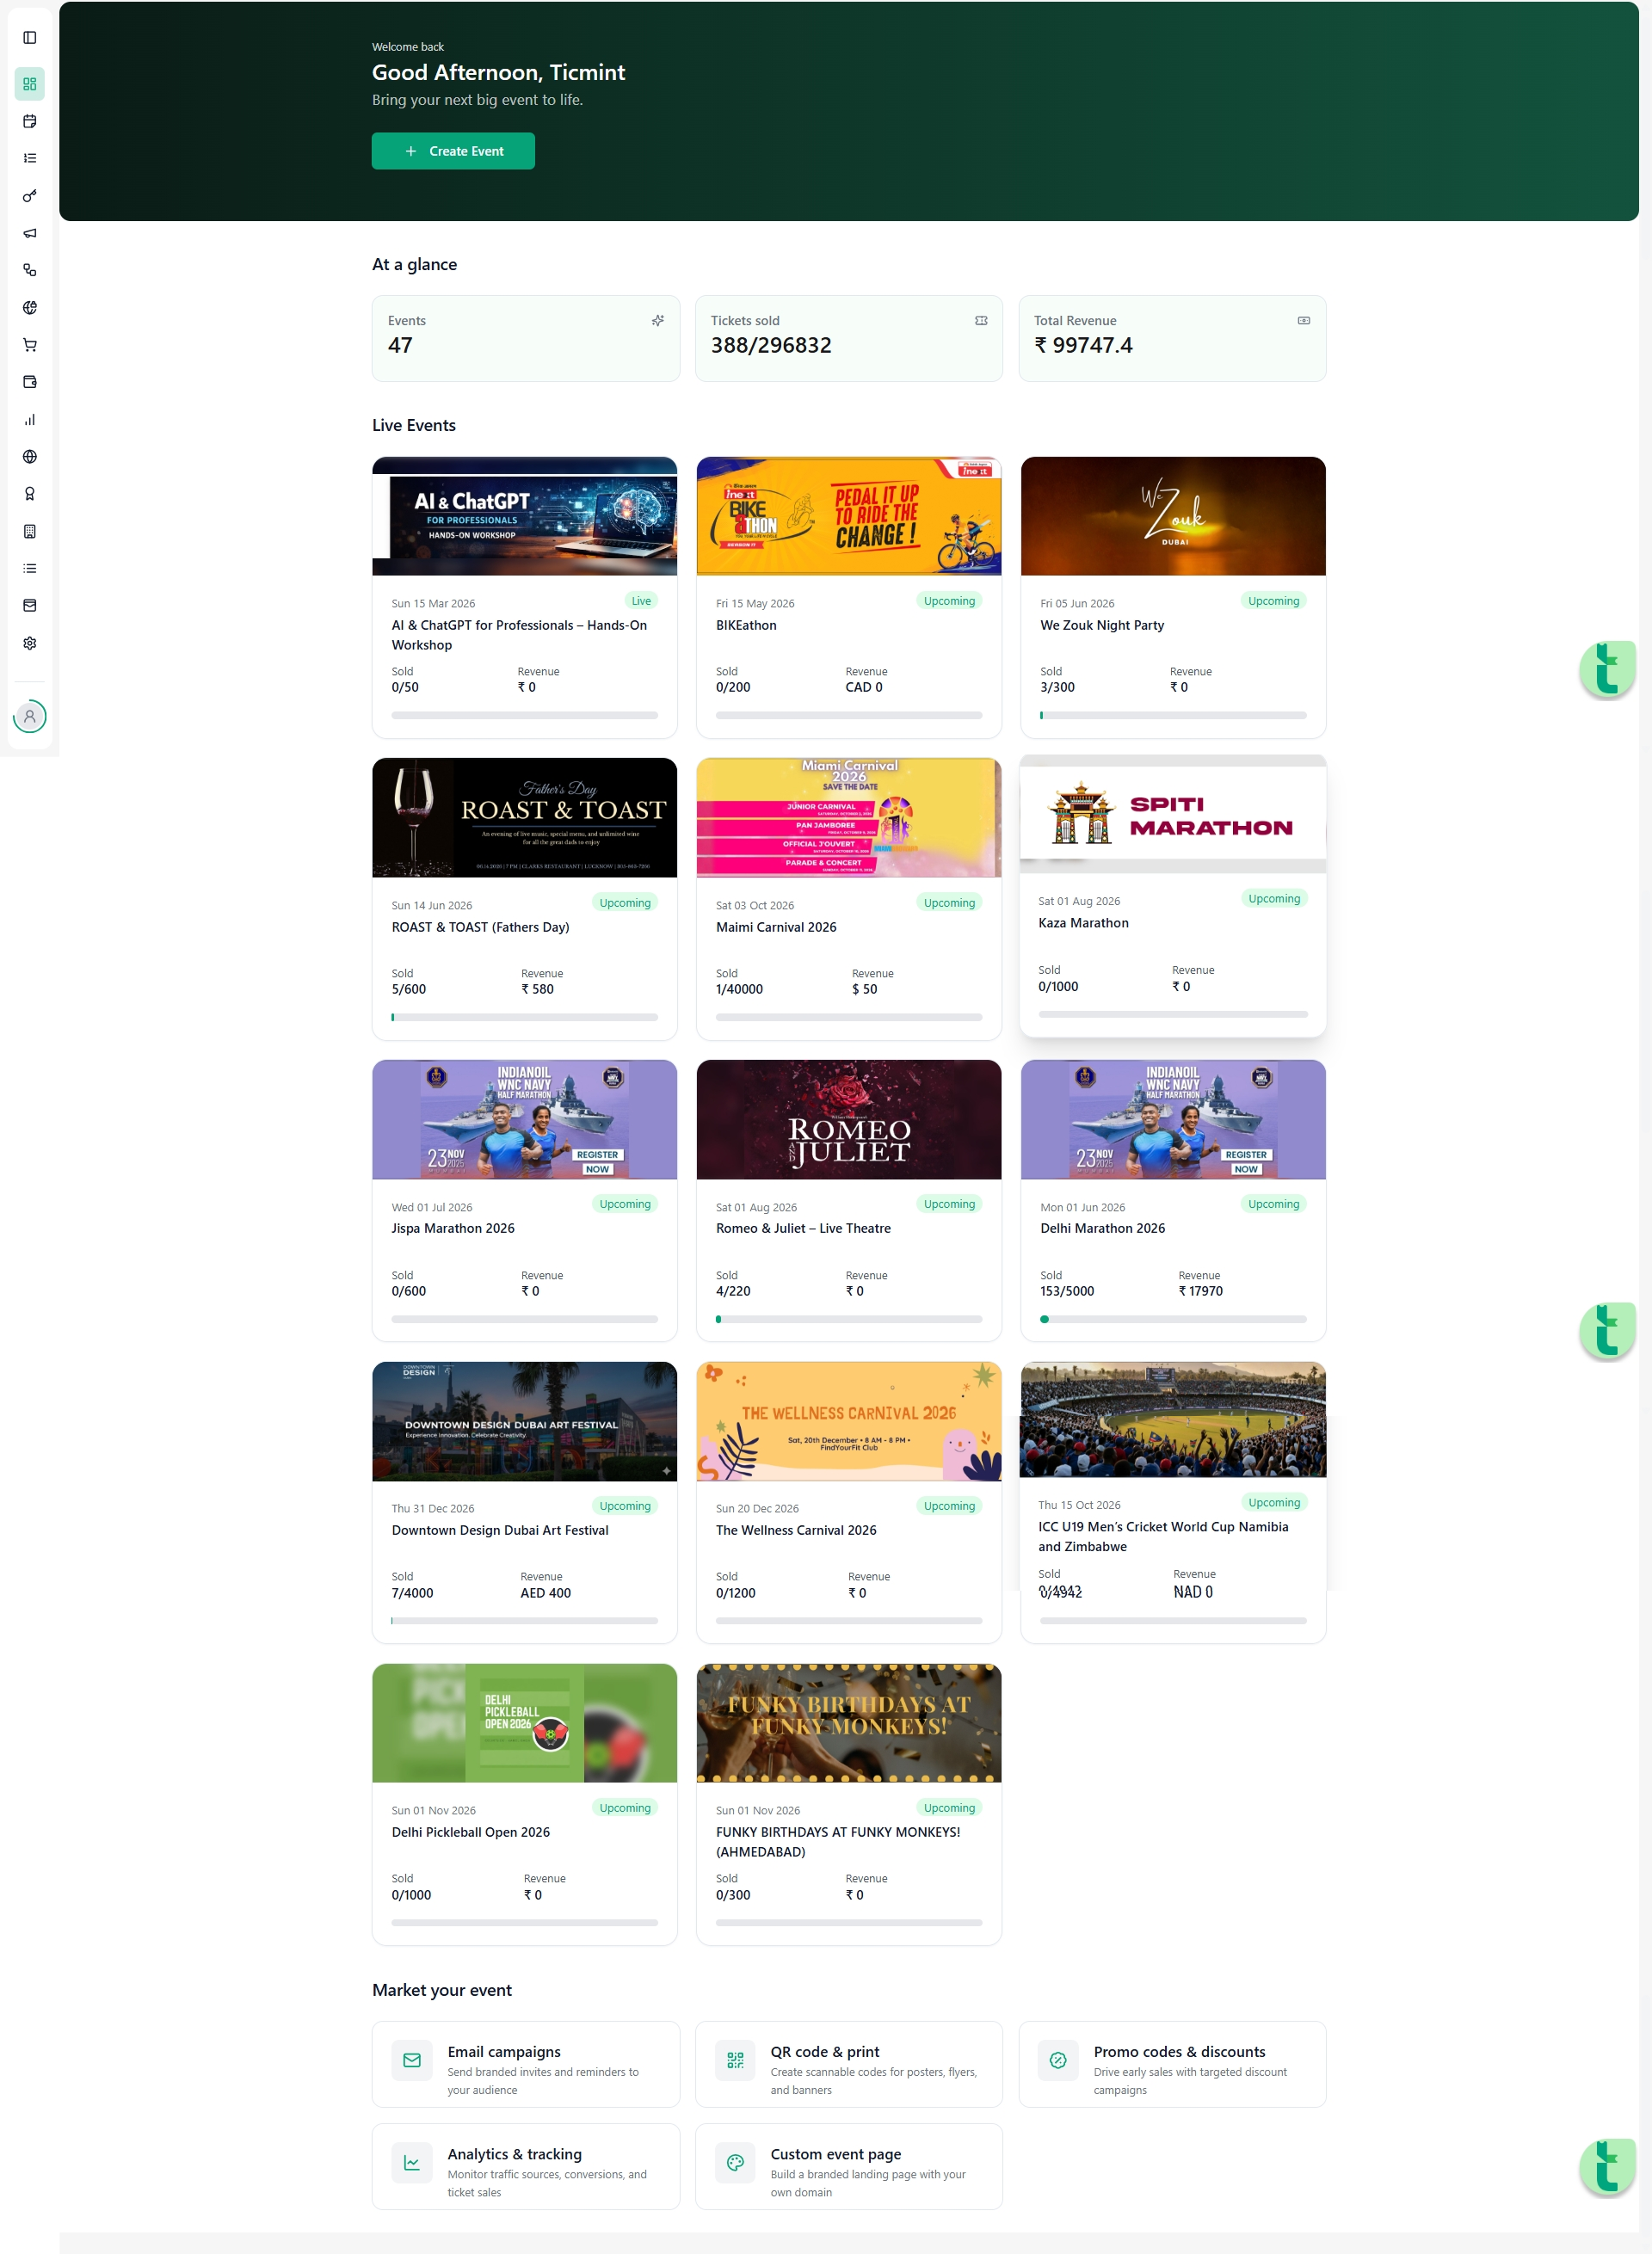
Log in to your Ticmint Partner Dashboard.
From the left-hand navigation panel, click on Settings.
You will land on the Settings Overview page, where all configuration modules are displayed as cards.
2. Settings Overview Page
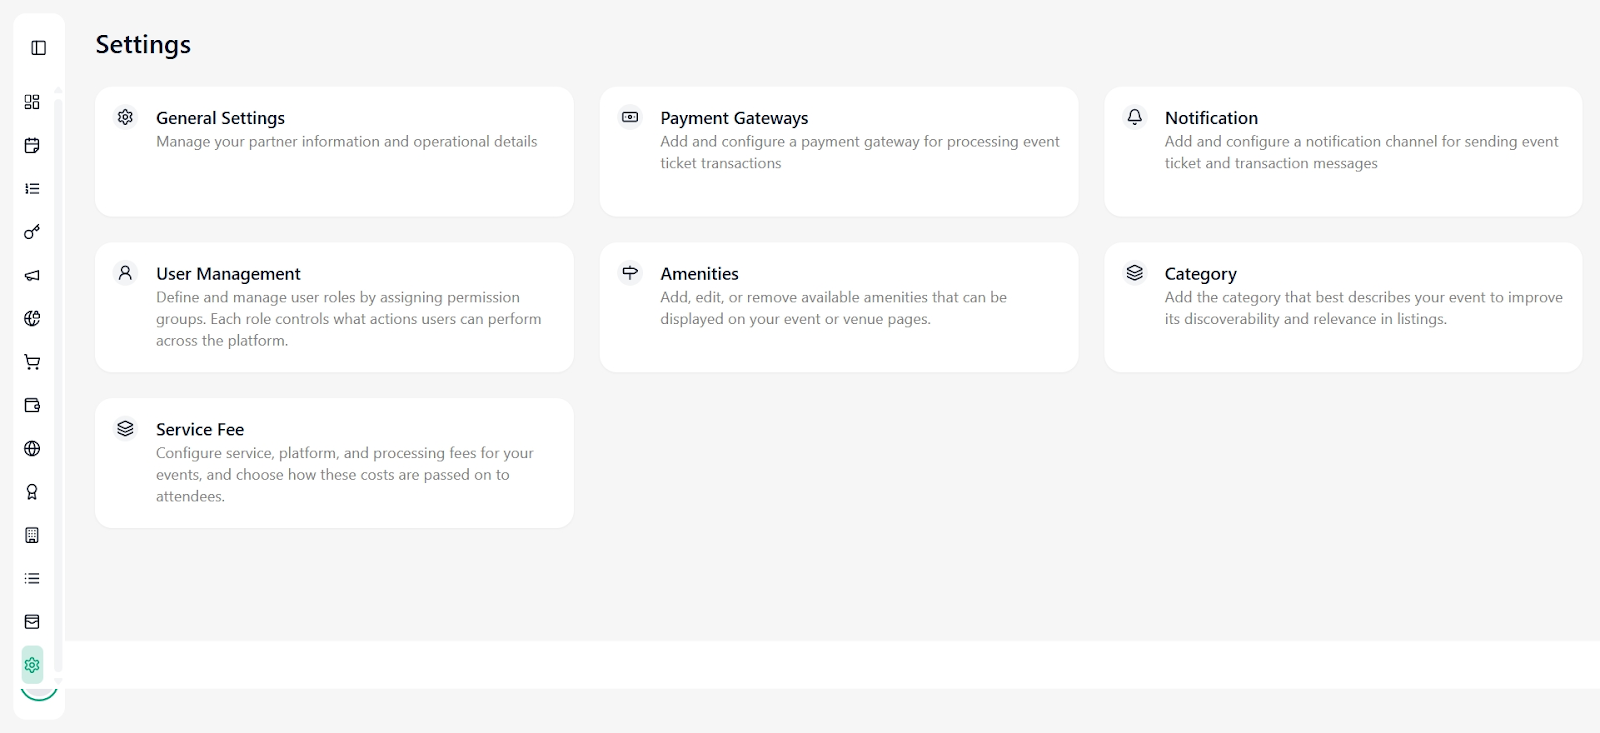
The Settings page acts as a central control panel for managing platform-level configurations. The following modules are available:
General Settings
Payment Gateways
Notification
User Management
Amenities
Category
Service Fee
Each module controls a specific part of how your events, payments, and communications function on Ticmint.
3. General Settings
Purpose
General Settings store your partner’s core identity and operational information. These details are used across invoices, receipts, payouts, and official communication.
Steps to Update General Settings
Click on General Settings.
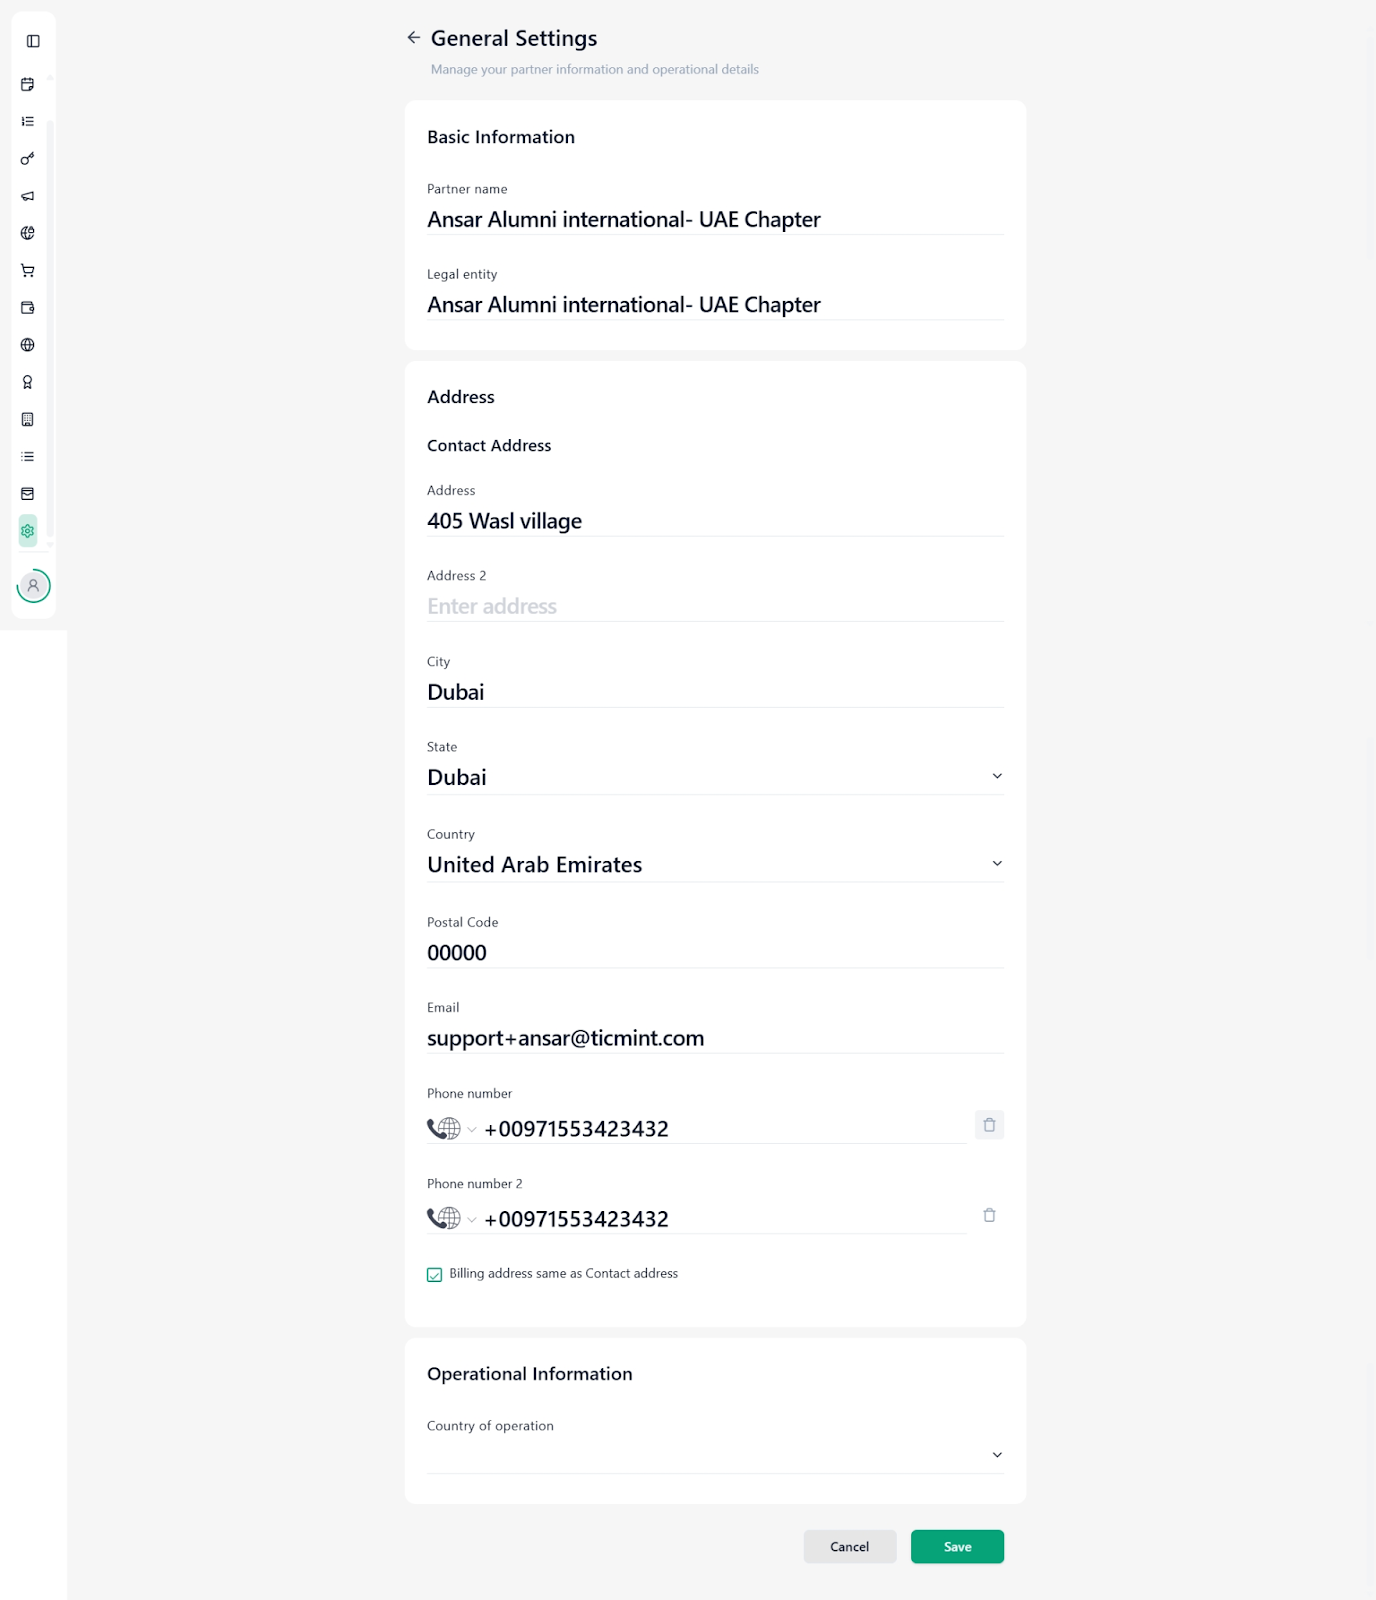
You will see sections for Basic Information, Address, and Operational Information.
Basic Information
Partner Name: The display name of your organisation on Ticmint.
Legal Entity: The officially registered legal name of your organisation. This is critical for compliance, invoicing, and payment settlements.
What is a Legal Entity?
A legal entity is the officially registered name of your organisation as per government or regulatory records. This name is used for contracts, taxation, and financial settlements.
Address & Contact Details
Contact address
City, state, country, postal code
Email address used for official communication
Primary and secondary phone numbers
Option to mark billing address same as contact address
Operational Information
Country of Operation: Defines where your organisation primarily operates or hosts events.
Click Save to apply changes.
4. Payment Gateways
Purpose
Payment Gateways allow you to collect ticket payments securely from attendees.
Viewing Payment Gateways
The Payment Gateway list shows:
Gateway name
Provider
API key status
Country
Currency
Adding a Payment Gateway
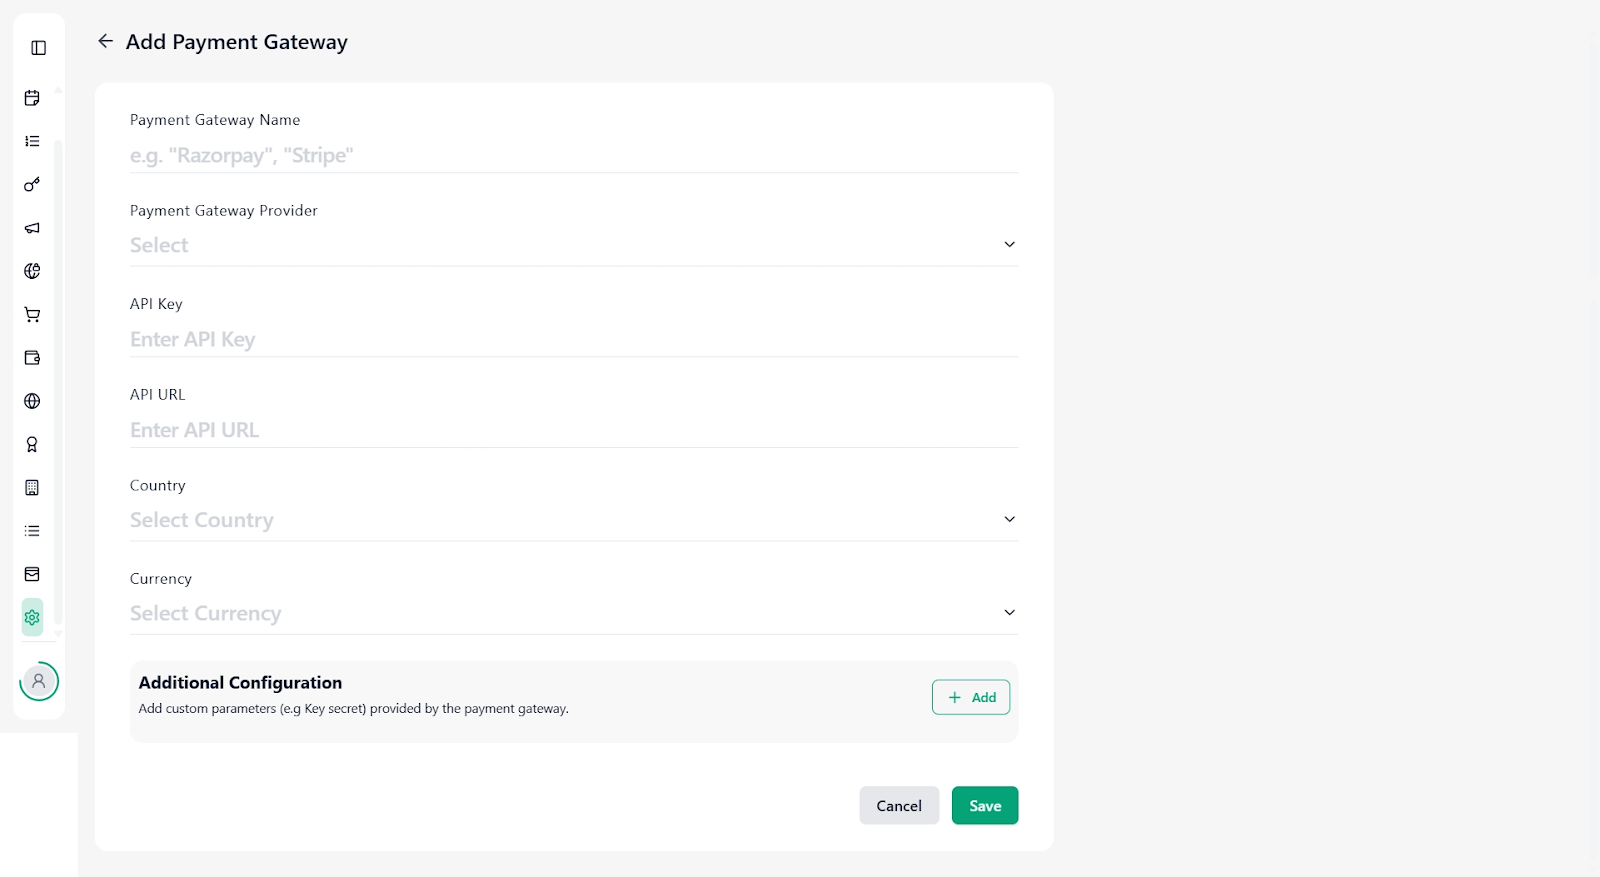
Click Add Payment Gateway.
Enter the following details:
Payment Gateway Name (e.g., Razorpay, Stripe)
Payment Gateway Provider
API Key (provided by the payment gateway)
API URL (if applicable)
Country
Currency
Additional Configuration
Use Additional Configuration to add parameters such as Key Secret or other gateway-specific values.
Click Save once completed.
Note: API keys are sensitive credentials. Ensure they are copied correctly from your payment provider dashboard.
5. Notifications
Purpose
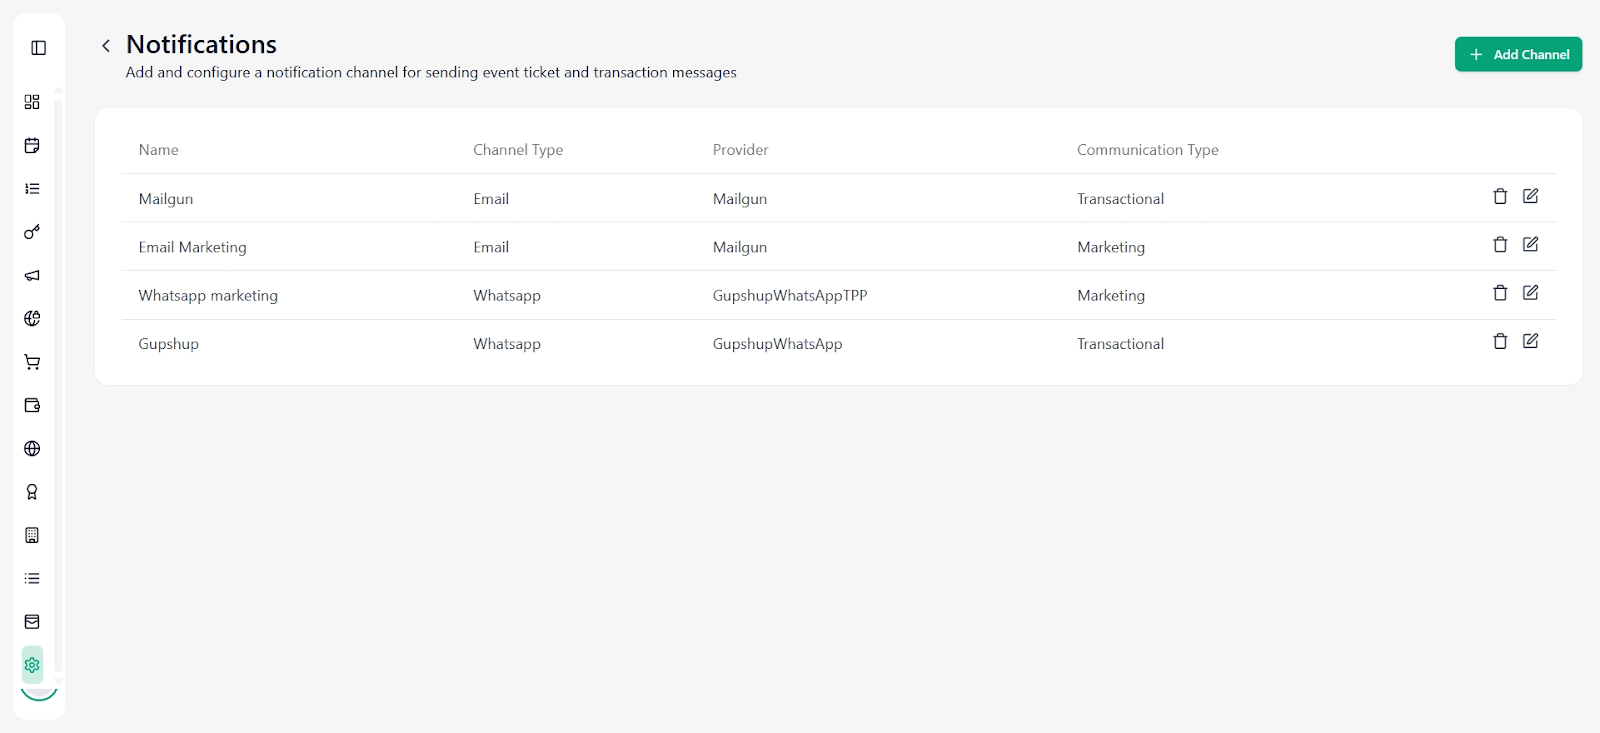
Notification settings control how transactional and marketing messages are sent to attendees.
Notification Channels
You can configure multiple channels, such as:
Email (Transactional & Marketing)
WhatsApp (Transactional & Marketing)
Adding a Notification Channel
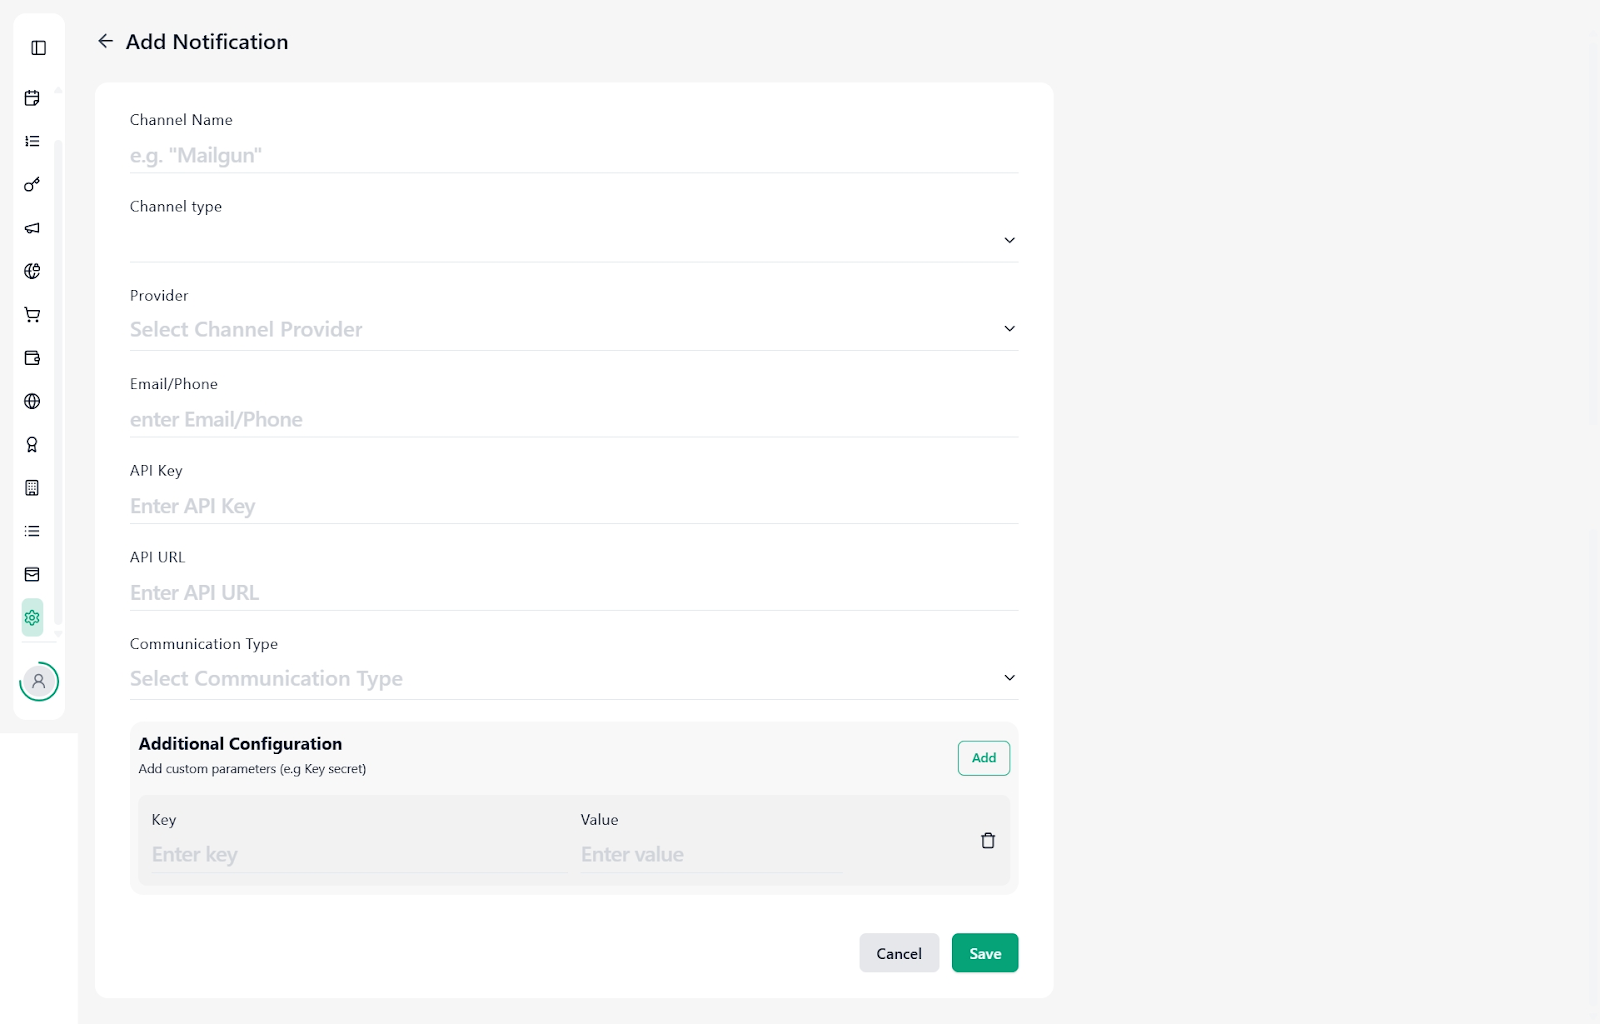
Click Add Channel.
Enter:
Channel Name
Channel Type (Email / WhatsApp)
Provider (e.g., Mailgun, Gupshup)
Email or Phone number
API Key & API URL
Communication Type (Transactional or Marketing)
Add any additional configuration if required.
Click Save.
6. User Management
Purpose
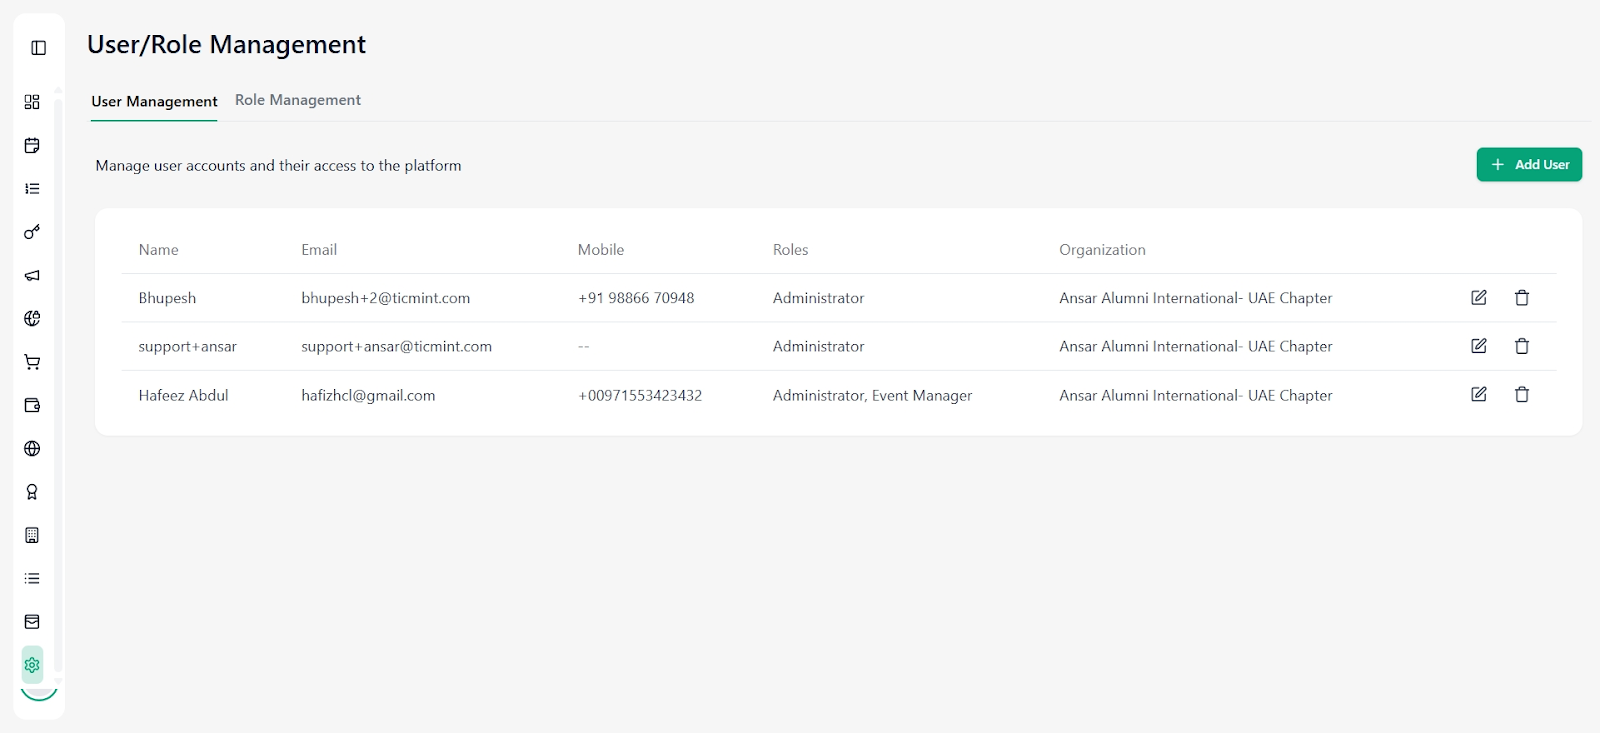
User Management allows you to control who can access your Ticmint dashboard and what permissions they have.
Viewing Users
The user list displays:
Name
Email
Mobile number
Assigned roles
Organization
Adding a User
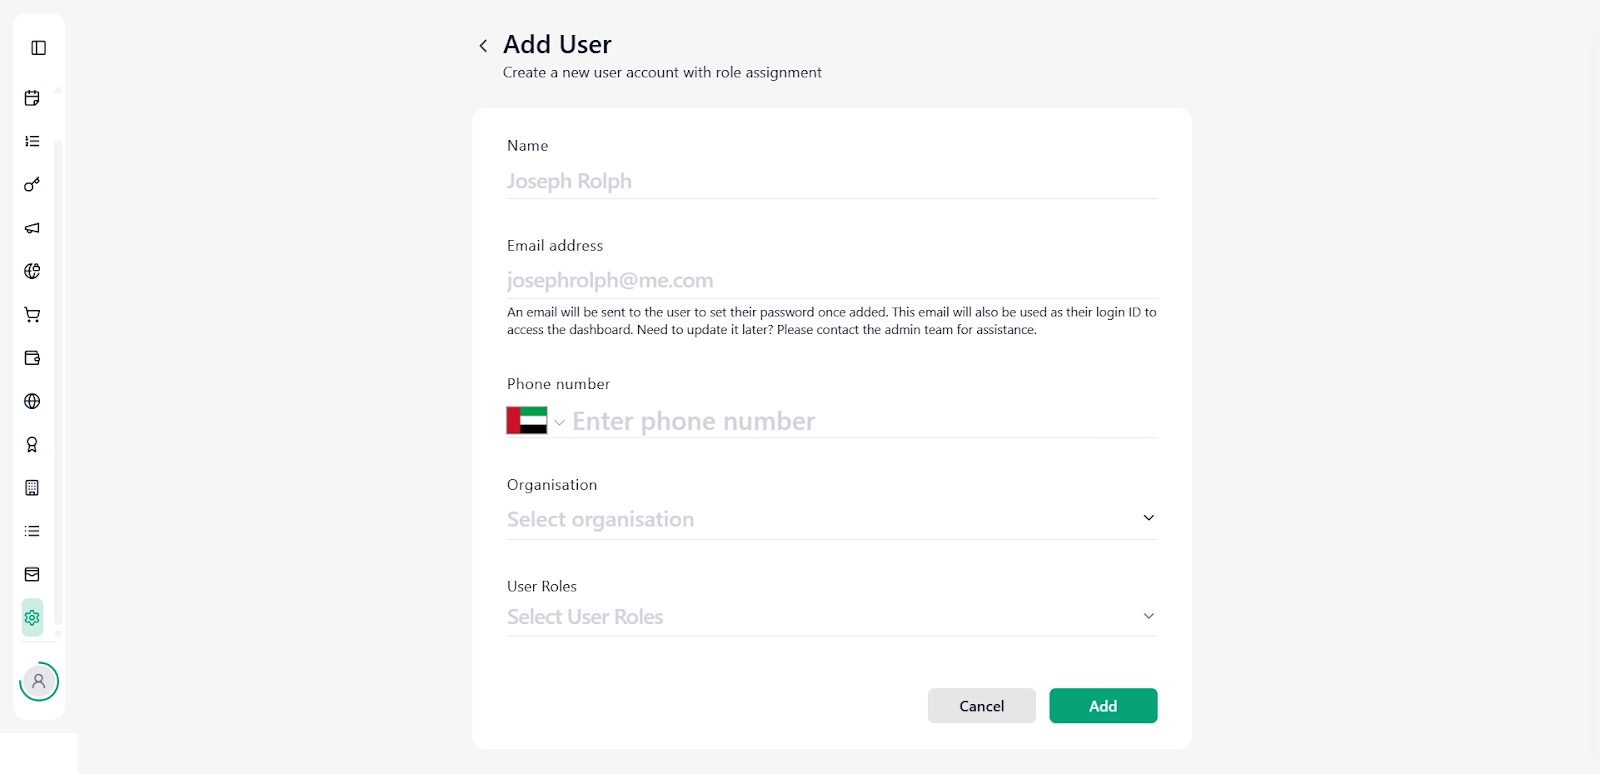
Click Add User.
Enter user details:
Name
Email address (used as login ID)
Phone number
Organization
User roles
Click Add.
An invitation email will be sent to the user to set their password.
Role Management
Roles define what actions a user can perform, such as:
Administrator
Event Manager
Finance access
Assign roles carefully to maintain security.
8. Amenities
Purpose
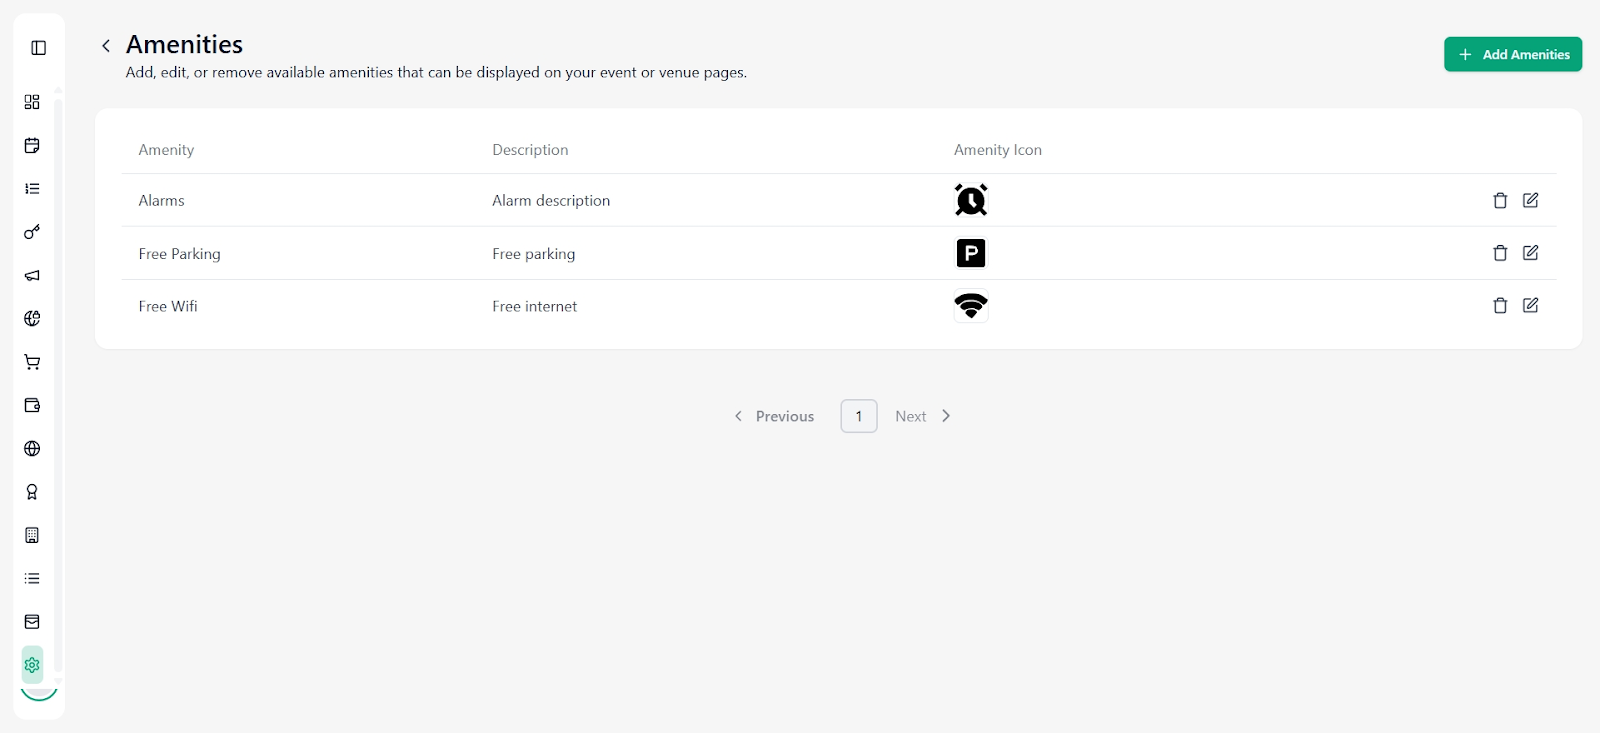
Amenities allow organisers to highlight facilities or services available at an event or venue. Displaying amenities helps attendees better understand what to expect and improves the overall event experience.
Adding an Amenity
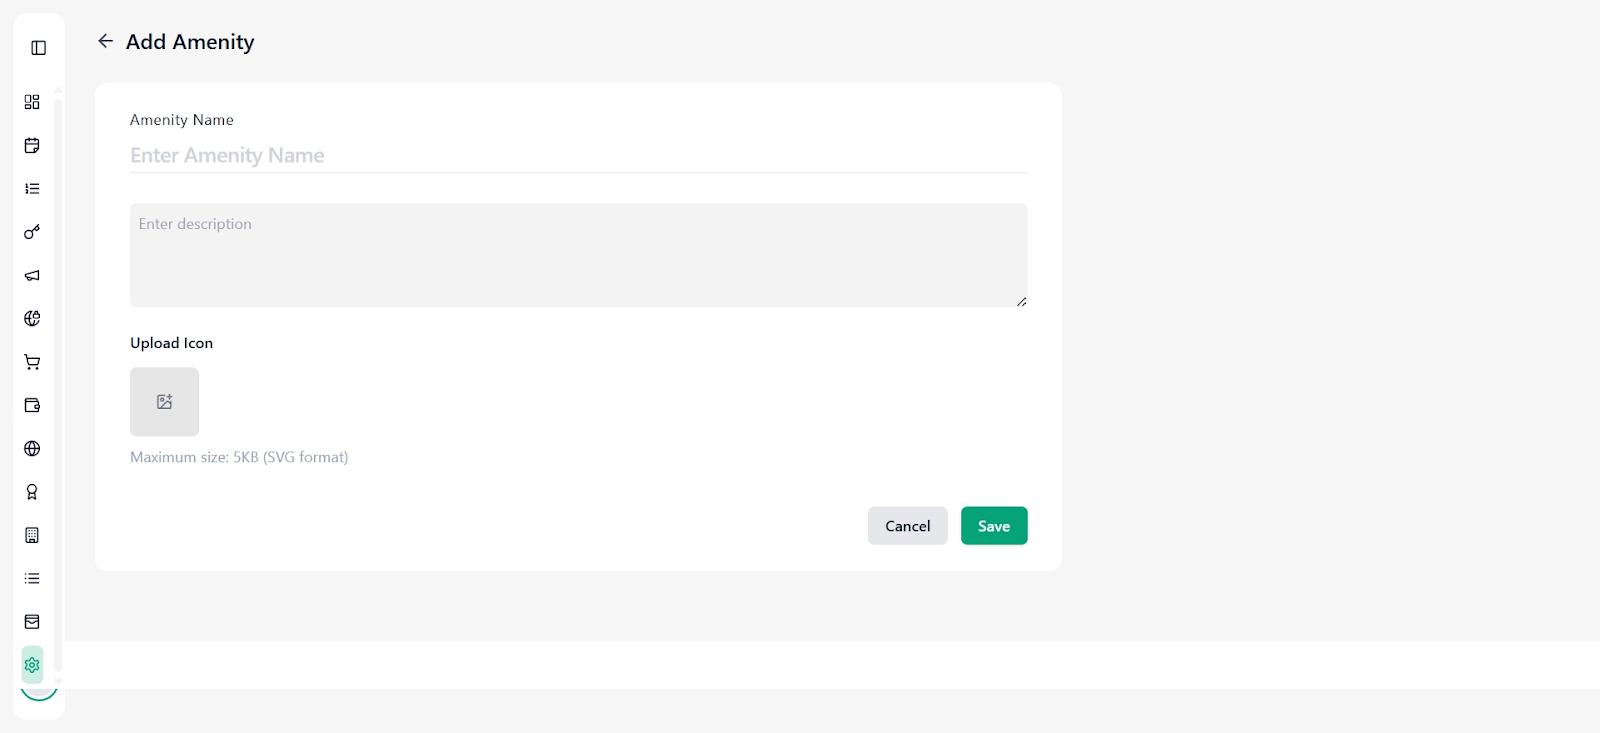
Navigate to Settings → Amenities.
Click Add Amenities.
On the Add Amenity screen, enter:
Amenity Name: Name of the facility (e.g., Free Parking, Wi-Fi).
Description: Short explanation of the amenity.
Upload Icon: Upload an icon in SVG format (maximum size: 5 KB).
Click Save to add the amenity.
Managing Amenities
View all added amenities in the list
Use the edit icon to update the name, description, or icon
Use the delete icon to remove an amenity
9. Category
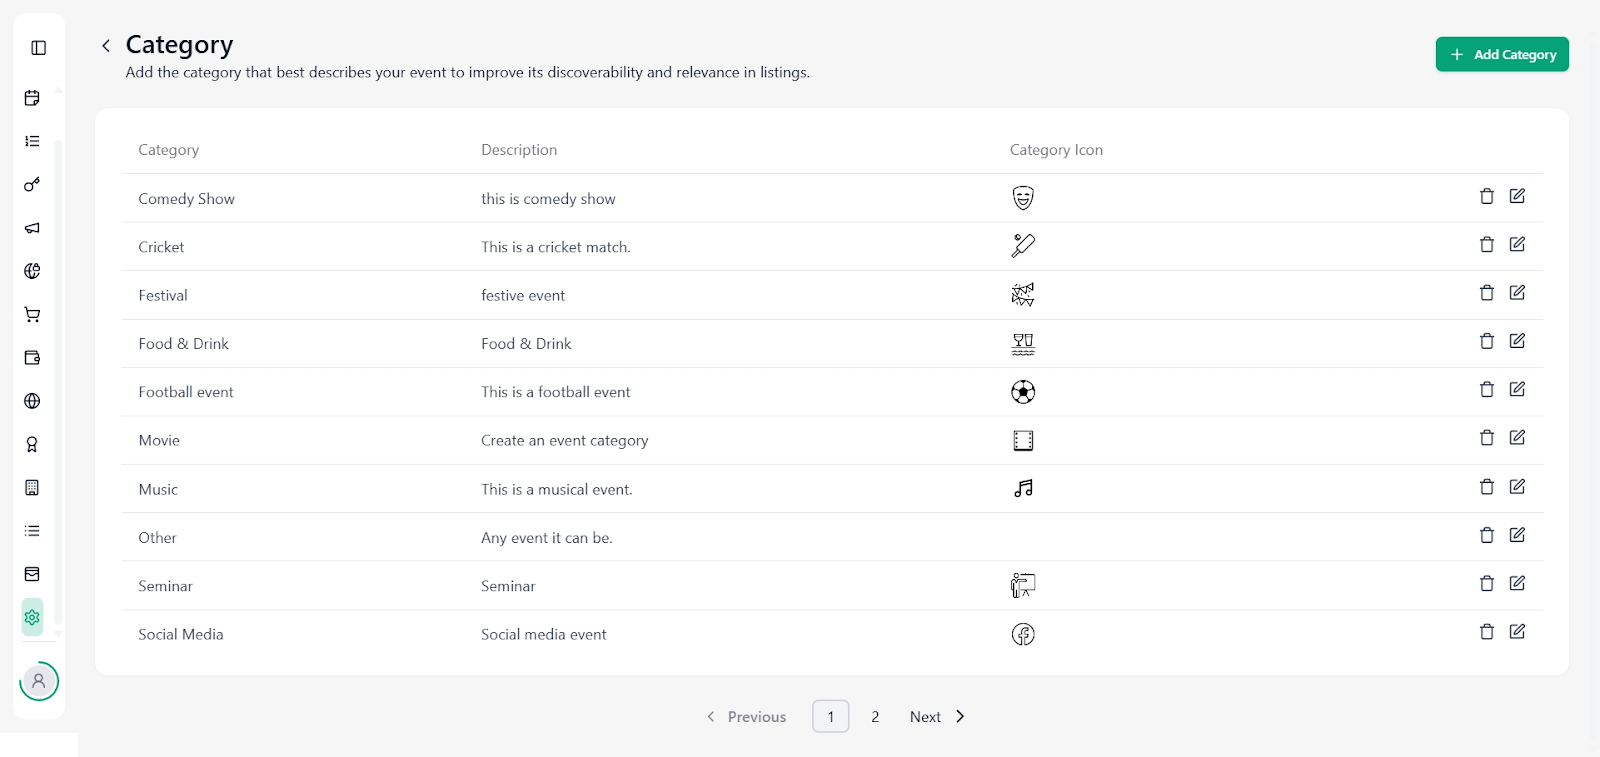
Purpose
Categories help classify events and improve discoverability across event listings. Selecting the right category ensures your event reaches the correct audience.
Viewing Categories
The Category list displays:
Category name
Description
Category icon
Adding a Category
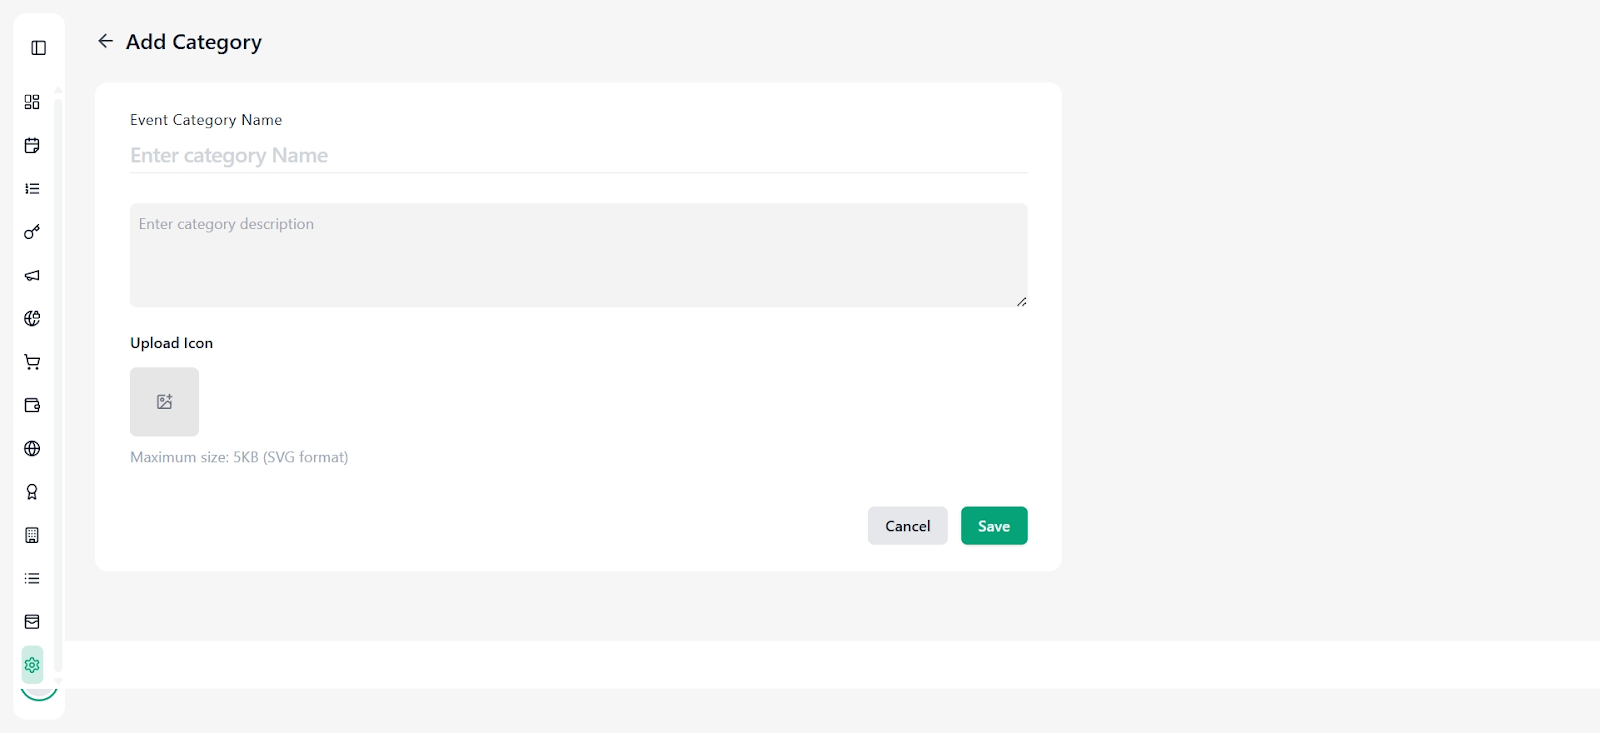
Navigate to Settings → Category.
Click Add Category.
Enter:
Event Category Name (e.g., Music, Sports, Seminar)
Description explaining the type of events
Upload Icon (SVG format, maximum size: 5 KB)
Click Save.
Managing Categories
Edit categories using the edit icon
Delete unused categories carefully, as they may be linked to existing events
10. Service Fee
Purpose
Service Fee settings define platform, processing, or additional fees applied to ticket purchases. These fees directly affect ticket pricing and invoices.
Service fees are calculated on Ticket Price + Applicable Taxes and support multiple tax components (e.g., CGST, SGST).
If Service Fee is enabled, a separate platform fee will not be charged to the customer. The platform fee is absorbed within the service fee and calculated internally.
Service Fee is setting-driven and is visible only if enabled in the partner’s subscription plan.
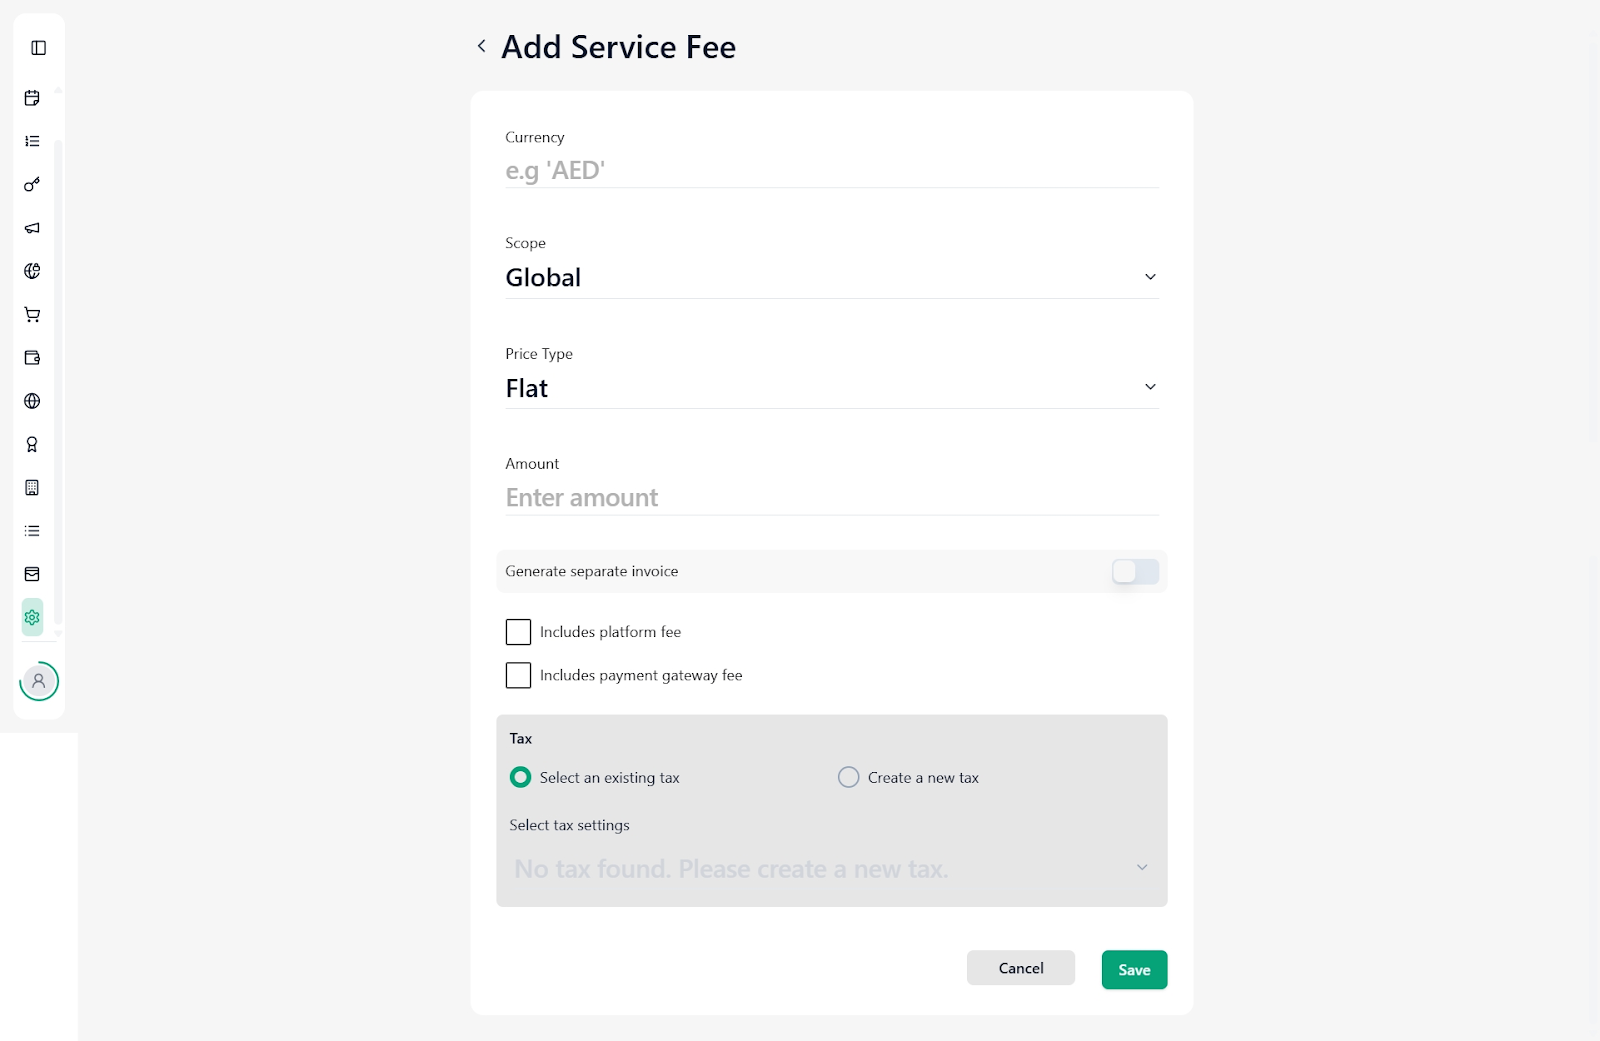
Adding a Service Fee
Navigate to Settings → Service Fee
Click Add Service Fee
Configure the following fields:
Currency: Select the applicable currency (e.g., INR, AED)
Scope: Choose whether the fee is Global or limited in scope
Price Type: Flat or Percentage
Amount: Enter the fee amount
Service Fee Configuration Levels
Service fee can be configured at multiple levels:
Global Level – Applies across all organizers and events
Organizer Level – Applies to a specific organizer
Event Level – Applies only to a specific event
Additional Options
Generate separate invoice: Creates a separate invoice for the service fee
Includes platform fee: Marks the fee as a platform charge
Includes payment gateway fee: Includes gateway charges in the service fee
Tax Configuration
Select an existing tax to apply a pre-configured tax
Or select Create a new tax if no tax exists
Supports multiple tax components such as CGST and SGST applied together.
Invoice Behavior
Separate Invoice Configuration
If the separate invoice toggle is disabled, the service fee will be included in the general invoice
If the toggle is enabled and SAC code is added:
A separate service fee invoice will be generated
The general invoice will display:
Total amount
Total service fee (separately)
10. Best Practices & Tips
Always verify legal entity and payment details
Test payment gateways before going live
Restrict admin access to trusted users only
Use transactional and marketing notifications appropriately
Keep settings updated to avoid payout or communication issues
Was this article helpful?
That’s Great!
Thank you for your feedback
Sorry! We couldn't be helpful
Thank you for your feedback
Feedback sent
We appreciate your effort and will try to fix the article