Overview
Email Marketing allows organizers to create, schedule, and send promotional emails to attendees and customers directly from the Ticmint Organizer Dashboard.
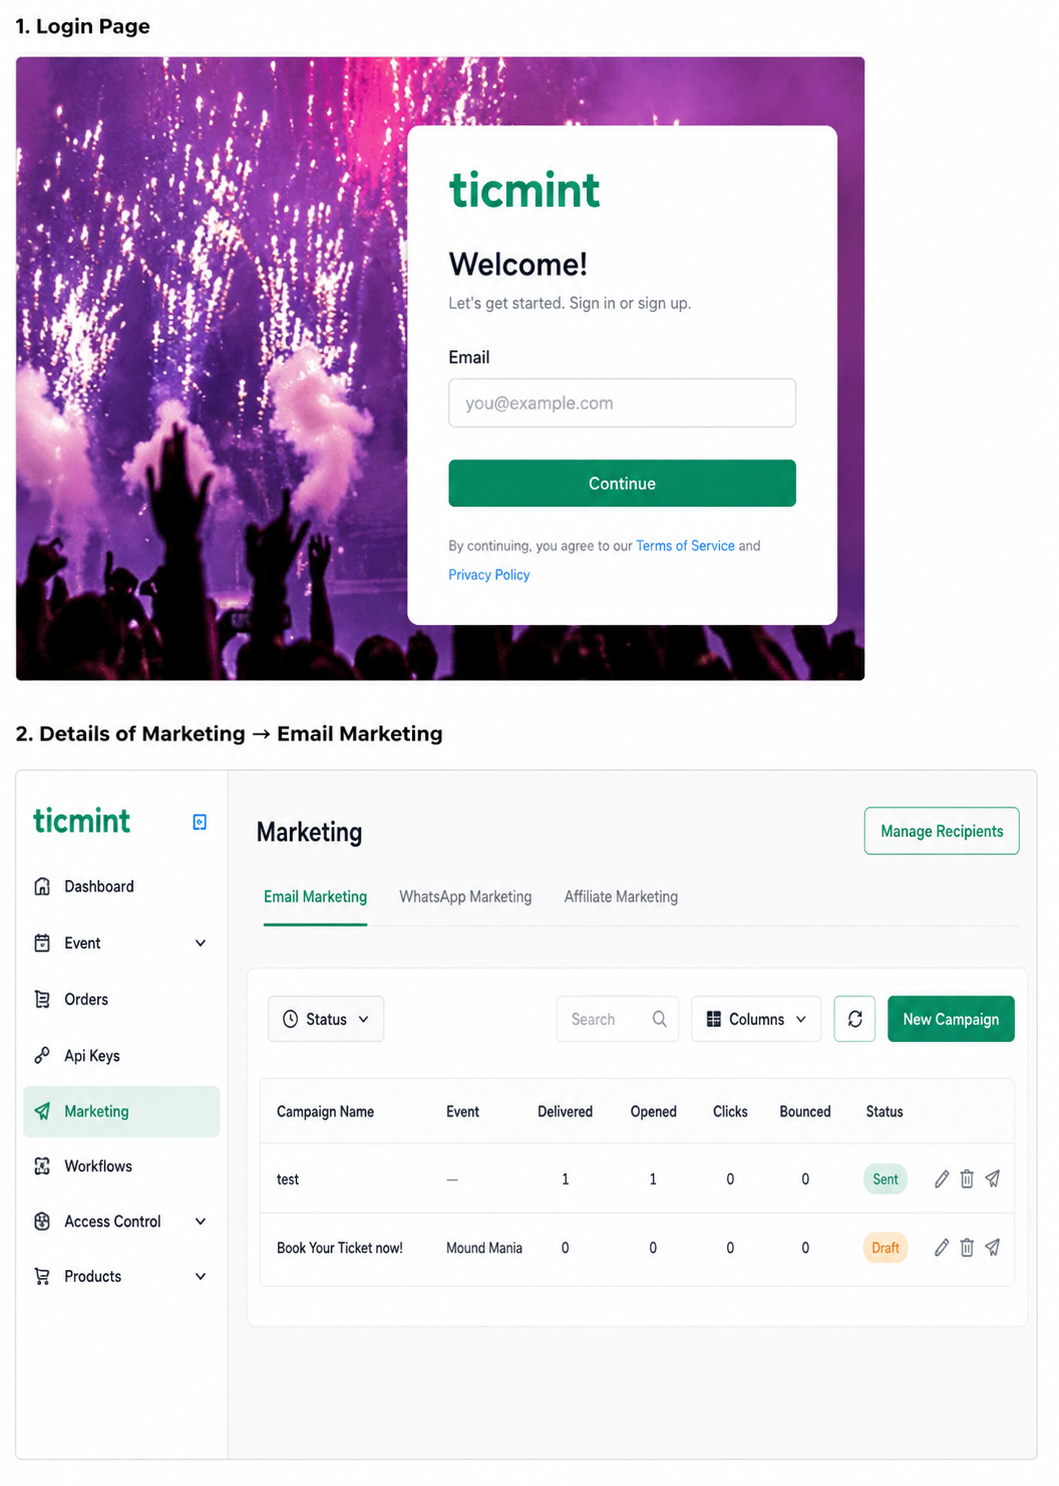
Step 1: Access Email Marketing
Log in to the Organizer Dashboard.
Navigate to Marketing.
Click Email Marketing.
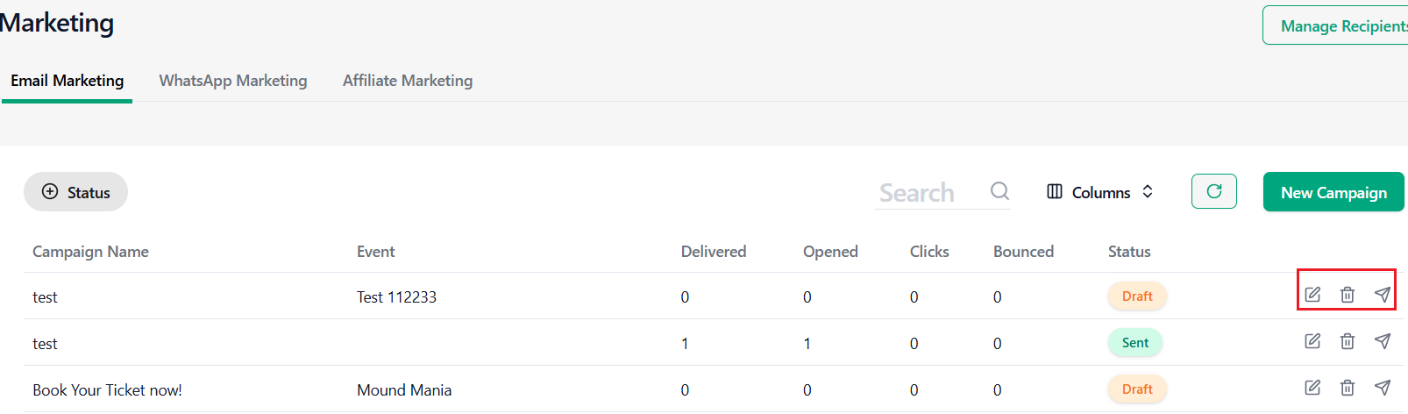
The Email Marketing dashboard displays all campaigns along with their status and performance.
Available Actions
• Create New Campaign
• Edit Campaign
• Status
• Schedule Campaign
• View Analytics
• Delete Campaign
Step 2: Create a Campaign
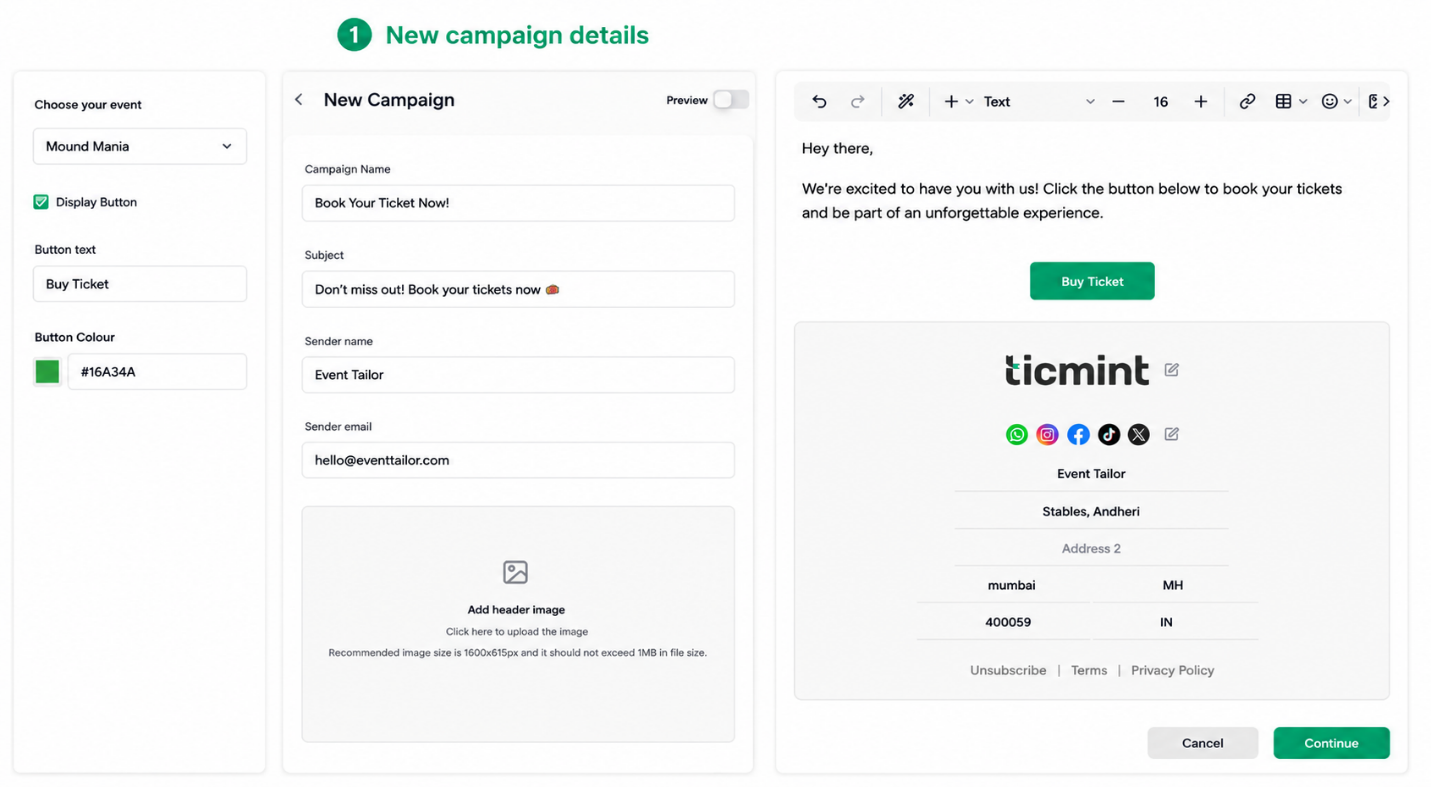
Click New Campaign.
Enter the required campaign details:
Banner Upload
Recommended Banner Size: 1600 × 615 px (PNG/JPG)
Email Content
Use the available editor tools to:
Add text and formatting
Insert images
Add buttons and links
Customize email content
Organization Details
Add:
Organization Name
Organization Address
Social Media Links
Supported Platforms:
☐ Facebook
☐ Instagram
☐ LinkedIn
☐ X (Twitter)
☐ YouTube
Preview Campaign
Enable the Preview option to review the email before proceeding.
Click Continue.
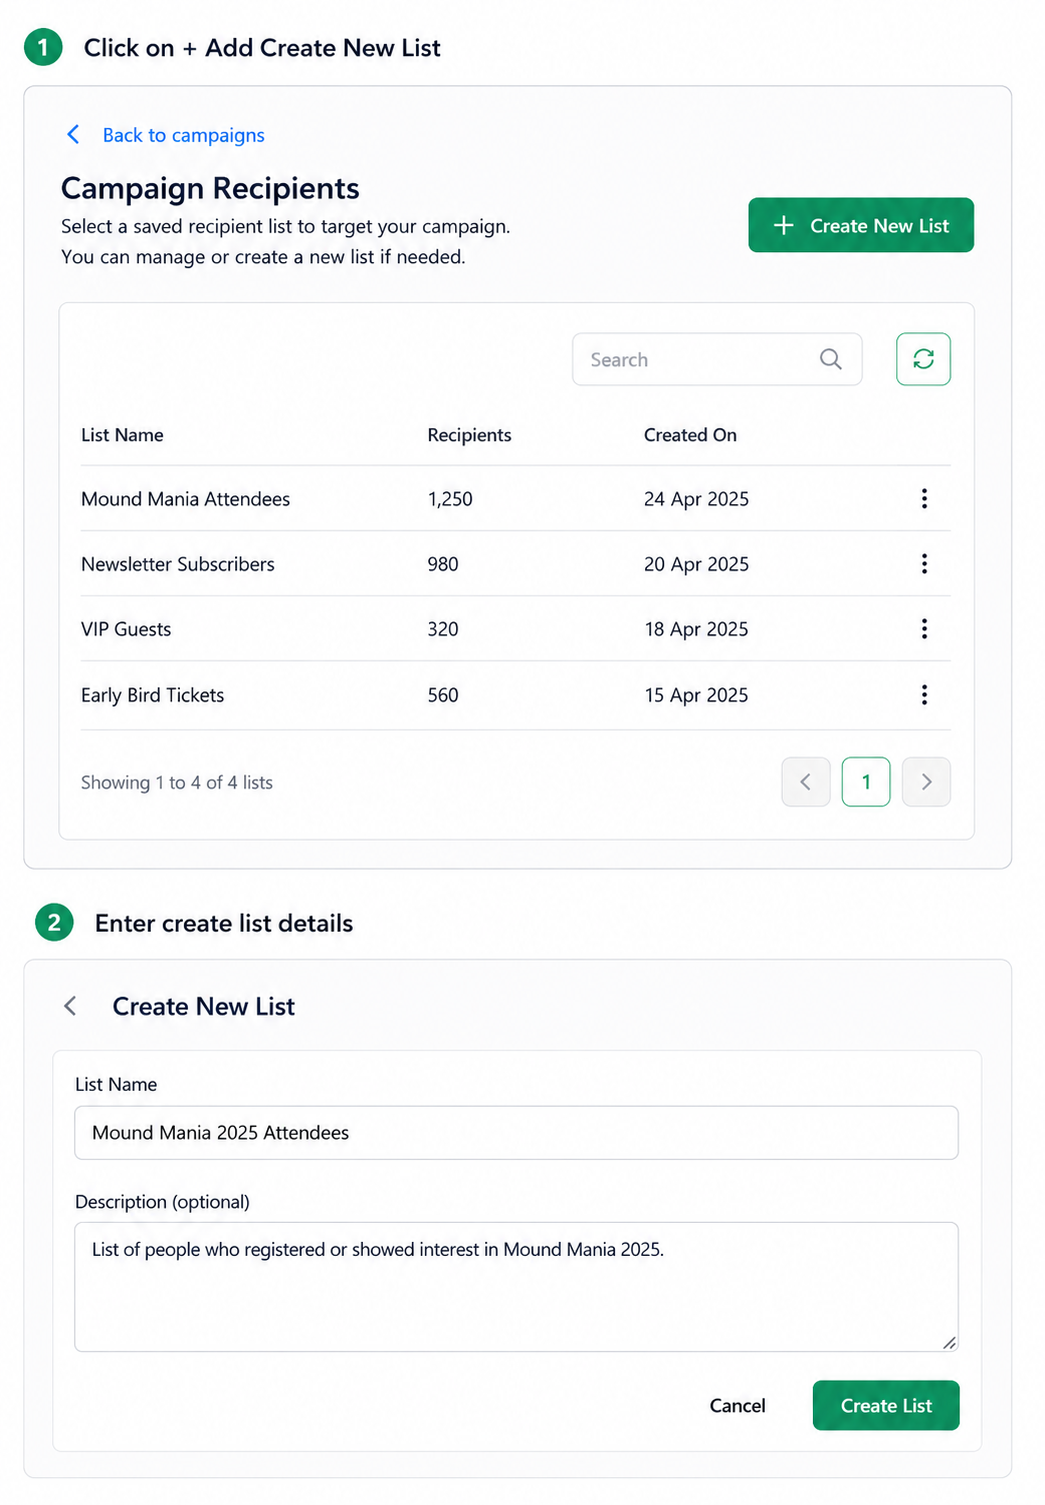
Step 3: Add Recipients
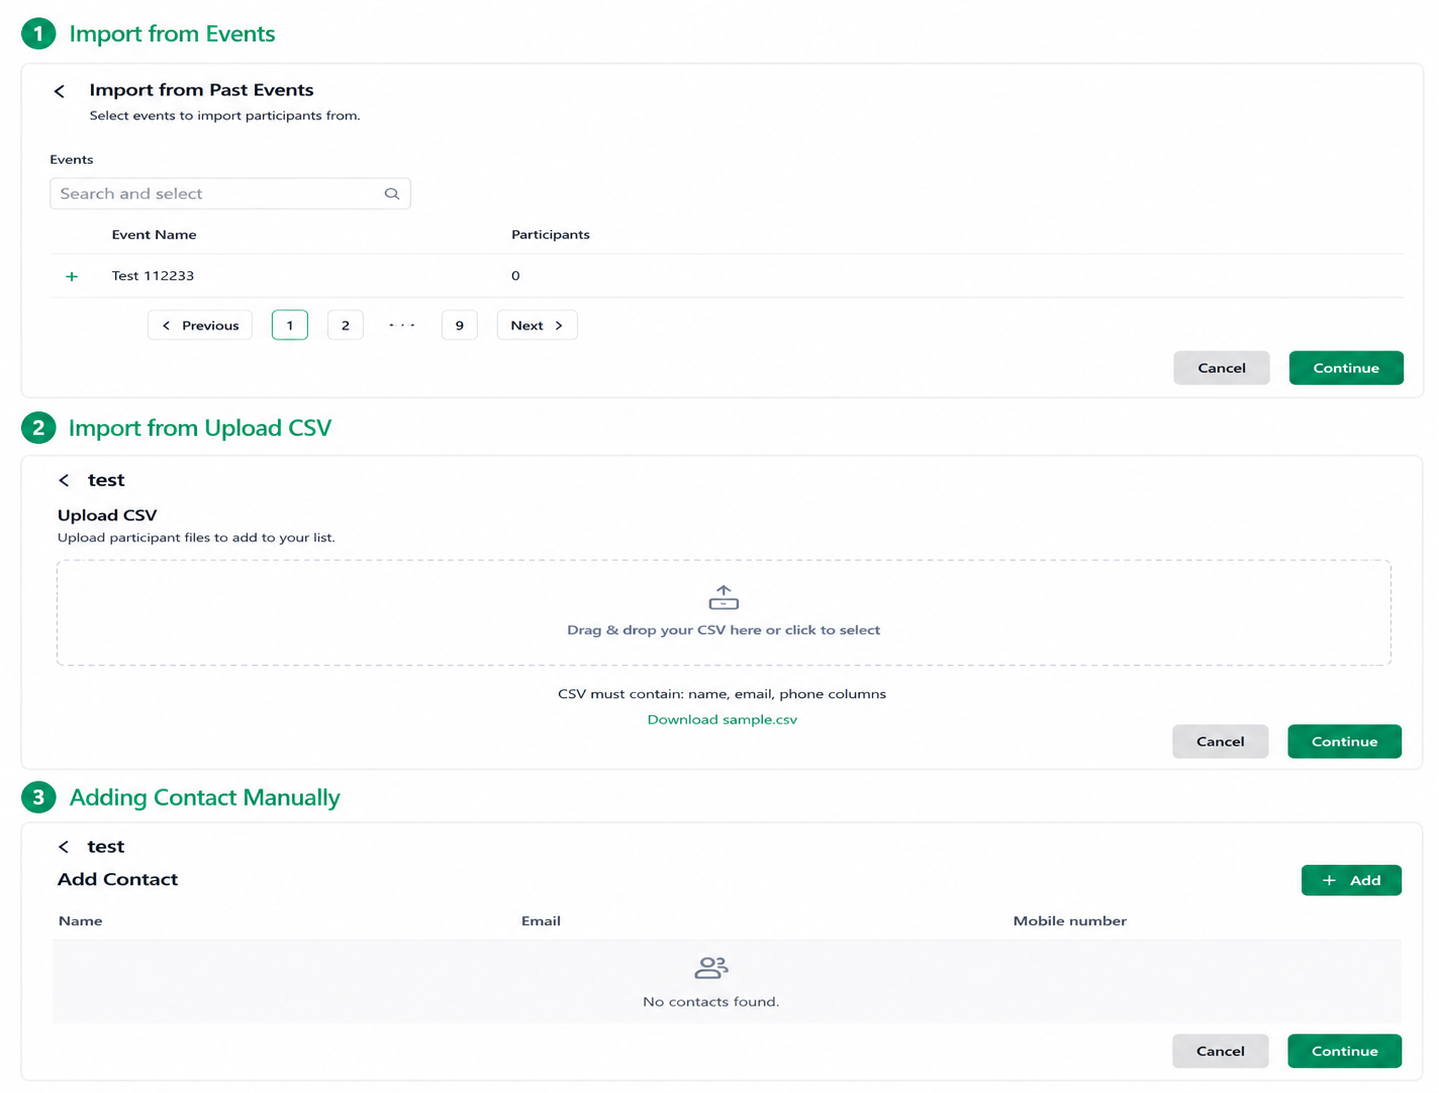
Click on + Create New list and enter create list details.
Choose one of the following methods:
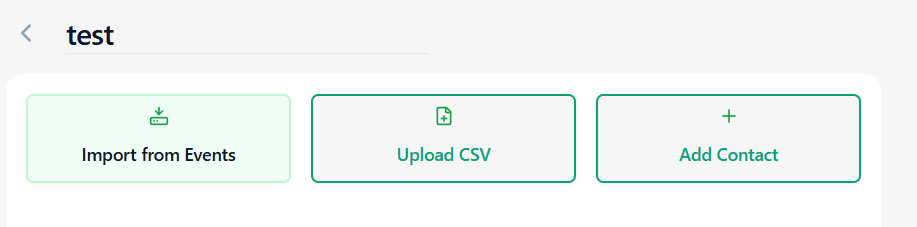
Option A: Import Event Attendees
Use attendee data from previous events.
Click Create List.
Enter:
List Name
Description (Optional)
Click Create List.
Select Import from Events.
Choose the required event.
Click Continue.
Option B: Upload CSV File
Download the sample CSV template.
Populate attendee details.
Upload the CSV file.
Click Continue.
Required Fields
Validation Checklist
☐ CSV file validated
☐ No duplicate email addresses
☐ Email format verified
Option C: Add Contacts Manually
Click Add Contact.
Enter:
Click Add.
Click Continue.
Step 4: Review Campaign
Before sending, verify the following:
• Subject Line Reviewed
• Event Selected
• Recipients Verified
• Banner Uploaded
• Content Proofread
• All Links Tested
Step 5: Send Campaign
Click Send Campaign to start delivery.
Campaign Status
Step 6: View Analytics
Navigate to:
Marketing → Email Marketing → Analytics
Key Metrics
Analytics Checklist
• Review Delivery Performance
• Track Open Rates
• Monitor Click-Through Rates
• Identify Bounced Emails
• Review Unsubscribe Trends
Tips for Successful Campaigns
Use a clear and engaging subject line to increase open rates.
Personalize your content to connect with your audience.
Optimize images and logos to maintain a professional look.
Include clear calls-to-action (CTAs) to encourage engagement.
Learn more about event marketing software on the Ticmint website.
Was this article helpful?
That’s Great!
Thank you for your feedback
Sorry! We couldn't be helpful
Thank you for your feedback
Feedback sent
We appreciate your effort and will try to fix the article