Overview
The Discounts feature in Ticmint enables event organizers to offer special pricing on tickets through promo codes, memberships, and group discounts.
Navigate to Discounts
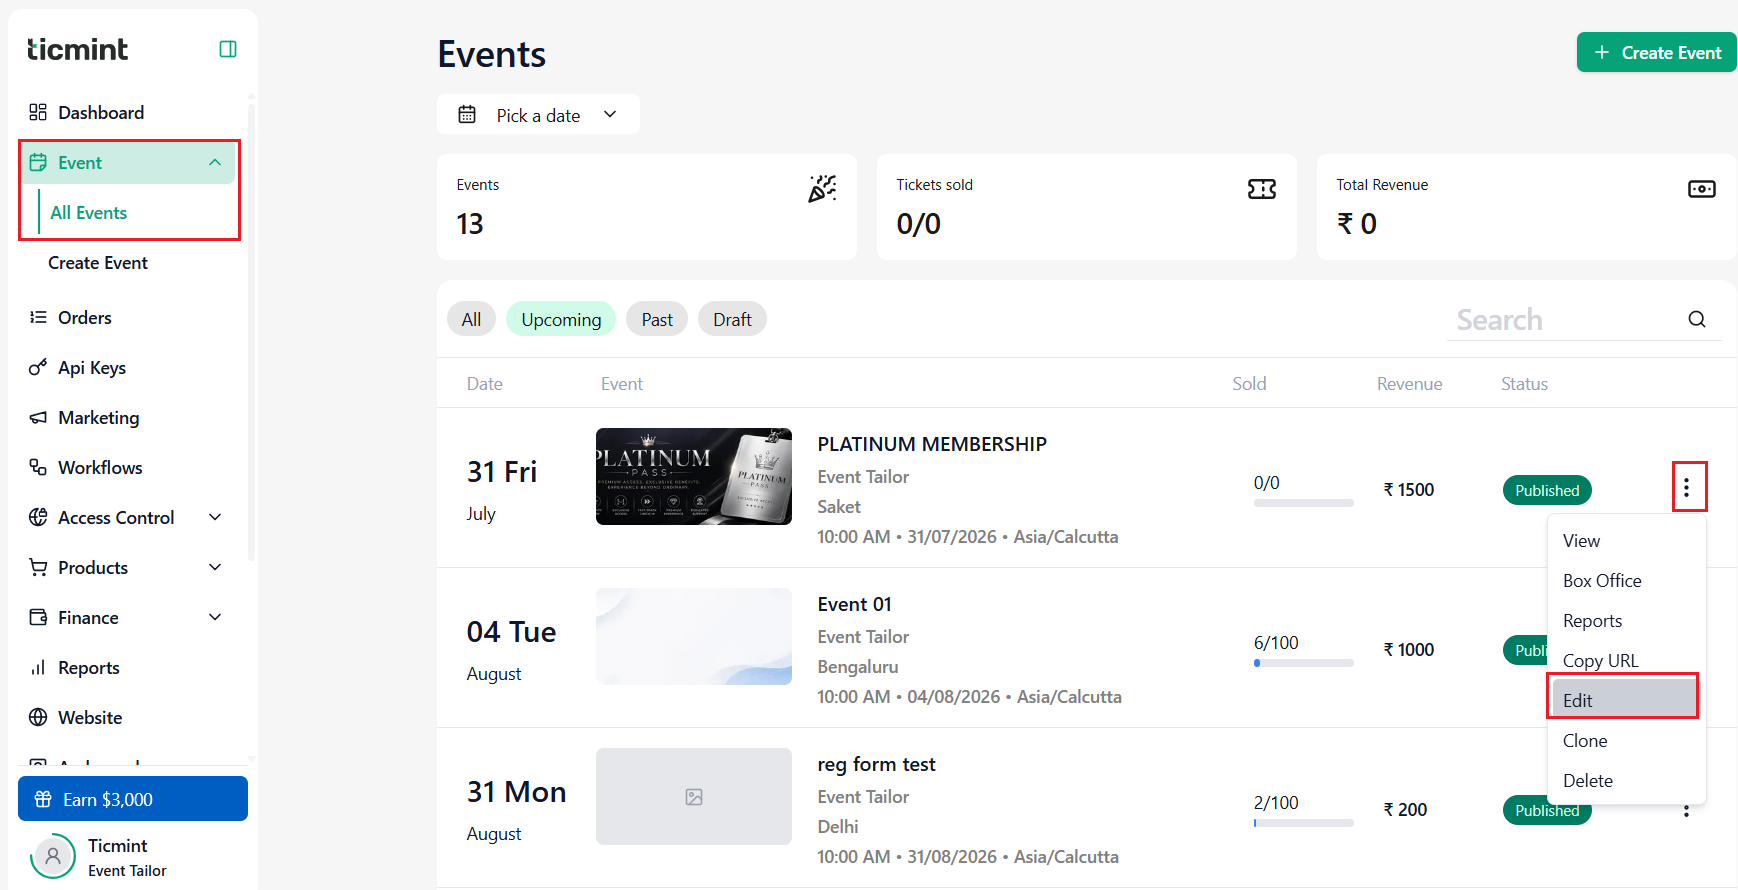
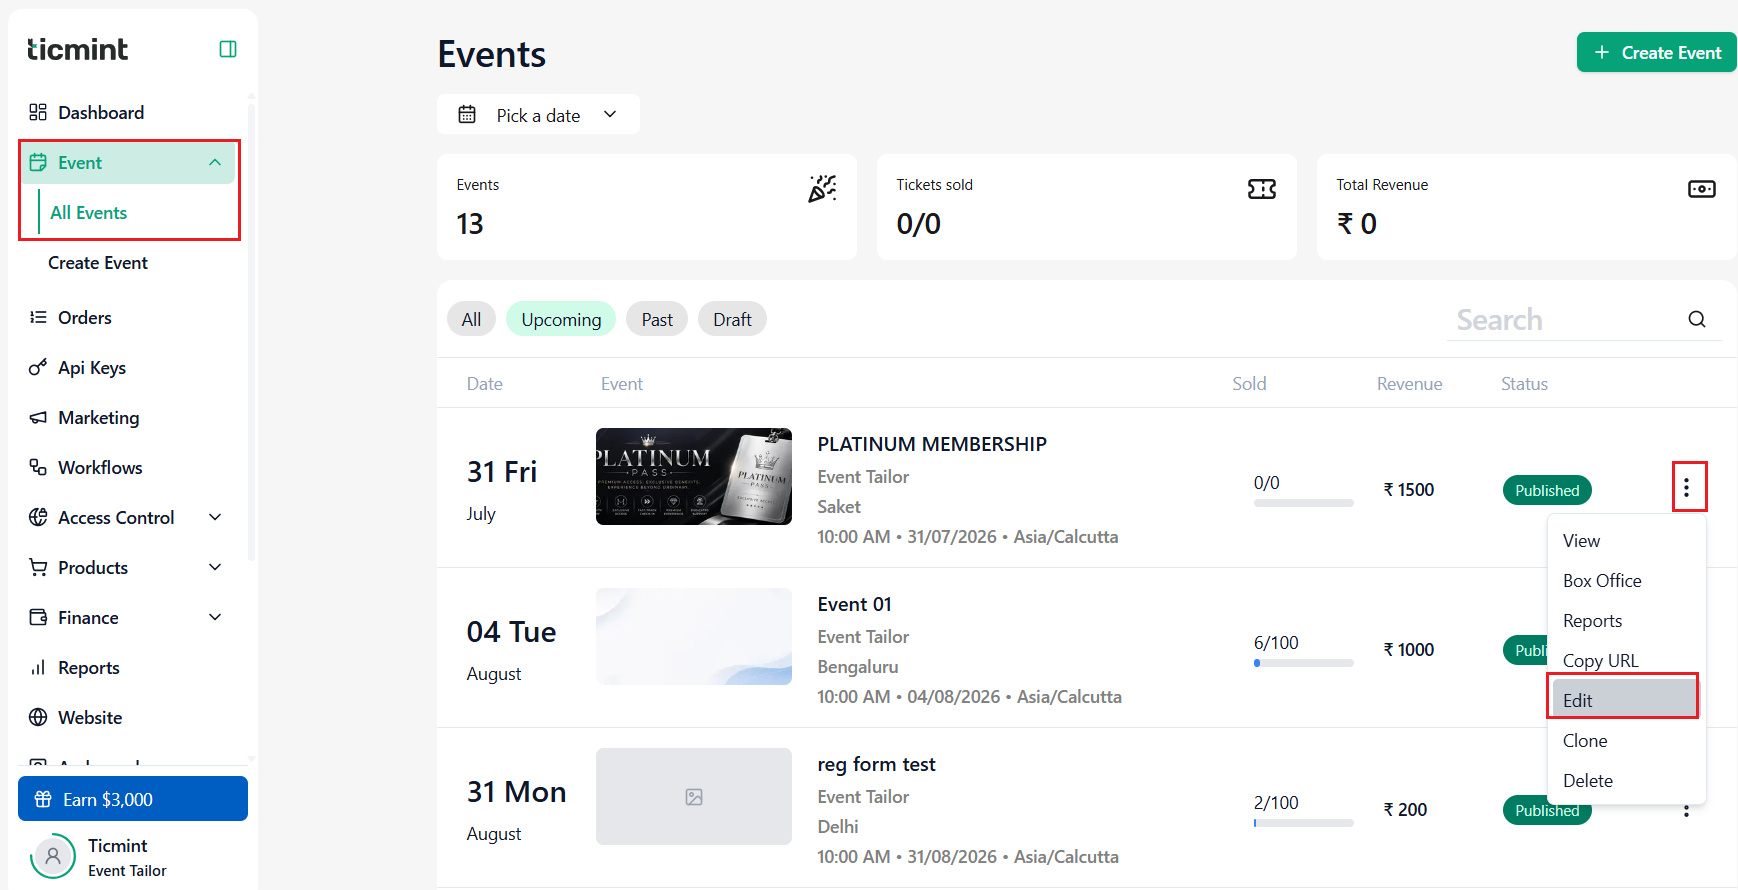
Navigate to Events.
Select the required event.
Click Edit.
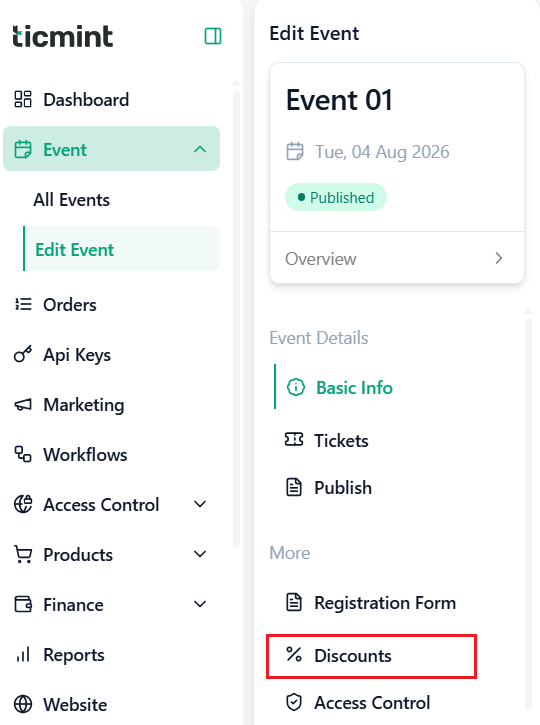
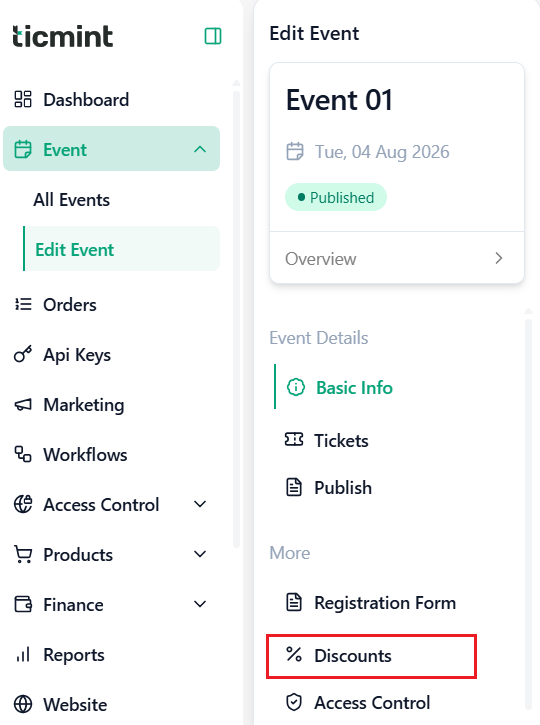
If the event is already created, select Edit Event.
If creating a new event, complete the Basic Information section and add tickets first, then navigate to the Discounts tab.
Create a Discount
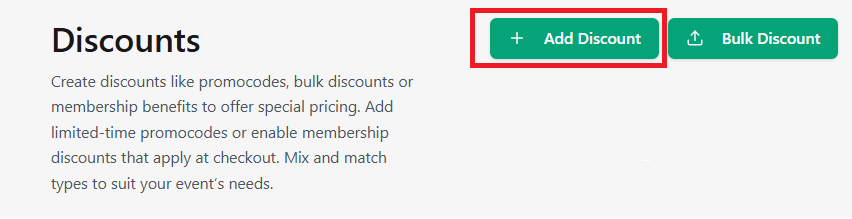
Click Add Discount.
Select one of the following discount types:
Promo Code
Membership
Group Discount
Promo Code
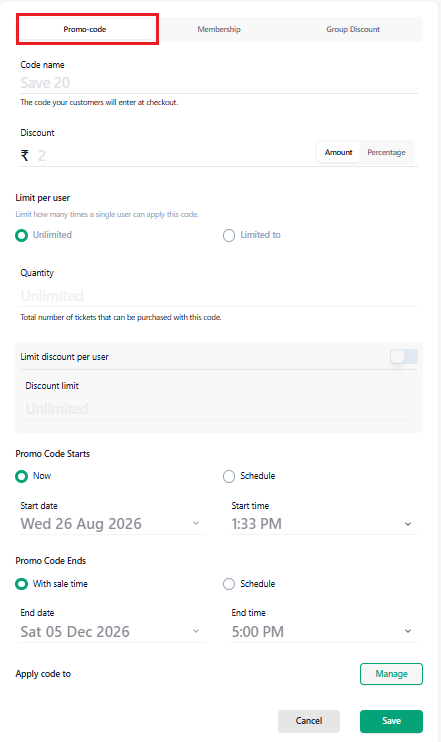
Promo Codes allow organizers to offer discounts using a unique code that attendees can enter during checkout.
Steps
Enter the Promo Code Name.
Enter the Discount Value.
Select the Value Type:
Amount
Percentage
Configure Limit Per User:
Unlimited – Users can apply the code without quantity restrictions.
Limited – Specify the maximum number of times a user can apply the code.
Enable Limit Discount Per User if required and enter the discount limit.
Configure the Start Date and Time and End Date and Time.
Alternatively, click Schedule to configure the promotion for a later date and time.
Click Manage.
Select the ticket types or membership types to which the promo code should apply.
Click Save.
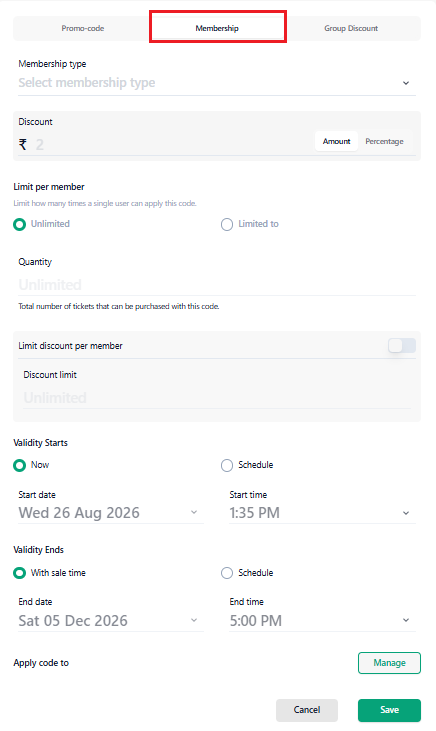
Membership Discount
Note: Membership types must be created from the Dashboard before creating a Membership Discount.
Steps
Select the Membership Type from the dropdown list.
Enter the Discount Value.
Select the Discount Type:
Amount
Percentage
Configure Limit Per Member.
Enable Limit Discount Per Member if required and enter the limit.
Configure the Start Date and Time and End Date and Time.
Alternatively, click Schedule to configure the discount for a later date and time.
Click Manage.
Select the eligible Visible Tickets for the discount.
Click Save.
Group Discount
Group Discounts automatically apply when a buyer purchases a minimum number of tickets.
Steps
Select Group Discount.
Enter the Minimum Quantity.
The minimum number of tickets required to qualify for the discount.
Enter the Discount Value.
Select the Discount Type:
Amount
Percentage
Configure Limit Per Member.
Enable Limit Discount Per Member if required and enter the limit.
Configure the Start Date and Time and End Date and Time.
Alternatively, click Schedule to configure the discount for a later date and time.
Click Manage.
Select the eligible Visible Tickets for the discount.
Click Save.
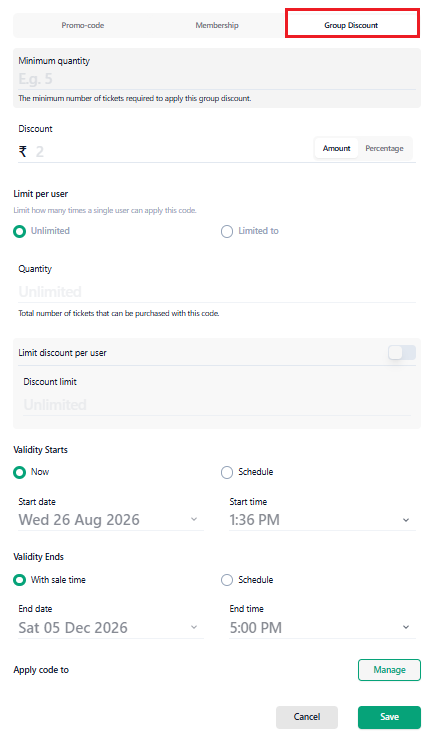
Result: The selected discount will be created successfully and will be applied based on the configured rules and schedule.
Bulk Discount
The Bulk Discount feature allows organisers to assign discounted tickets to multiple users at once by uploading a CSV file. This is especially useful for corporate bookings, group allocations, and large-scale ticket distribution.
Instead of manually creating discounts for individual users, organisers can upload user details in bulk, and the system will automatically process and apply the discounts.
Navigate to Discounts
1. Navigate to Events.
2. Select the required event.
3. Click Edit.
If the event is already created, select Edit Event.
If creating a new event, complete the Basic Information section and add tickets first, then navigate to the Discounts tab.
4. Click Bulk Discount.
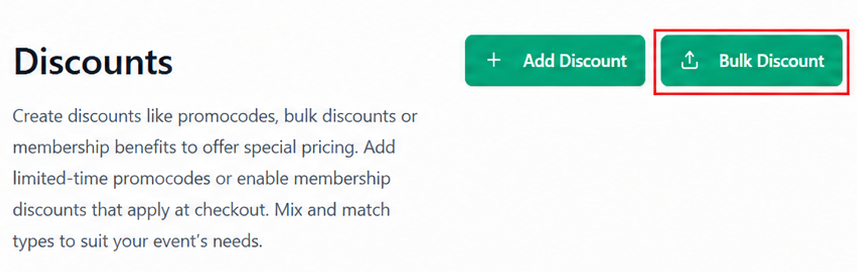
5. Click Download sample.csv.
Upload a CSV file containing email addresses. The system will generate discount codes and send them via email to each recipient.
6. Open the downloaded CSV file and enter the required values.
7. Ensure the CSV file contains the following columns: Fig. (e)
email
discountPercentage
ticketTypeNames
quantity
8. Save the completed CSV file.
9.Click Upload CSV.
10. Select the saved CSV file and upload it.
11. The system will automatically process the uploaded data and generate discount codes for the specified users.
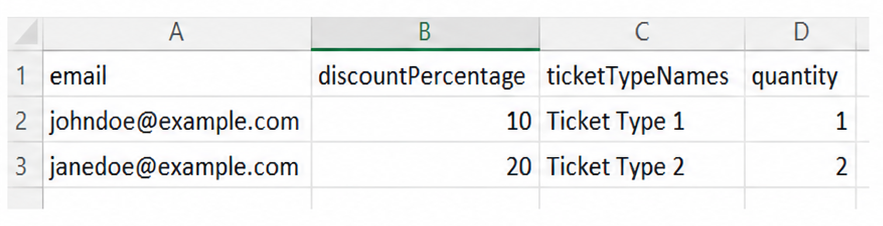 Enter the details
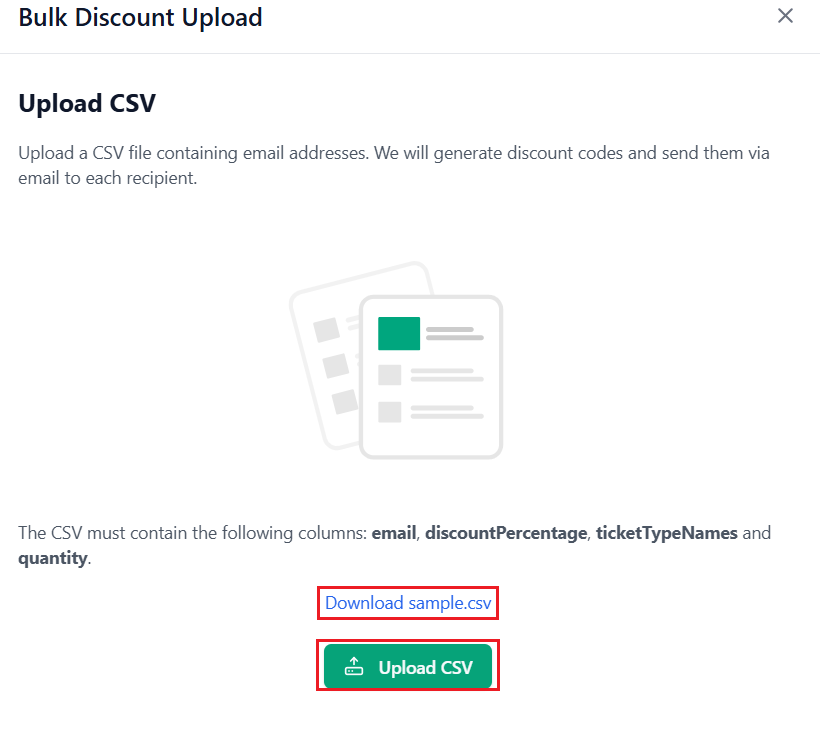
Download enter the details and Upload the file
Email Notifications
After processing is complete, users will automatically receive an email notification.
The email includes:
1. Ticket allocation details or discount information.
2. Instructions (if applicable) to redeem or access tickets.
This ensures users receive all required information without the need for manual communication.
Result
The selected discount will be created successfully and applied based on the configured rules and schedule. Bulk discount recipients will automatically receive their discount details via email.
Best Practices
Communicate discount terms clearly to attendees.
Monitor active discounts to avoid overlaps or conflicts.
Track discount performance via sales reports for insights.
Was this article helpful?
That’s Great!
Thank you for your feedback
Sorry! We couldn't be helpful
Thank you for your feedback
Feedback sent
We appreciate your effort and will try to fix the article