After creating your event and adding tickets, you can publish the event by following the steps below.
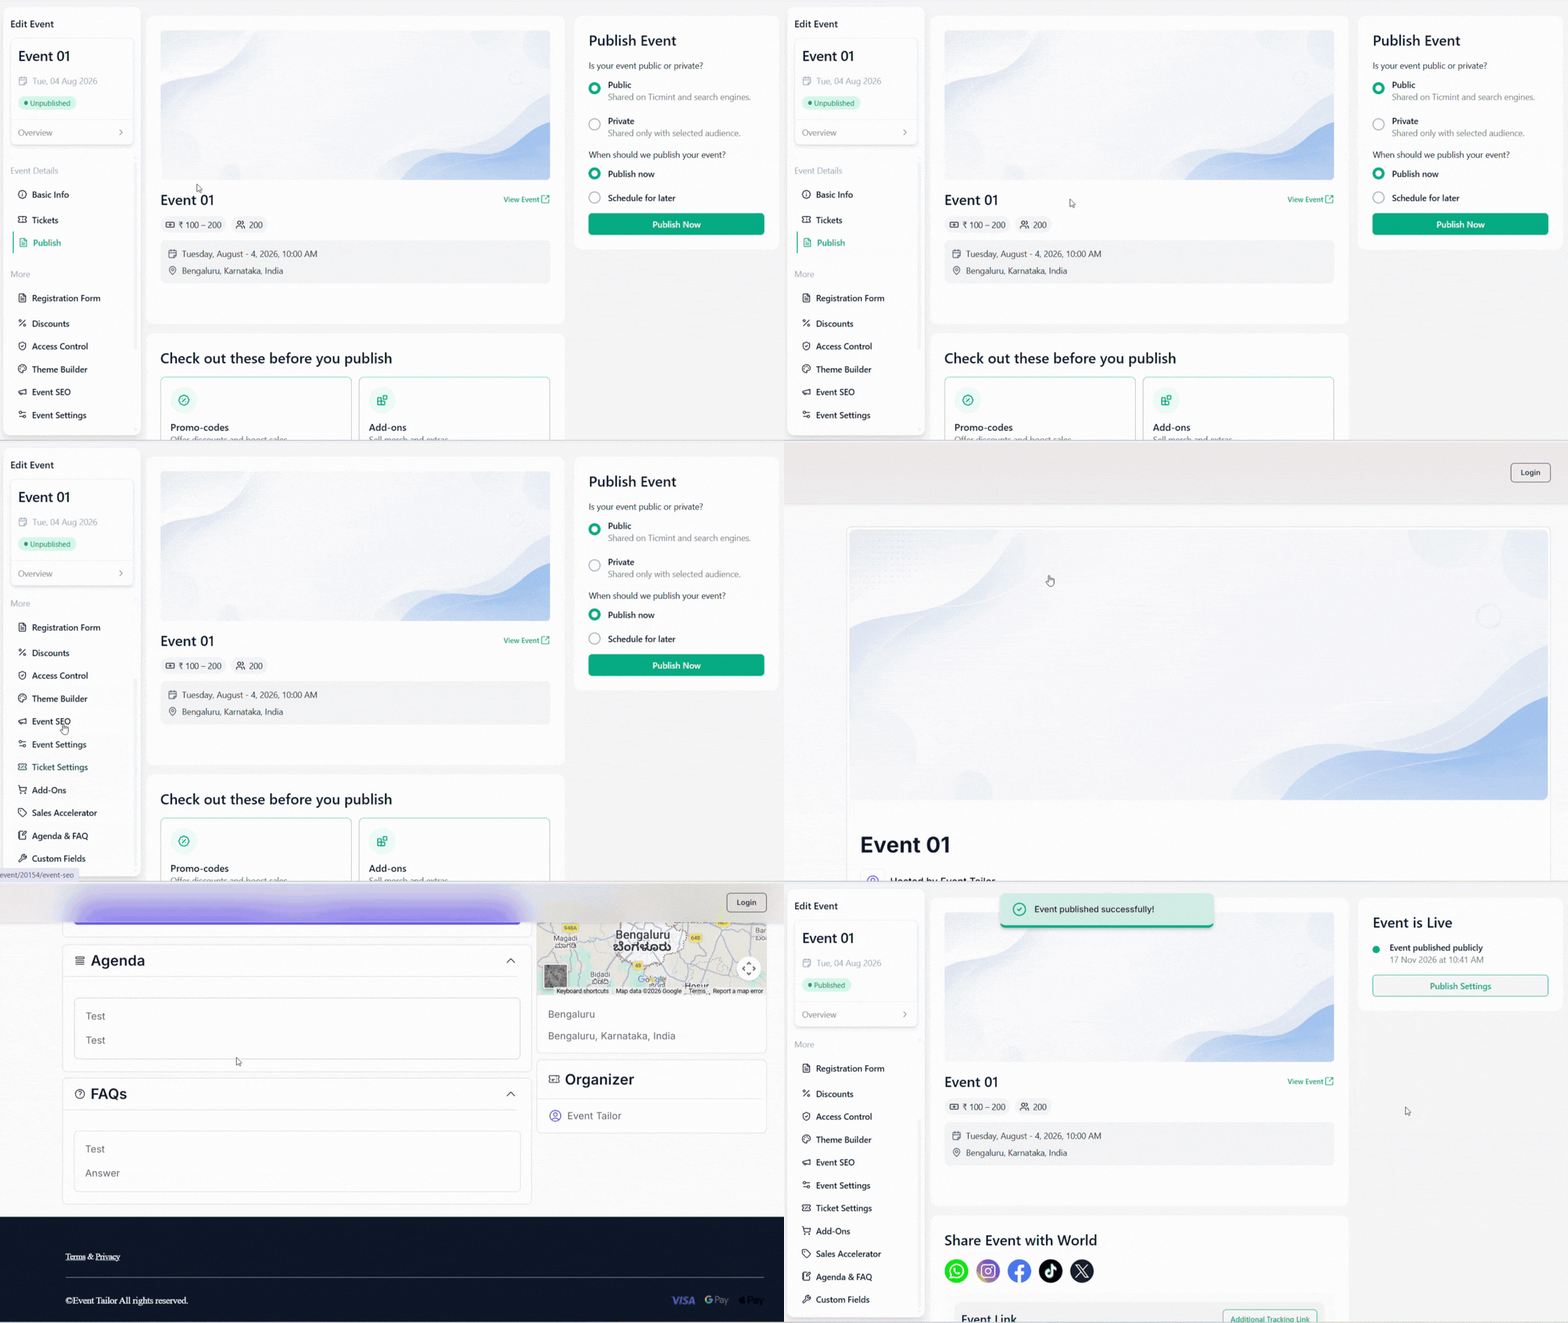
1. Access Publish: During event creation, click Publish. Alternatively, open the created event, click the three-dot menu (⋮) → Edit → Publish.
2. Preview Event: Click View Event to check how the event appears to attendees.
3. Verify Configurations: Ensure the following are configured correctly:
Promo Codes
Add-ons
Ticket Upgrades
Validators (Check-in Management)
4. Choose Event Visibility:
Public: Event is listed on Ticmint and discoverable through search engines.
Private: Event is accessible only to the selected audience.
5. Choose Publishing Time:
Publish Now: Makes the event live immediately.
Schedule for Later: Select the desired publishing date and time.
6. Schedule Unpublishing (Optional): Enable Schedule Unpublish Date and select the date and time when the event should automatically be unpublished.
7. Confirm Publishing:
For immediate publishing, click Publish Now.
For scheduled publishing, click Publish Later.
After Publishing
Your event can be shared through:
Event Link
QR Code
WhatsApp
Instagram
Facebook
X (Twitter)
You can also:
Send event invitations via email
Use the iFrame code to embed the event on your website
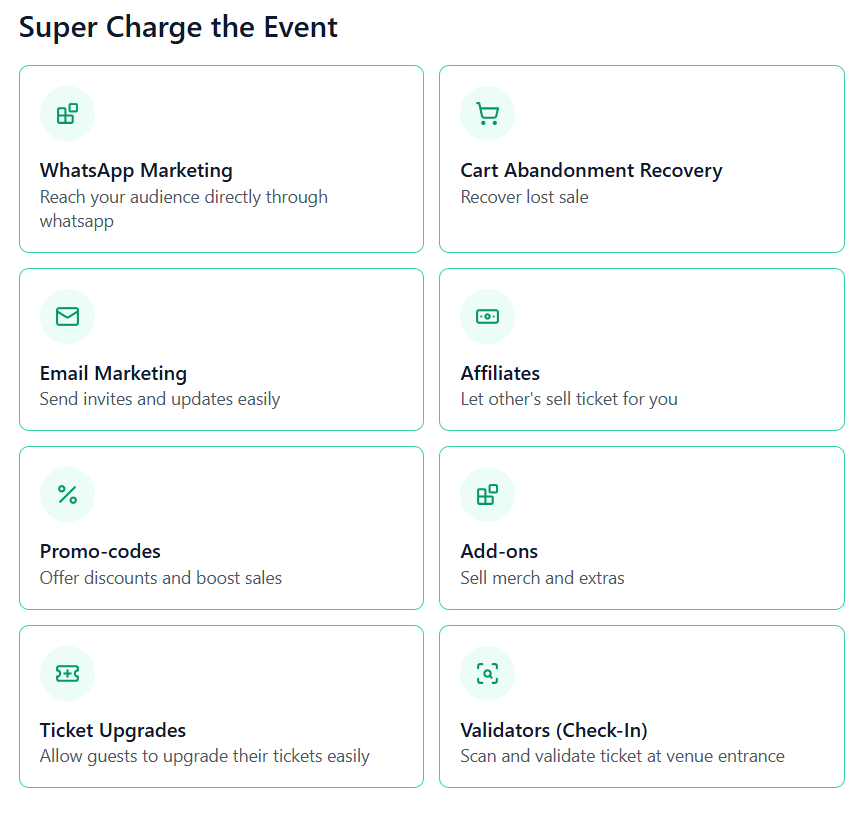
Supercharge Your Event
Enhance event performance using:
WhatsApp Marketing
Cart Abandonment Recovery
Email Marketing
Affiliate Programs
Promo Codes
Add-ons
Ticket Upgrades
Validators (Check-in Management)
Managing Published Events
You can click Publish Settings at any time to:
Unpublish the event
Modify publishing settings
Update visibility and scheduling options
Learn more about built-in event marketing on the Ticmint website.
Was this article helpful?
That’s Great!
Thank you for your feedback
Sorry! We couldn't be helpful
Thank you for your feedback
Feedback sent
We appreciate your effort and will try to fix the article