How to Create, Edit & Send WhatsApp Campaigns
This document provides a detailed, step-by-step guide to using the WhatsApp Marketing module in the Ticmint Support Portal. WhatsApp Marketing enables event organisers to communicate instantly with attendees using approved WhatsApp templates.
1. Overview of WhatsApp Marketing
WhatsApp Marketing allows event organisers to:
Send promotional messages
Notify attendees about event updates
Share discount coupons and offers
Broadcast important announcements
Target specific contact lists
All messages are delivered directly via WhatsApp, ensuring faster reach and higher engagement.
⚠️ Important: WhatsApp messages are sent using Meta-approved templates. Messages can only be sent after template approval.
2. Accessing WhatsApp Marketing
Log in to your Ticmint Dashboard.
Navigate to the Marketing module from the left-hand menu.
Click on WhatsApp Marketing.
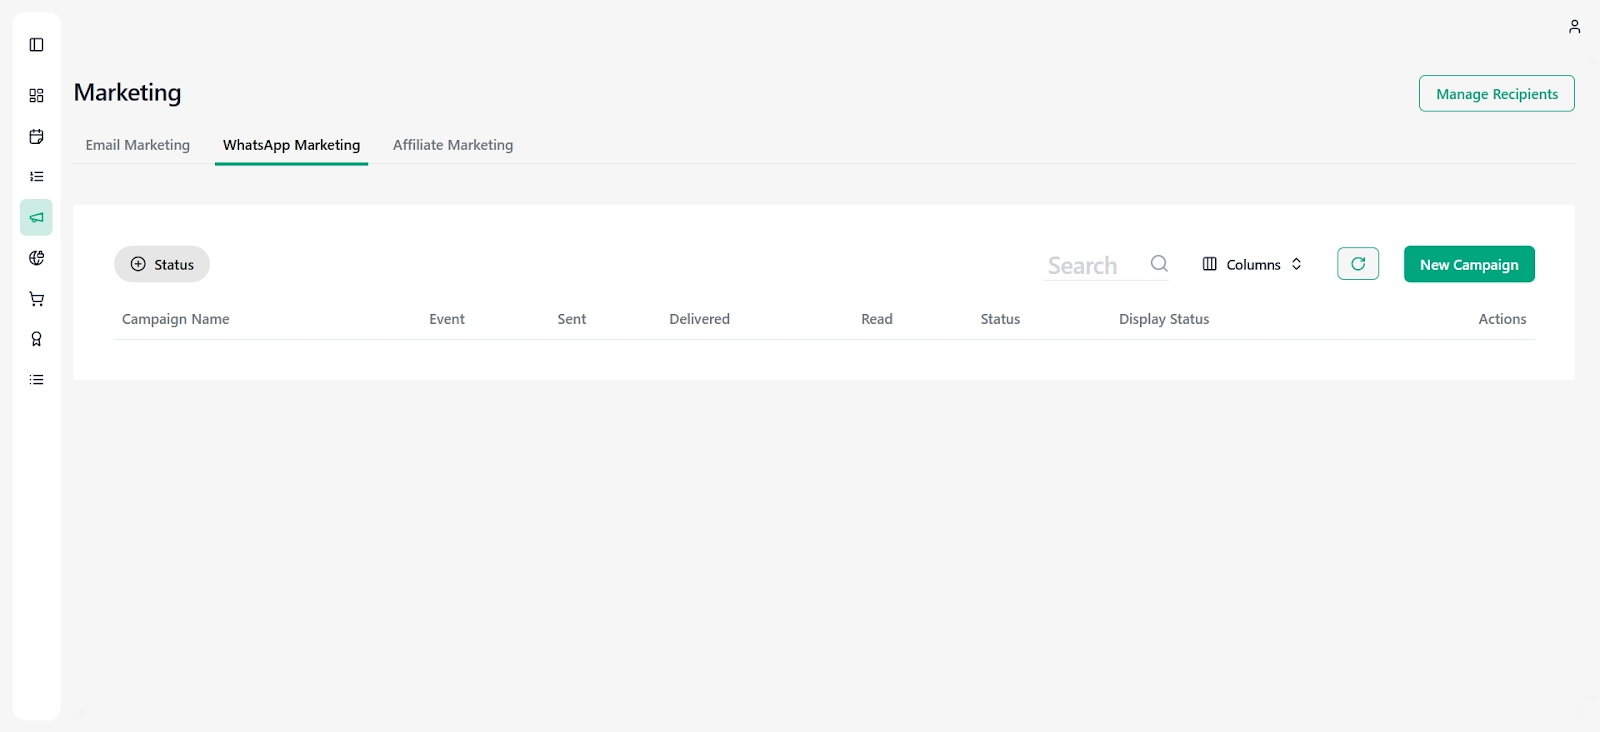
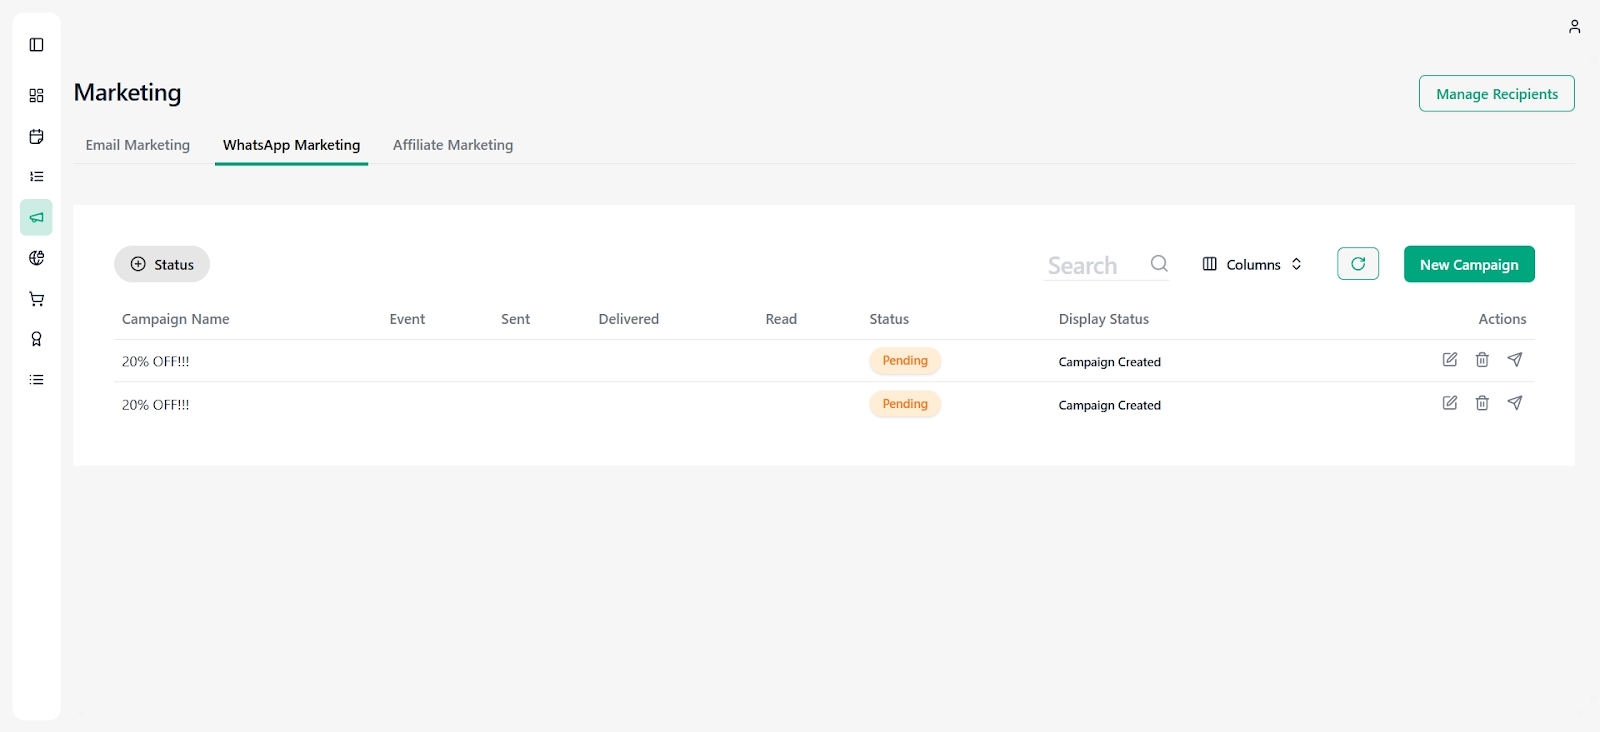
WhatsApp Marketing Dashboard
Here you can view all past and current campaigns with details such as:
Campaign Name
Event
Sent Count
Delivered Count
Read Count
Status (Draft / Pending / Sent)
Actions (Edit, View)
Additional capabilities available in the dashboard:
Username variable support for better personalisation in messages
Template delete option allowing users to remove unused, pending, and rejected templates
Scrollable view for large content templates to improve readability
You can also use filters or the search bar to find campaigns quickly.
3. Creating a New WhatsApp Campaign
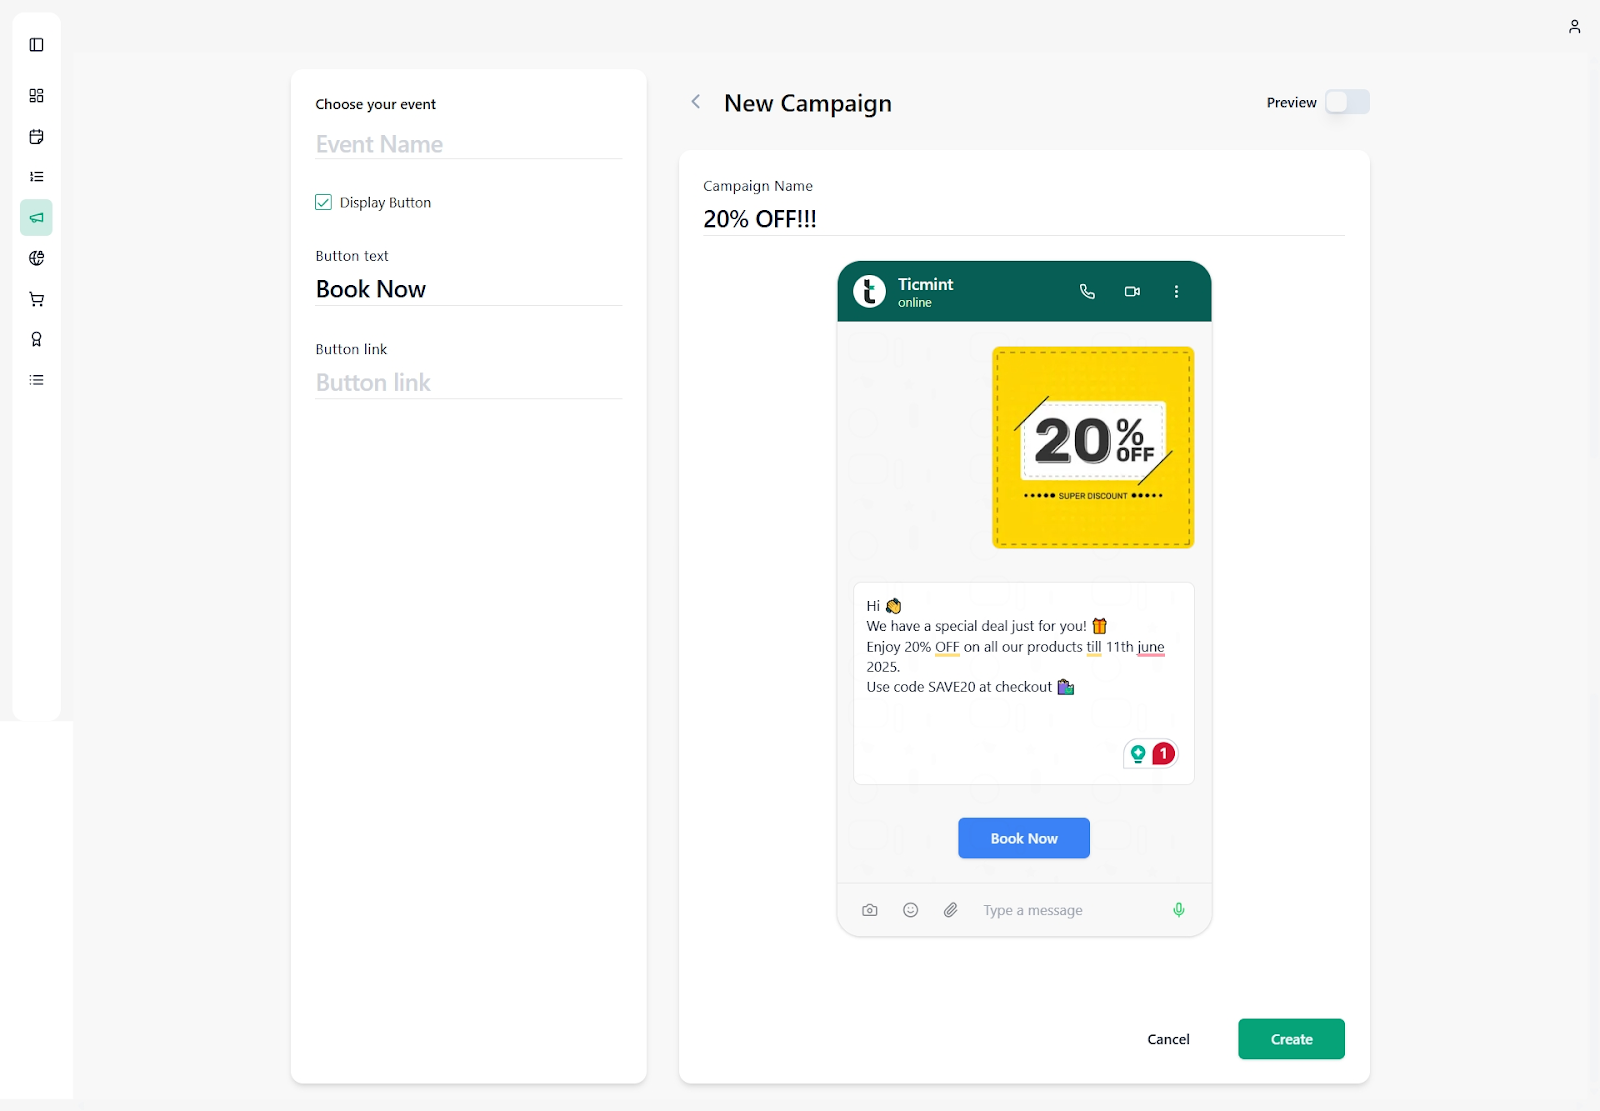
Click New Campaign to begin.
3.1 Campaign Name
Enter a clear and identifiable campaign name
(Example: Early Bird Reminder, Event Day Update)
3.2 Select Event (Optional)
Choose the event you want to associate the campaign with.
This helps track performance event-wise.
3.3 Display Button (Optional – CTA)
Enable Display Button to add a call-to-action such as:
Book Now
View Event
Add:
Button text
Button link (event page or external URL)
3.4 Design Your WhatsApp Message
Write the message content.
You may also upload:
Images
Banners or flyers
Promotional creatives
A live preview will appear on the right, showing exactly how the message will look on WhatsApp.
4. WhatsApp Template Approval (Mandatory)
? Important Meta Approval Step
Every WhatsApp message is sent using a template.
Once you create a template, it is automatically submitted to Meta (WhatsApp) for approval.
Only approved templates can be used to send messages.
Template Approval Status:
Pending Approval – Awaiting Meta review
Approved – Template is ready to send
Rejected – Requires edits as per Meta guidelines
⏱️ Approval typically takes a few minutes to 24 hours, depending on Meta.
Once the template is approved, you will be able to send the campaign.
5. Managing Recipients
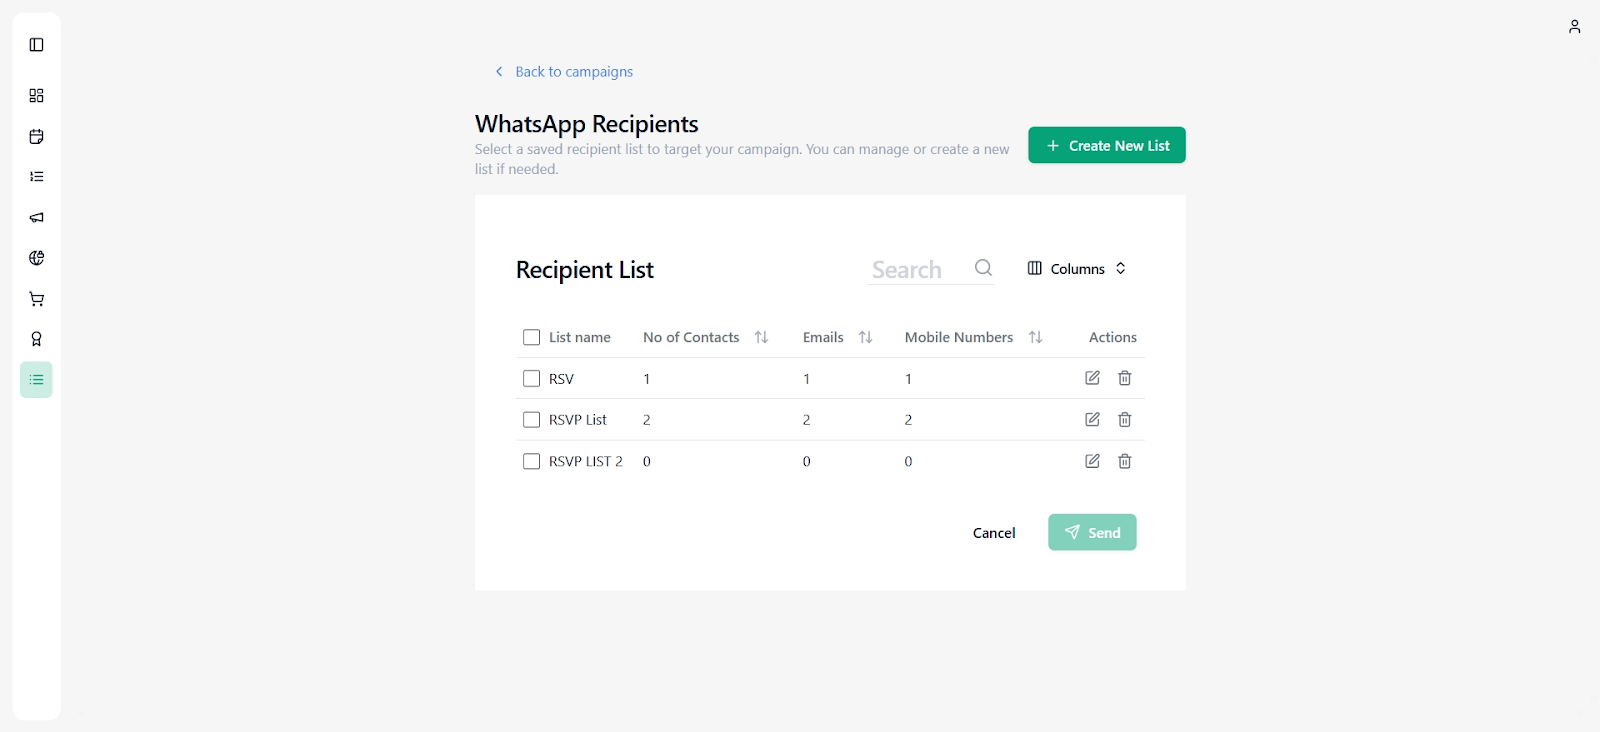
After creating the campaign, select who will receive the message.
Click Manage Recipients.
5.1 Import Contacts
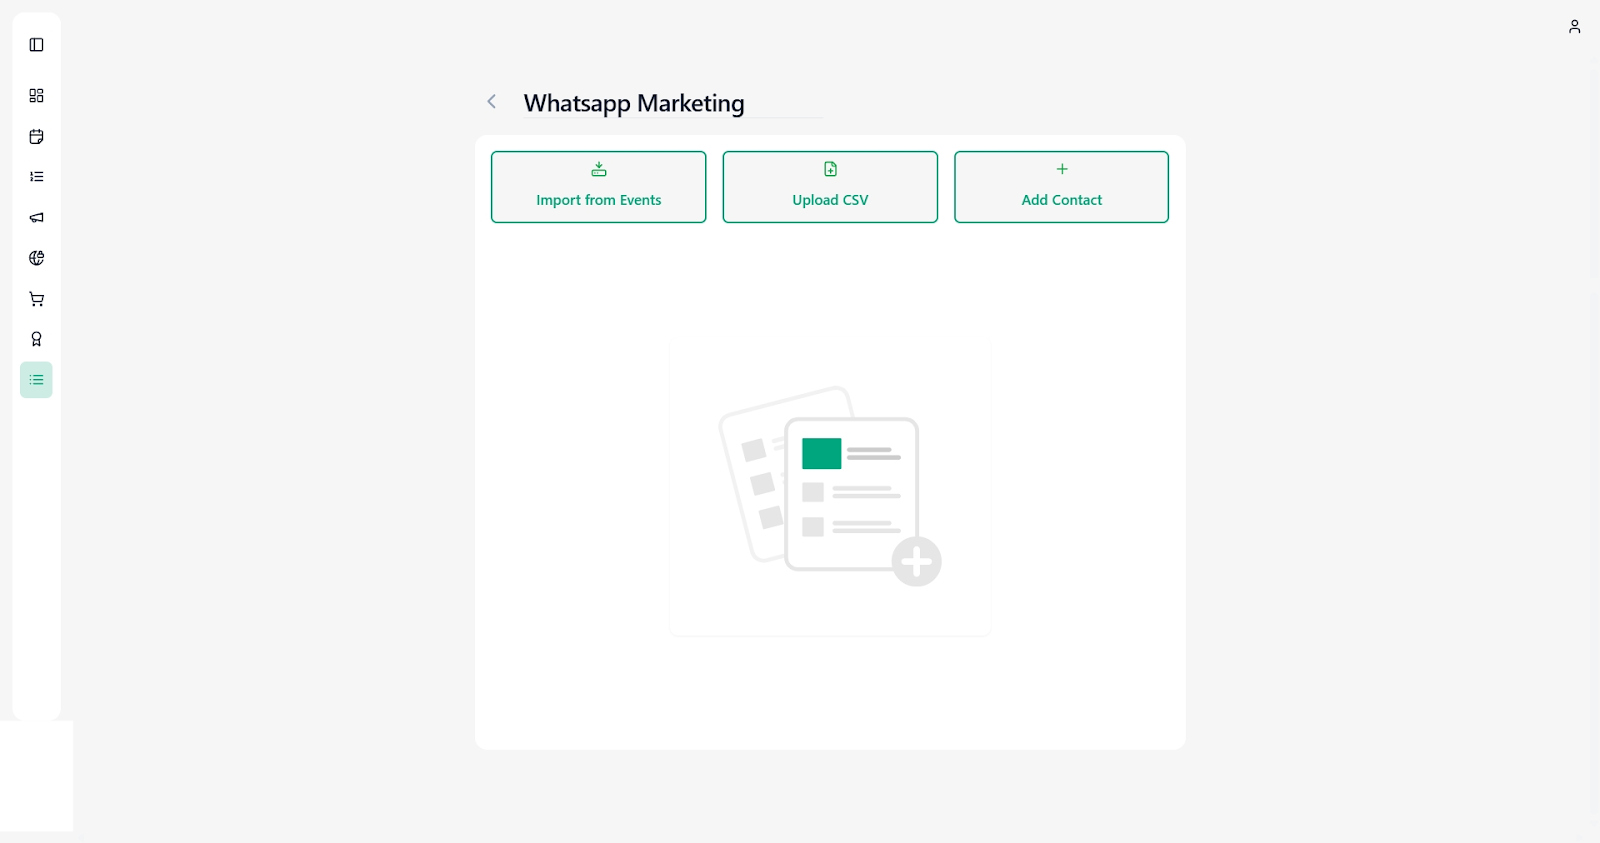
You can add recipients using:
Import from Events – Automatically pulls attendee data
Upload CSV – Bulk upload contacts
Add Contact – Manual entry
5.2 Add Contact (Manual)
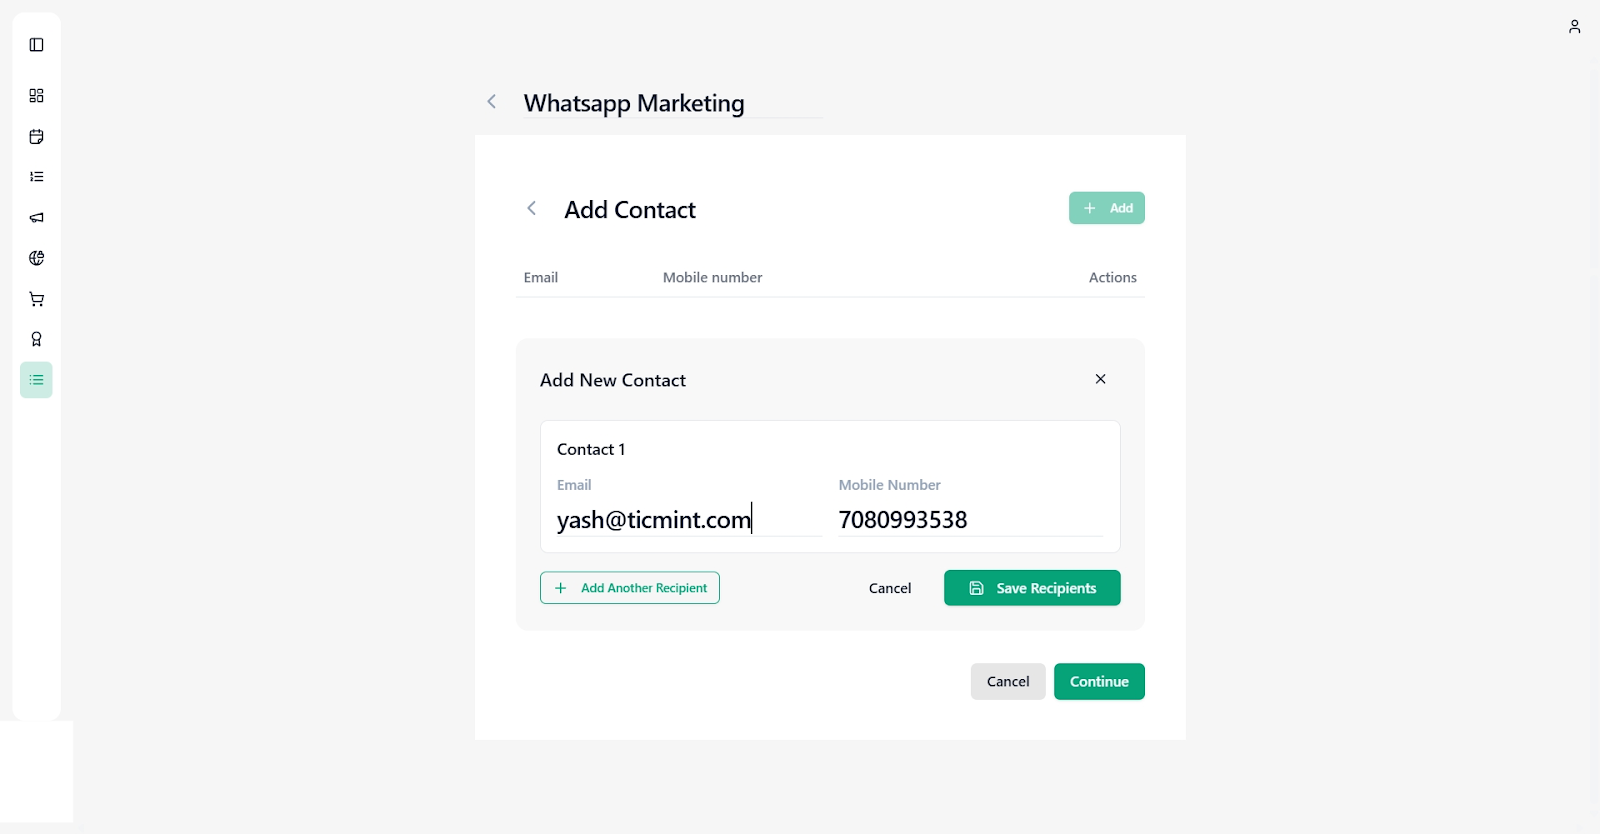
Click Add Contact
Enter:
Email address
Mobile number (with country code)
Click Save Recipients
Apply the list to the campaign
6. Sending the Campaign
Once:
The message template is approved, and
The recipient list is selected
➡️ Click Send.
Campaign Status
Pending – Campaign created and queued
Sent – Successfully dispatched
Delivered – Delivered to recipient devices
Read – Message opened by recipients
All statuses are visible from the campaign listing screen.
7. Editing an Existing Campaign
To modify a campaign before sending:
Click the Edit icon under Actions.
You can update:
Campaign name
Message content
Images or media
CTA button text and link
Click Update to save changes.
⚠️ Editing message content may require re-approval by Meta.
8. Downloading Campaign Analytics & User Details

You can also download detailed user-level analytics for each campaign.
How to Download:
Go to the WhatsApp Marketing Dashboard
Locate your campaign
Click the Download icon on the right side under Actions
What the Report Includes:

The downloaded file (CSV/Excel) contains:
Phone Number
Message Status (Delivered / Read / Failed)
Failure Reason (if any)
Sent Date & Time
Use Case:
Identify failed messages and reasons
Track engagement at user level
Re-target users if needed
Analyze campaign performance deeply
9. Best Practices for WhatsApp Marketing
Use short, clear, and compliant messages
Add images to improve engagement
Always include a CTA button
Avoid sending too many messages to prevent spam issues
Send reminders closer to event dates
Use coupon codes and limited-time offers for better conversions
Create templates early to allow time for Meta approval
Was this article helpful?
That’s Great!
Thank you for your feedback
Sorry! We couldn't be helpful
Thank you for your feedback
Feedback sent
We appreciate your effort and will try to fix the article