Overview
The Membership Module in Ticmint allows organisers to create membership programs that provide exclusive access to members-only events, special ticket privileges, discounts, and attendee verification through QR-based authentication.
Memberships can be used for:
VIP Clubs
Fan Membership Programs
Sports Club Memberships
Premium Event Access
Annual or Seasonal Membership Plans
Exclusive Ticket Sales
1. Accessing the Membership Module
Step 1: Login
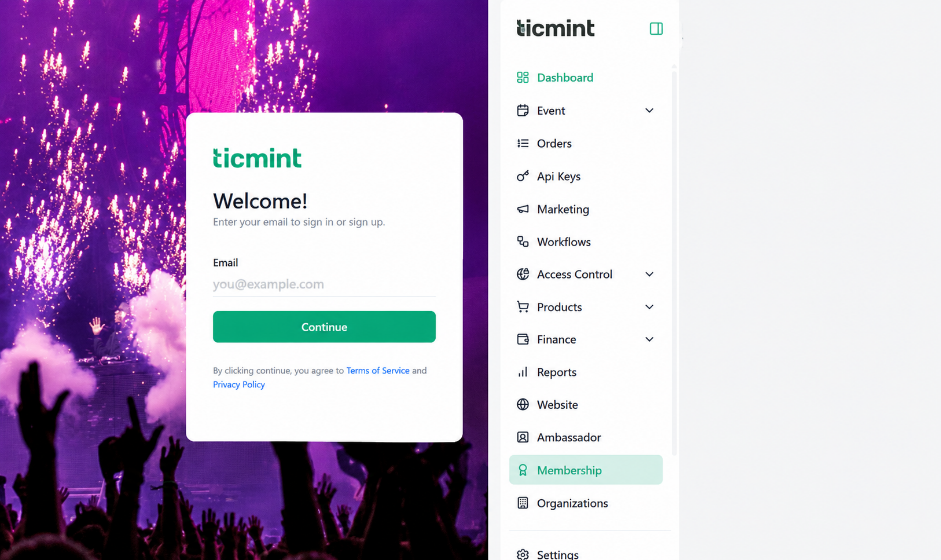
Log in to your Ticmint Partner Dashboard.
Enter your registered email address and password.
After successful login, you will be redirected to the Dashboard Home.
Click Membership
2. Creating a New Membership
Step 1: Open Membership Module
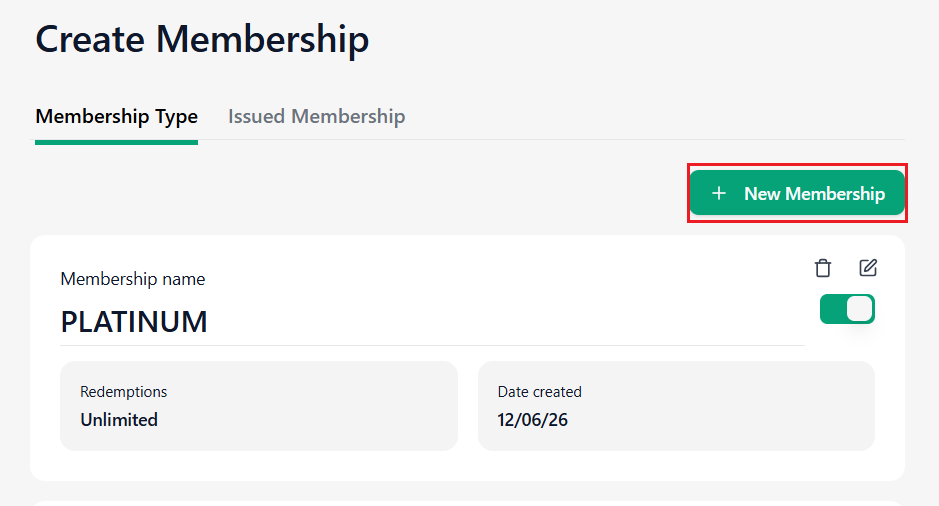
Click Membership Type.
Click + New Membership.
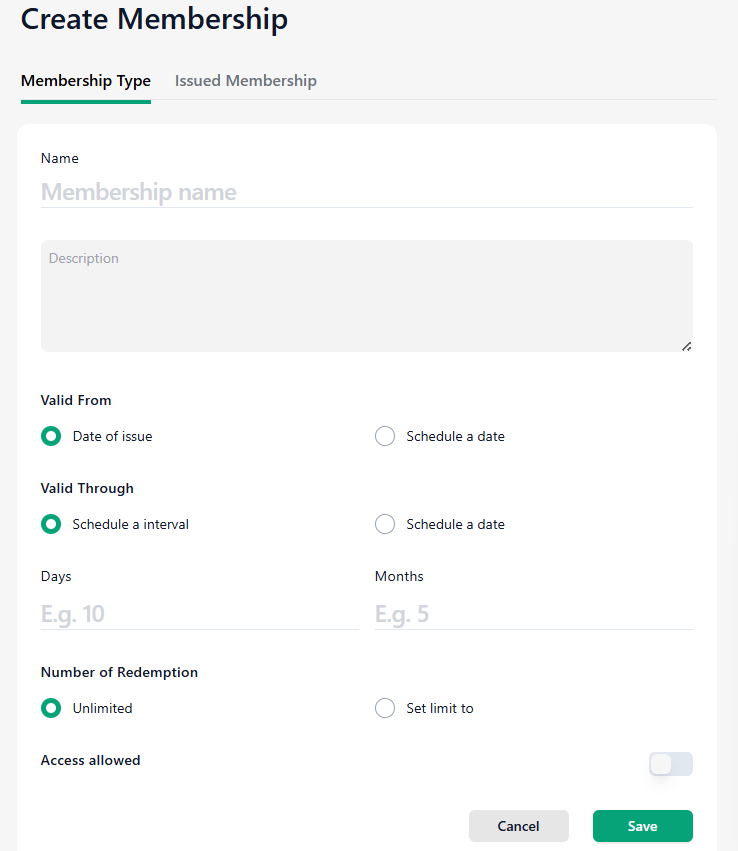
Step 2: Enter Membership Details
Membership Name
Enter the name of the membership.
Examples:
VIP Membership
Gold Pass
Fan Club Membership
Premium Access
Description
Enter a brief description explaining the membership benefits and usage.
Step 3: Configure Validity Settings
Valid From
Select one of the following options:
Date of Issue
Membership validity begins immediately when issued or purchased.
Schedule a Date
Select a specific start date and time for the membership to become active.
Valid Through
Select one of the following options:
Schedule an Interval
Enter the number of Days and/or Months.
Membership validity will be calculated from the start date.
Schedule an End Date
Select a specific expiry date and time.
Step 4: Configure Redemption Limits
Under Number of Redemptions, choose:
Unlimited
Members can redeem benefits without restrictions.
Limited
Enter the maximum number of redemptions allowed.
Example:
5 Redemptions
10 Redemptions
25 Redemptions
Step 5: Allow Access
Enable Allow Access if membership authentication and access control are required.
When enabled:
✓ Membership holders can be verified.
✓ Membership QR codes can be validated.
✓ Access can be controlled for members-only events.
Step 6: Save Membership
Review all details.
Click Save.
The membership type is now available for issuing and event configuration.
3. Issued Membership
Issued Membership allows organisers to manually assign memberships to specific users.
Step 1: Open Issued Membership
Navigate to Membership.
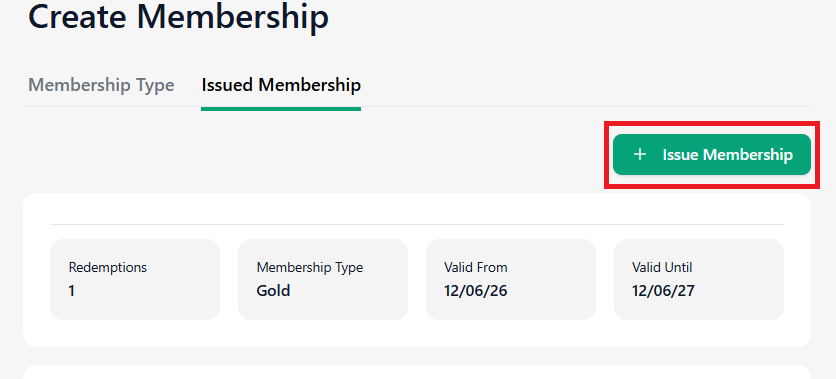
Click Issued Membership.
Click + Issue Membership.
Step 2: Enter Member Information
Fill in the following details:
First Name
Enter the member’s first name.
Last Name
Enter the member’s last name.
Email Address
Enter the member’s email address.
Membership Type
Select the membership type from the dropdown list.
Step 3: Configure Custom Limits and Validity
Enable Use Custom Limits and Validity if required.
This allows you to override the default membership settings.
Configure:
Start Date & Time
Select the membership activation date and time.
End Date & Time
Select the membership expiry date and time.
Number of Redemptions
Enter the maximum number of allowed redemptions.
Example:
5
10
25
Unlimited (if applicable)
Step 4: Save Issued Membership
Verify all member details.
Click Save.
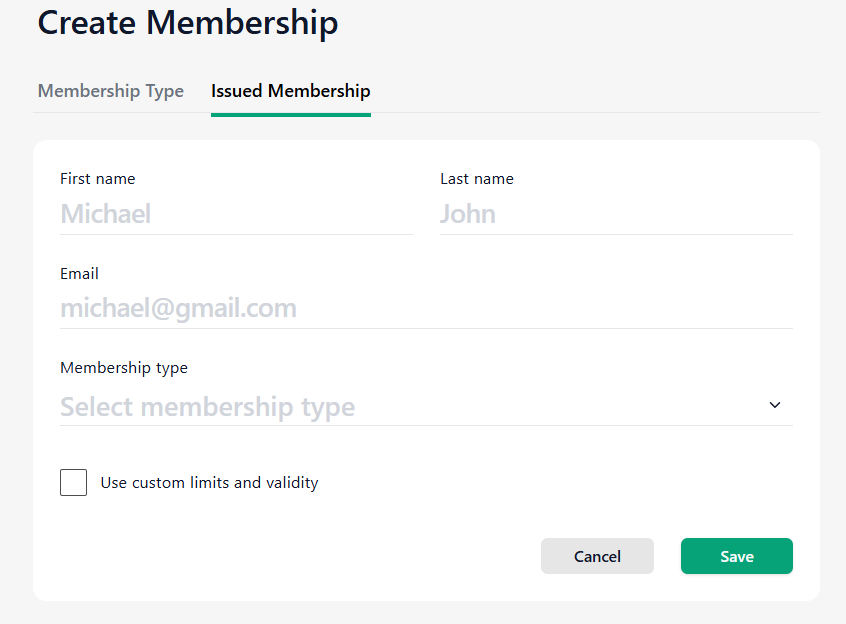
The membership will be issued immediately and linked to the member’s email address.
Learn more about community event ticketing on the Ticmint website.
Was this article helpful?
That’s Great!
Thank you for your feedback
Sorry! We couldn't be helpful
Thank you for your feedback
Feedback sent
We appreciate your effort and will try to fix the article