Settings Module Guide

Created by Ticmint Support, Modified on Mon, 27 Jul at 12:33 PM by Ticmint Support

This document provides a step-by-step guide for configuring the Settings Module in the Ticmint Partner Dashboard. It covers organization settings, payment gateways, notification channels, user management, role management, amenities, categories, and service fees.

Access the Settings Module

  1. Log in to the Ticmint Dashboard using your organizer credentials.

  2. From the left-hand navigation menu, click Settings.


1. General Settings

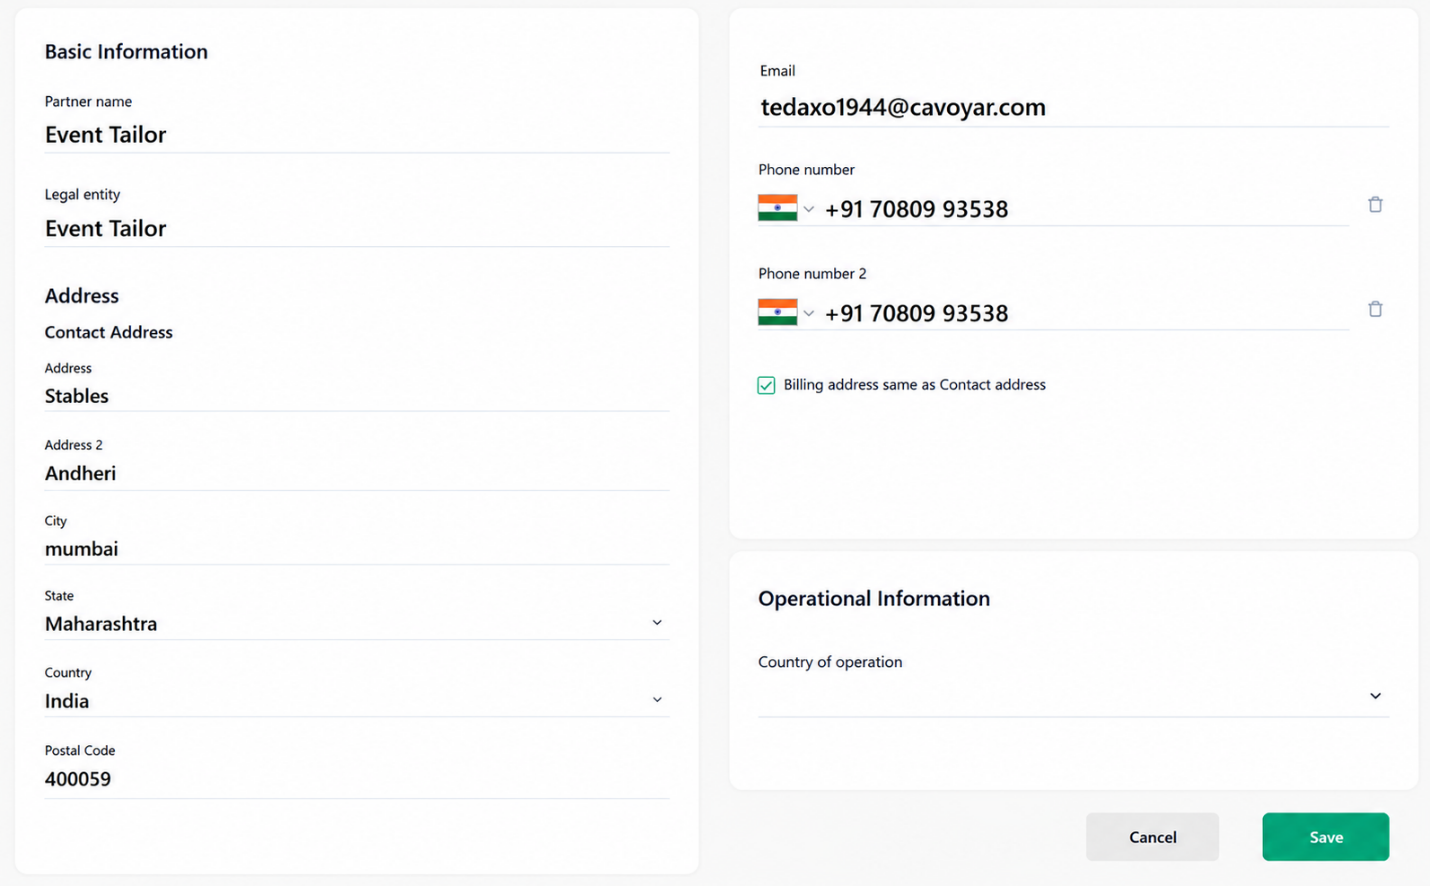
The General Settings section allows administrators to configure the organization’s basic information.
Field

Description

Partner Name

Enter the event organizer or partner name.

Legal Entity

Enter the registered legal entity name.

Contact Address

Enter the primary contact address.

Address

Enter the street address.

Address 2

Enter additional address details (optional).

City

Enter the city.

State

Select the state from the dropdown.

Country

Select the country from the dropdown.

Postal Code

Enter the postal or ZIP code.

Email

Enter the official contact email address.

Phone

Enter the primary contact number.

Phone Number 2

Enter an alternate contact number (optional).

Billing Address Same as Contact Address

Enable this option if the billing address is the same as the contact address.

Country of Operation

Select the operating country.

Save

Click Save to apply the changes.

Cancel

Click Cancel to discard unsaved changes.


2. Payment Gateway

The Payment Gateway section allows administrators to configure online payment providers.

Add a Payment Gateway
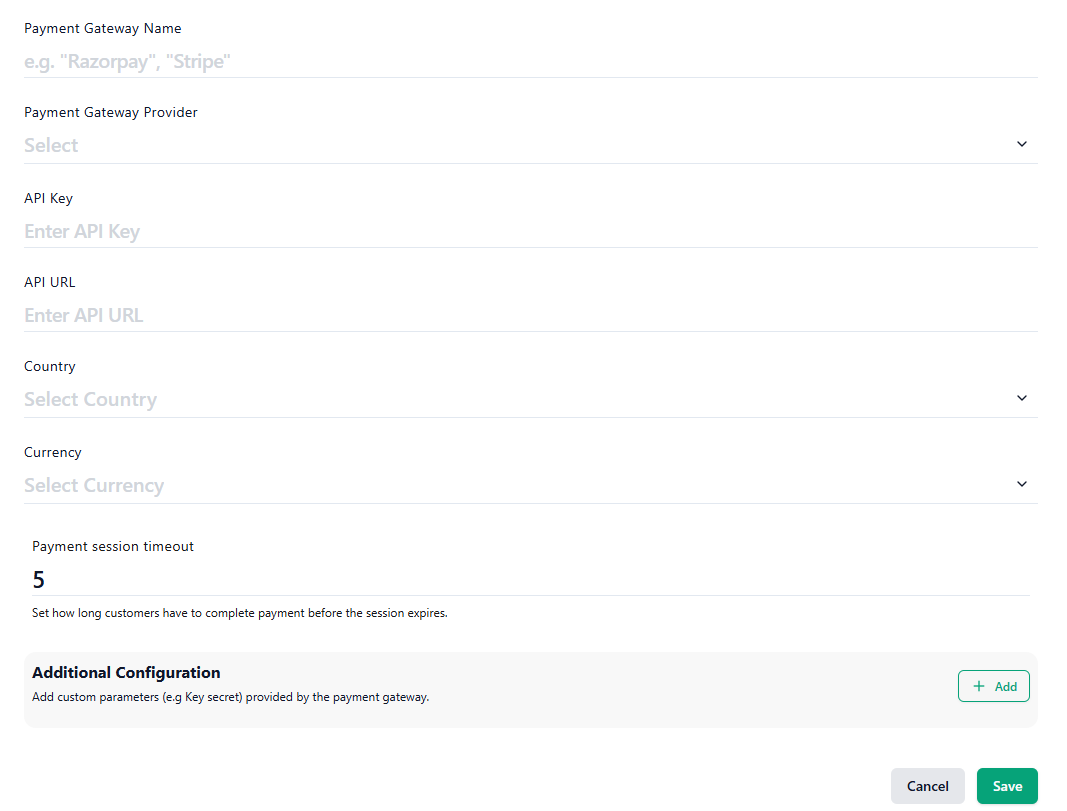
Field

Description

Payment Gateway Name

Enter a unique name for the payment gateway (e.g., Razorpay, Stripe).

Payment Gateway Provider

Select the payment gateway provider from the dropdown list.

API Key

Enter the API Key provided by the payment gateway provider.

API URL

Enter the API endpoint URL provided by the payment gateway provider.

Country

Select the country where the payment gateway will be used.

Currency

Select the transaction currency.

Payment Session Timeout

Enter the payment session timeout (in minutes). This defines how long customers have to complete the payment before the session expires.

Additional Configuration

Click + Add to include custom parameters (e.g., Key Secret, Client ID, Merchant ID, Secret Key, or other provider-specific configuration values).

Cancel

Click Cancel to discard the changes.

Save

Click Save to create and enable the payment gateway configuration.


3. Notification Channel

The Notification Channel section allows administrators to configure communication providers for Email, SMS, WhatsApp, and other notification services.

Add a Notification Channel
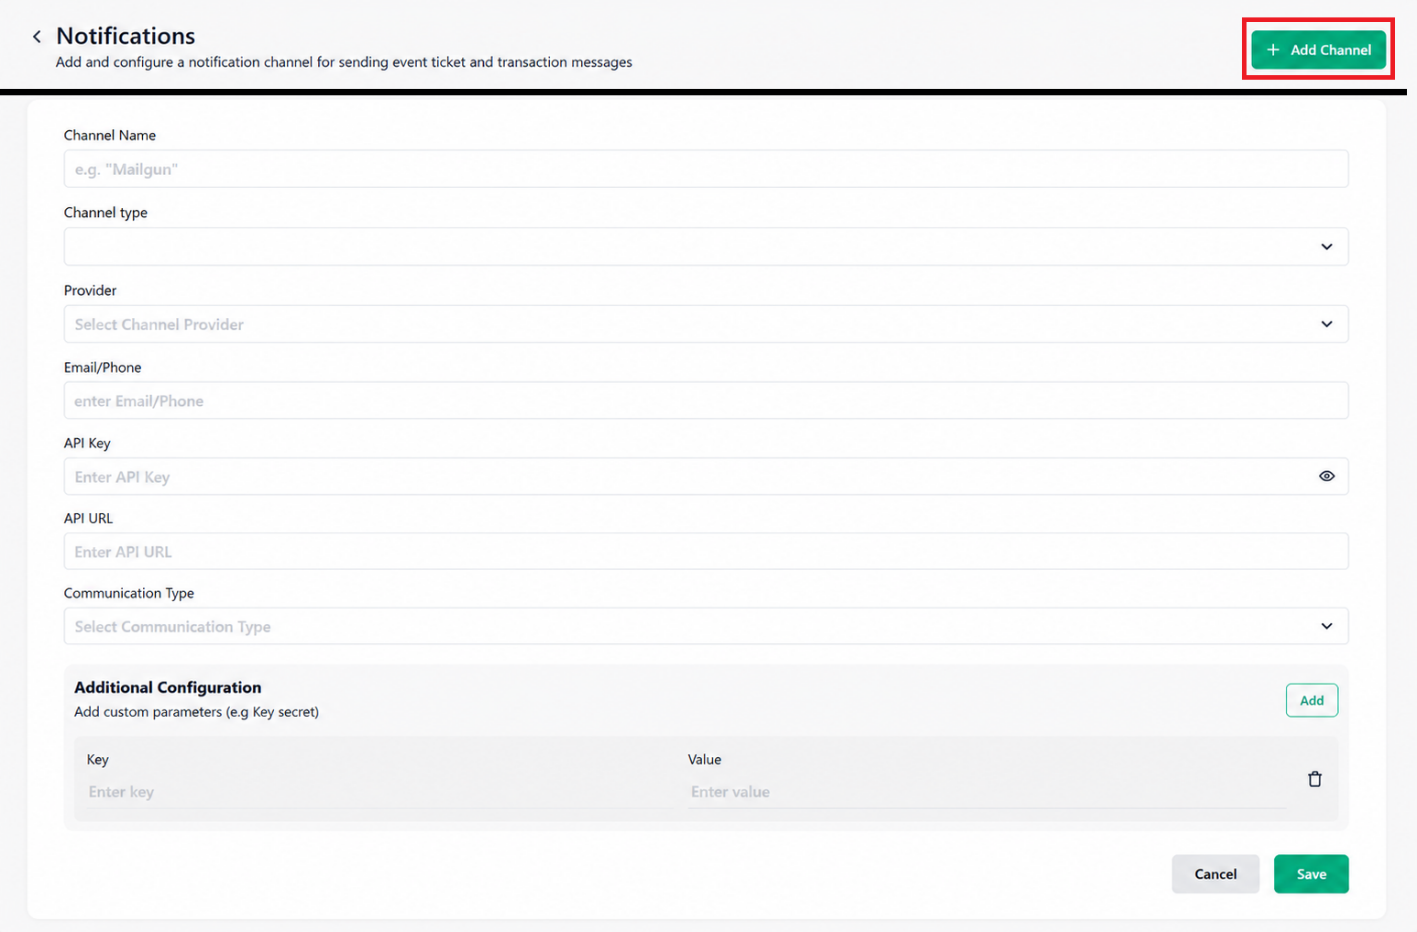
Field

Description

Channel Name

Enter a unique name to identify the notification channel.

Channel Type

Select the type of notification channel.

Provider

Choose the notification service provider.

Email/Phone

Enter the email address or phone number associated with the provider.

API Key

Enter the API key issued by the provider.

API URL

Enter the provider's API endpoint URL.

Communication Type

Select the communication method supported by the provider.

Key

Enter the configuration parameter name (e.g., Secret Key, Sender ID, Domain, Auth Token).

Value

Enter the corresponding value for the configuration parameter.

Save

Saves the notification channel configuration.

Cancel

Closes the page without saving changes.


4. User Management

The User and Role Management module allows administrators to create user accounts and assign roles.

Add a User

Step

Action

1

Navigate to User Management.

2

Click + Add User.

3

Enter the Name.

4

Enter the Email Address.

5

Enter the Phone Number.

6

Select the Organization.

7

Select the required User Role.

8

Click Add.

Note: After the user is created, an email is automatically sent allowing them to set their password. The same email address will be used as their login ID.

Available User Roles

Role

Description

Staff User

Read-only access across organizer features.

Ticket Ambassador

Sells tickets, manages assigned events, and views commissions.

Event Supervisor

Event management with limited operational permissions.

Administrator

Full access to all subscribed features across organizations.

Event Manager

Full event management including campaigns, orders, affiliates, and themes.

Validator

Scans and validates tickets during event entry.


Role Management

The Role Management module allows administrators to create custom roles with specific permission groups.

Navigate to Role Management.

  1. Click Add Role.

  2. Enter the Role Name.

  3. Select the required Permissions.

• Assign Ticket Ambassadors • Create WhatsApp Templates • Customize Event Theme • Default Permissions • Event Ops: View Only • Manage Access Control • Manage Affiliates • Manage API Keys • Manage Campaigns • Manage Connected PGs • Manage Data Across Organizations • Manage Events • Manage Finance & Settings • Manage Membership • Manage Orders • Manage Products • Manage Reports • Manage Ticket Ambassadors • Manage Websites • Manage Workflows • Resend Tickets • Scan Tickets • Staff User: Read Only • Ticket Ambassador Analytics • Ticket Ambassador Box Office • Ticket Ambassador Dashboard • Use Sales Accelerator • Use Ticket Templates • View Data Across Organizations • View Events • View Membership • View Orders • View Reports • View Ticket Ambassadors

  1. Click Save.


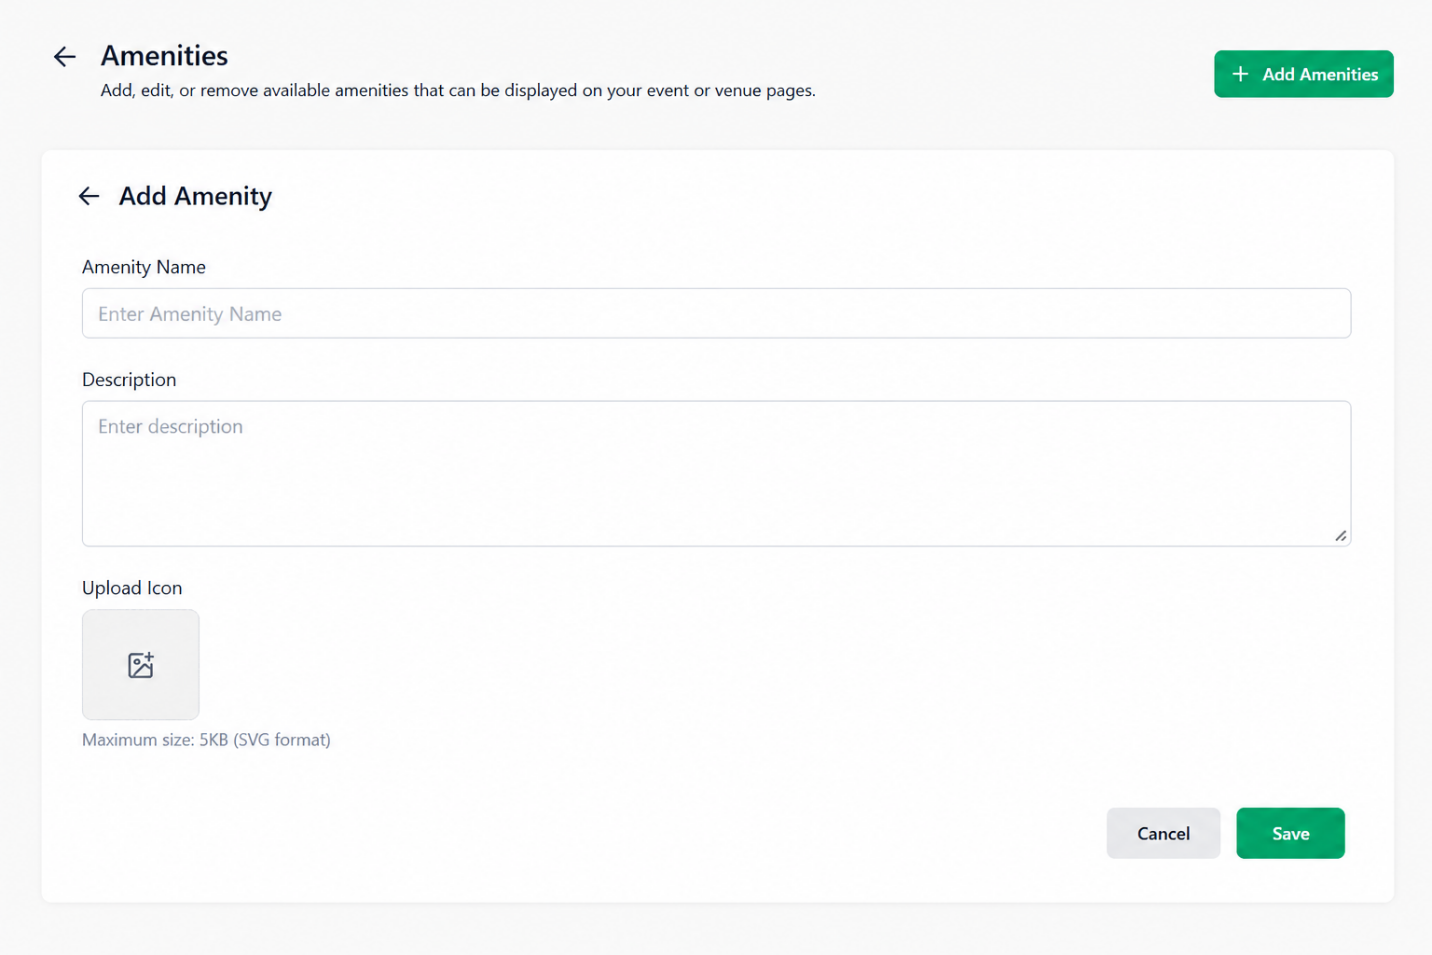
6. Amenities

The Amenities module allows administrators to manage amenities displayed on event and venue pages.

Navigate to Amenities.

  1. Click + Add Amenity.

  2. Enter the Amenity Name.

  3. Upload the Amenity Icon.

  4. Click Save.


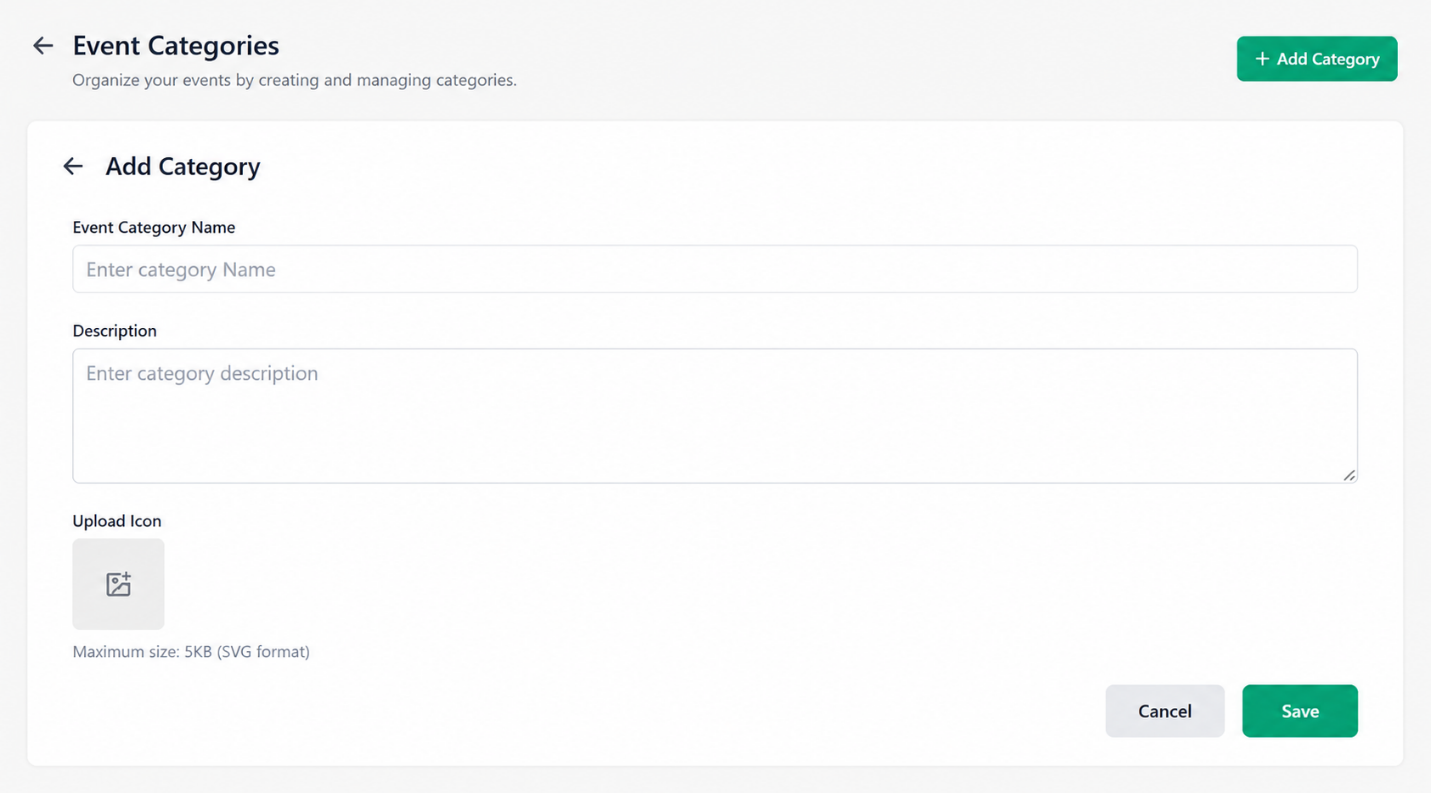
7. Category

The Category module allows administrators to organize events into searchable categories.

Navigate to Category.

  1. Click + Add Category.

  2. Enter the Event Category Name.

  3. Upload the Category Icon.

  4. Click Save.


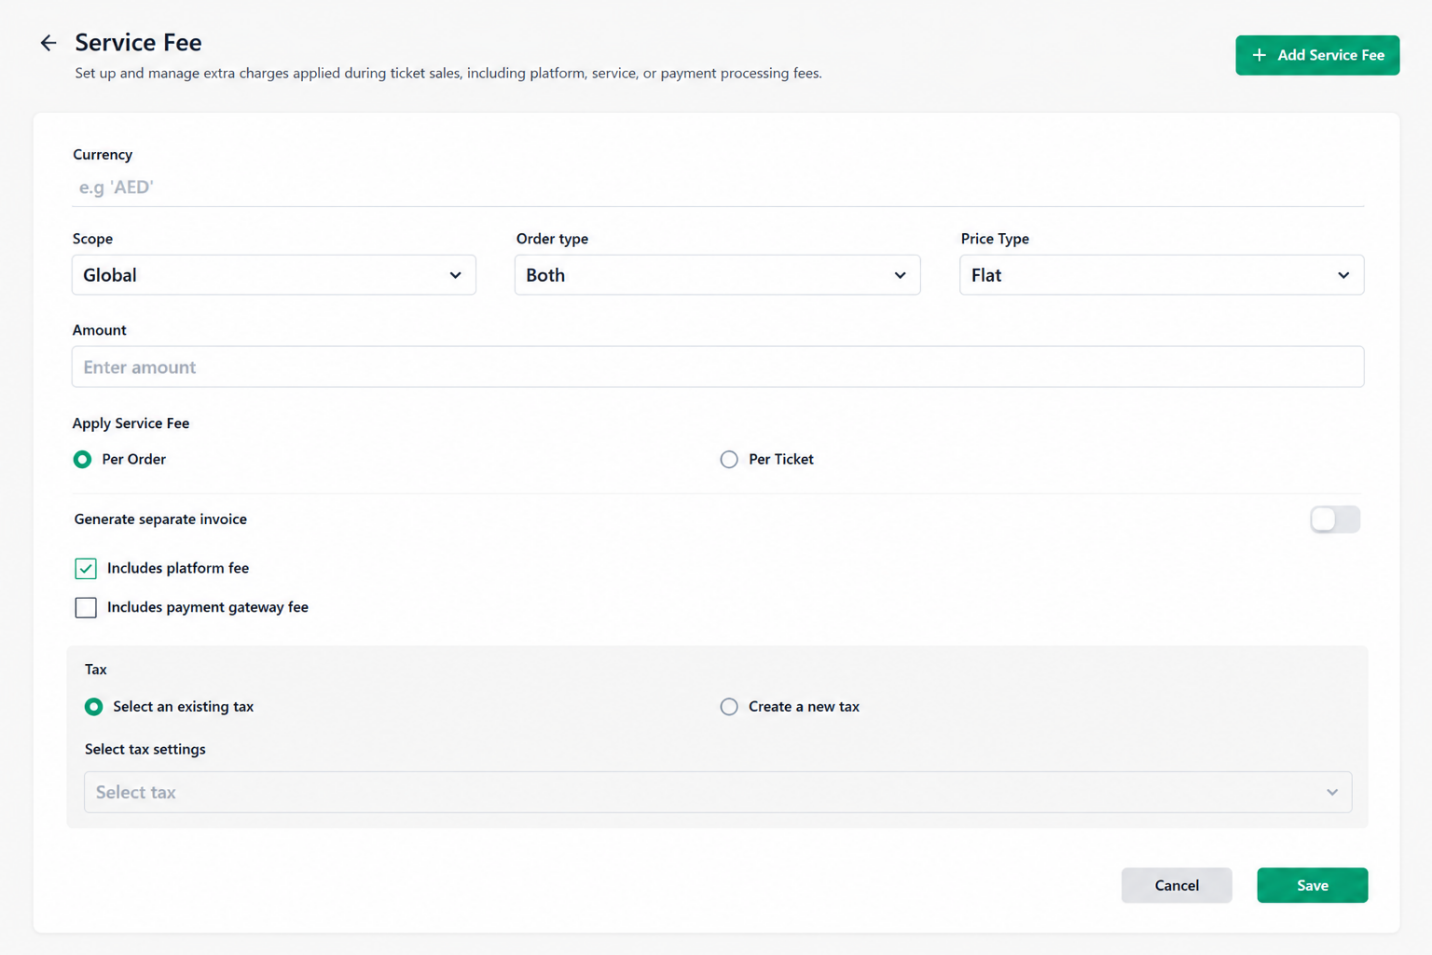
8. Service Fee

The Service Fee module allows administrators to configure additional charges applied during ticket purchases.

Navigate to Service Fee.

  1. Click + Add Service Fee.

  2. Select the Currency.

  3. Select the Scope Type.

  4. Select the Order Type.

  5. Select the Price Type.

  6. Enter the Amount.

  7. Select whether the fee applies Per Order or Per Ticket.

  8. Enable Generate Separate Invoice if required.

  9. Enable Includes Platform Fee if required.

  10. Enable Includes Payment Gateway Fee if required.

  11. Select an existing Tax or create a new one.

  12. Click Save.


Was this article helpful?

That’s Great!

Thank you for your feedback

Sorry! We couldn't be helpful

Thank you for your feedback

Let us know how can we improve this article!

Select at least one of the reasons
CAPTCHA verification is required.

Feedback sent

We appreciate your effort and will try to fix the article