Send your ticket sales and sign-ups to Meta straight from Ticmint's servers. Ad blockers and browser limits can't stop them, so your campaigns get cleaner data.
Before you start
- Admin access to the Meta Business account that owns your pixel.
- A Meta Pixel (also called a dataset). Don’t have one yet? Find and connect a Meta Pixel to Ticmint, then come back here.
1. Open Meta Events Manager
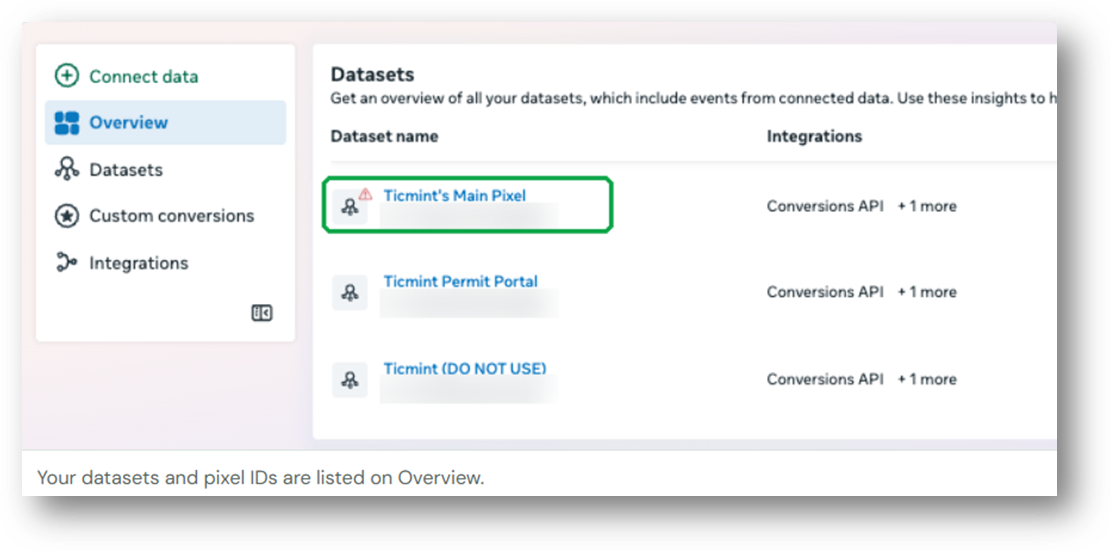
Go to Events Manager and sign in. The Overview page lists every dataset in your account. Find the pixel you use with Ticmint.
2. Select your pixel and open Settings
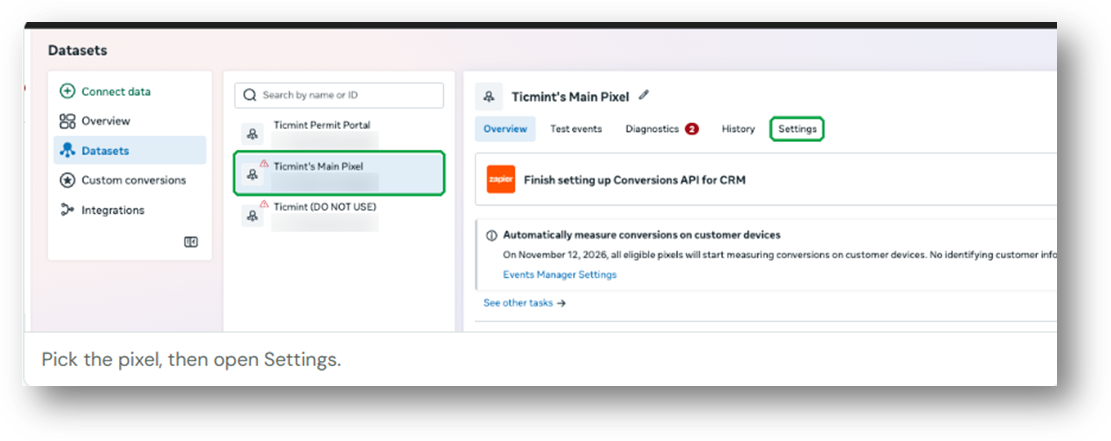
Click Datasets in the left menu, choose your pixel from the list, then click the Settings tab.
3. Find the Conversions API section
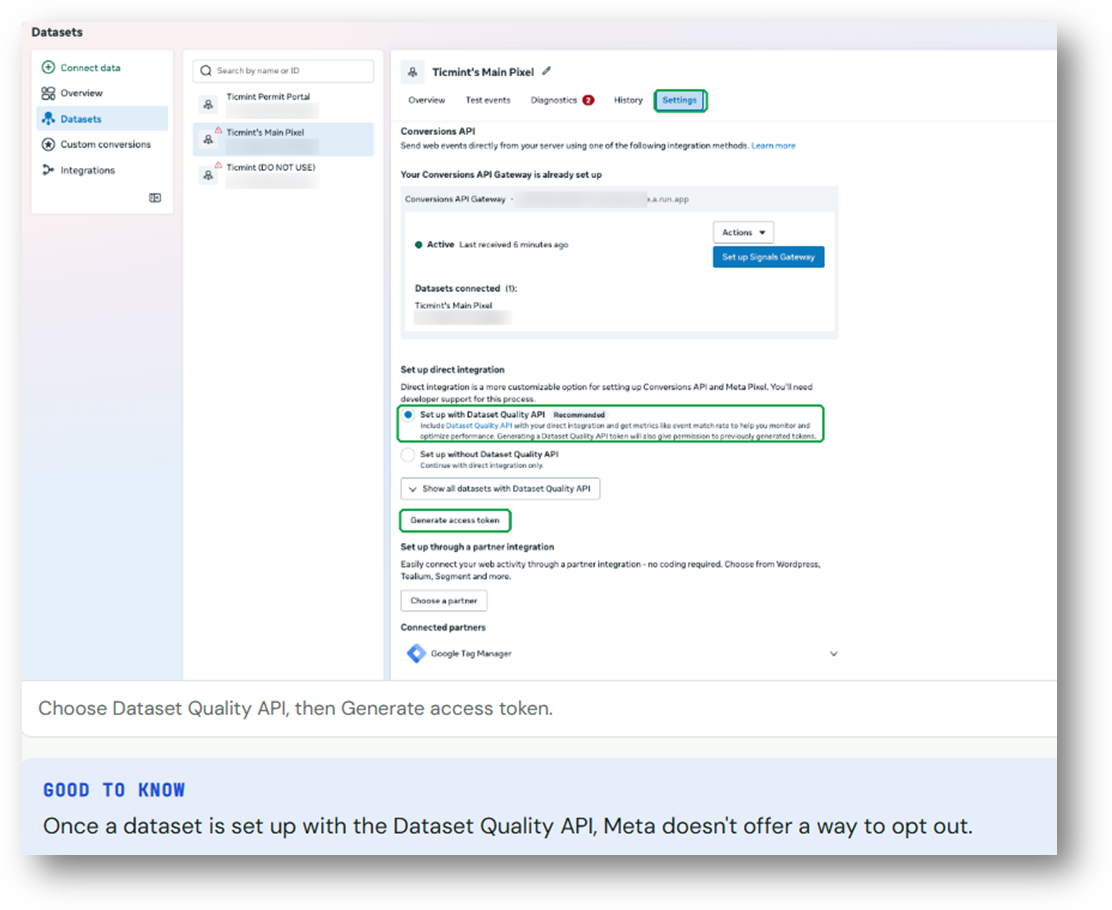
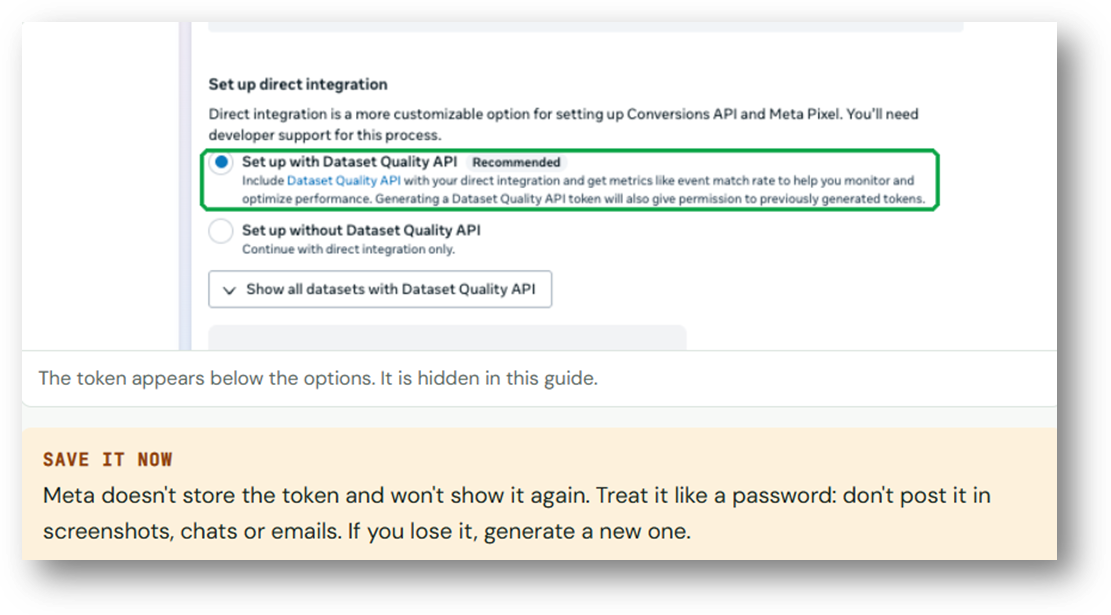
Scroll down to Conversions API and then to Set up direct integration. Choose Set up with Dataset Quality API. Meta marks it as recommended, and it gives you metrics such as event match rate. Then click Generate access token.
4. Select the dataset in the pop-up
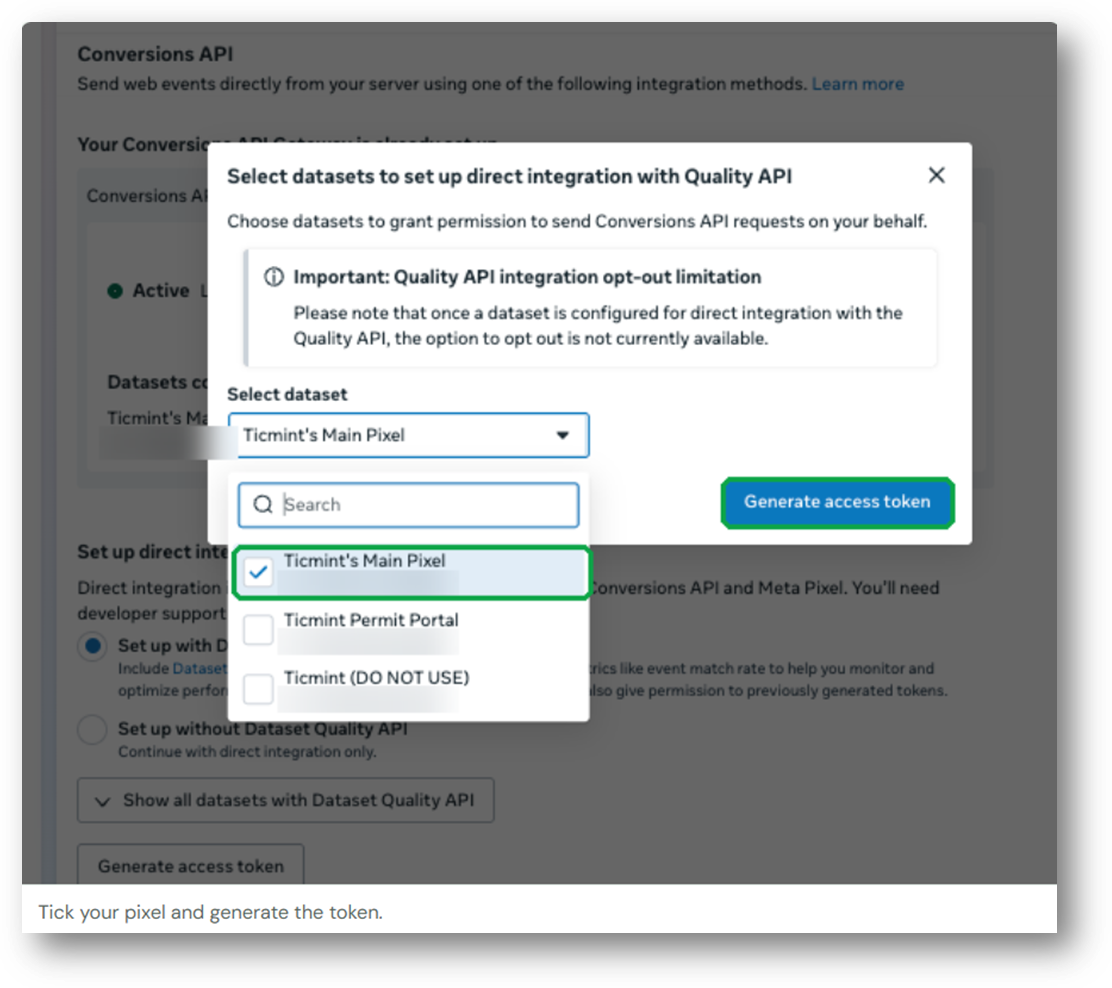
A pop-up asks which datasets can send Conversions API events for you. If your account has several pixels, you’ll see all of them. Tick the one you connected to Ticmint, then click Generate access token.
5. Copy your access token
Meta shows the token in a box below the integration options. It is a long string that starts with EAA. Copy all of it straight away.
6. Open your website settings in Ticmint
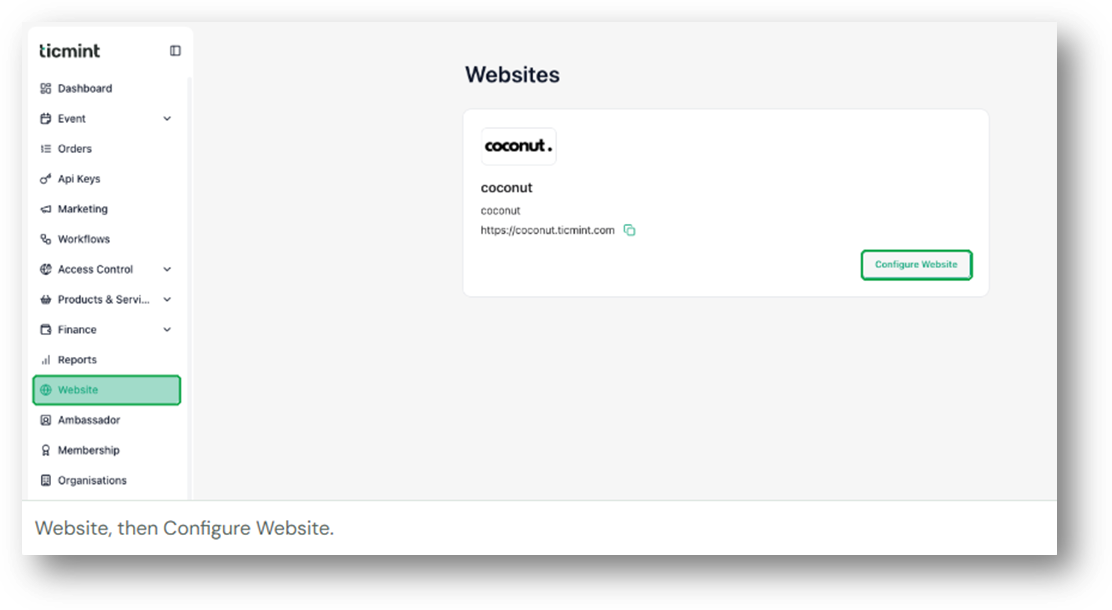
Sign in to your Ticmint dashboard. Click Website in the left menu, then click Configure Website on your website.
7. Paste your pixel ID and access token
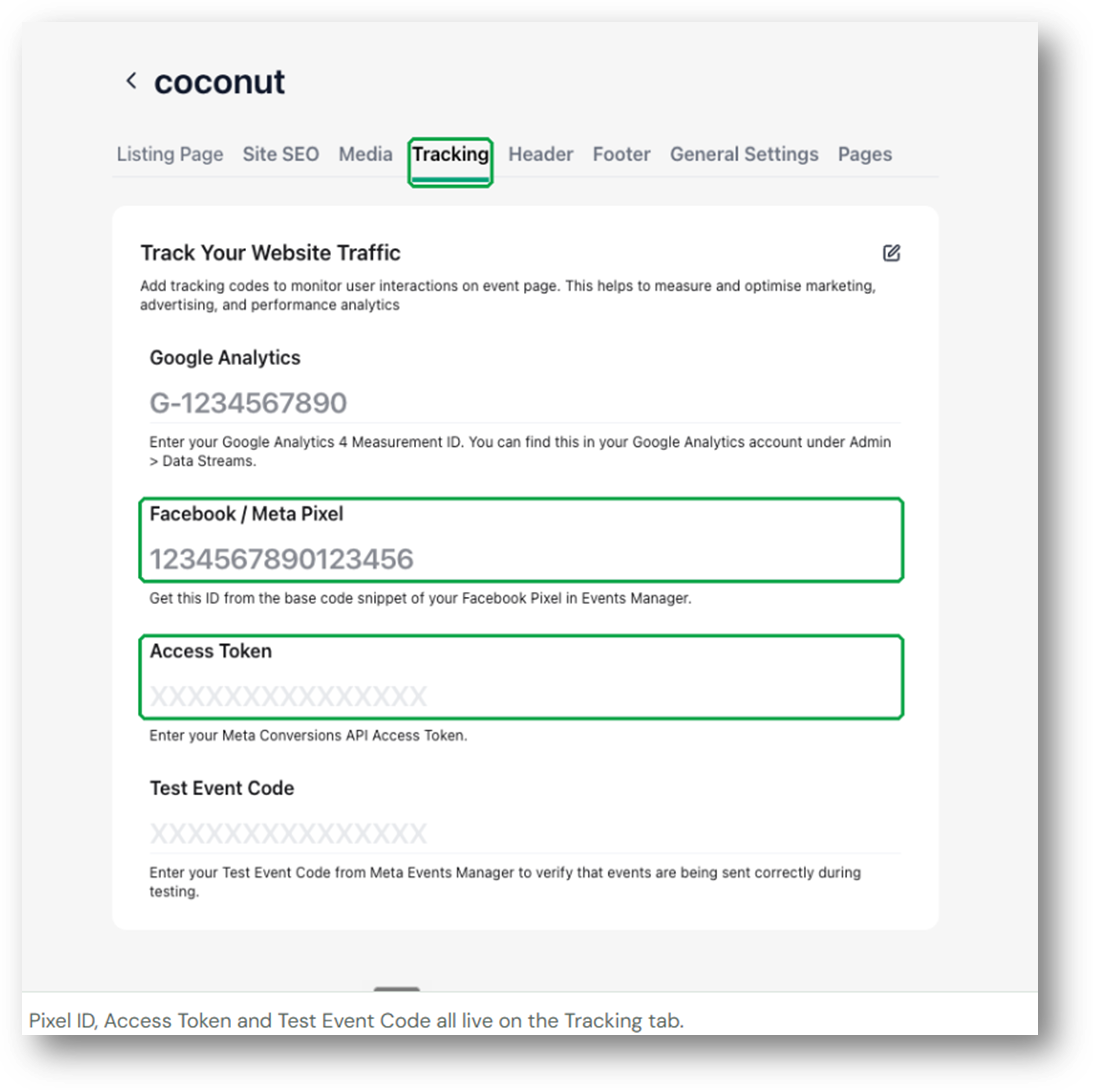
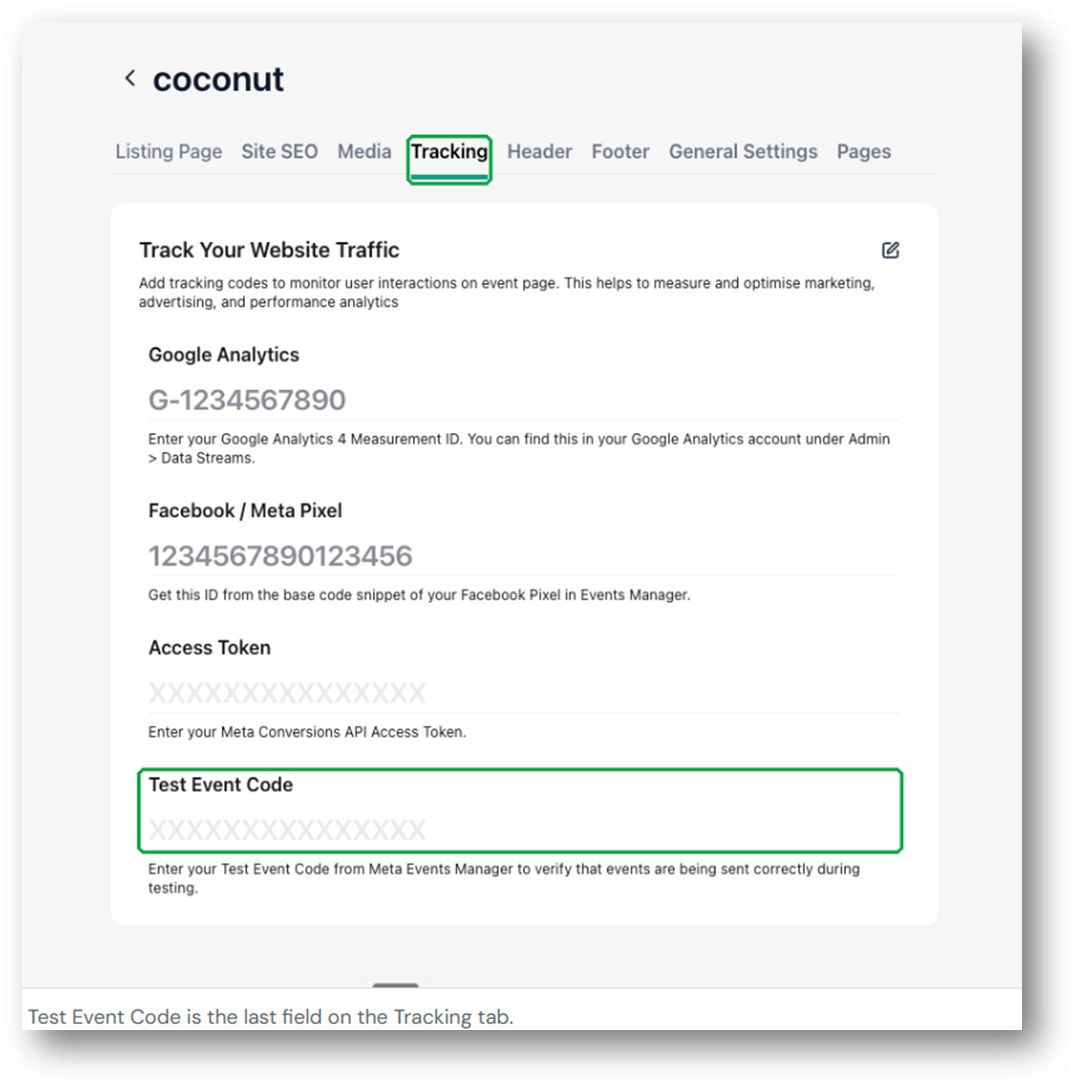
Open the Tracking tab. Under Facebook / Meta Pixel, enter your pixel ID. Under Access Token, paste the token you copied in step 5. Use the edit icon at the top right of the card if the fields are locked, and save.
8. Copy your test event code from Meta
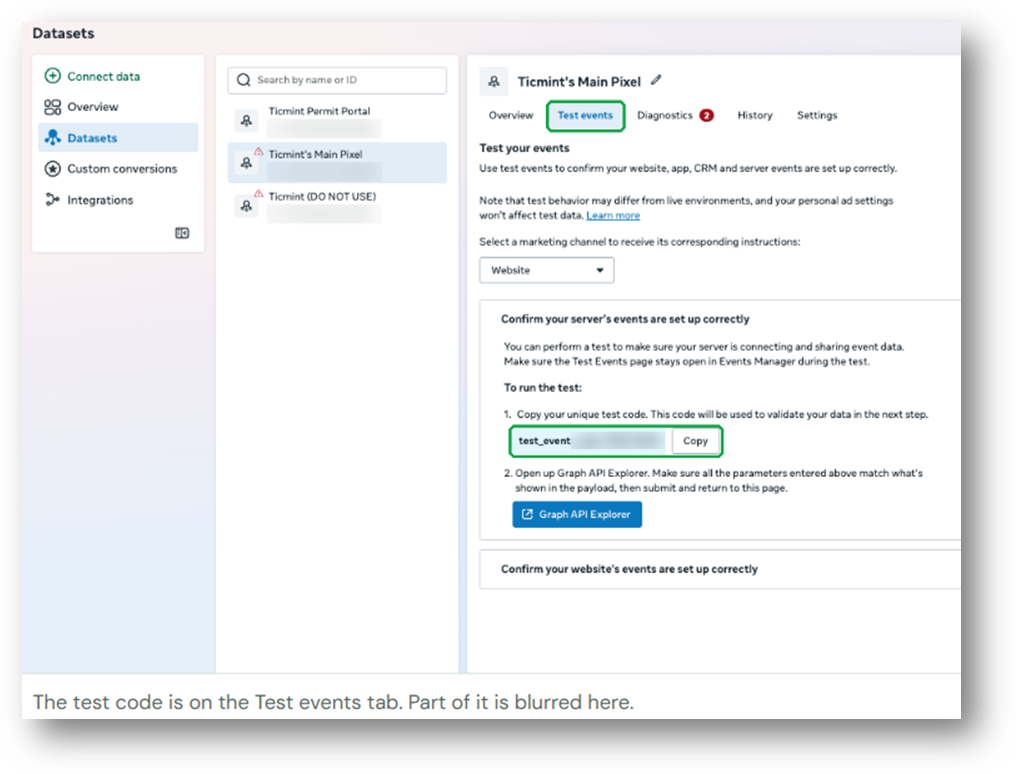
The test code lets you confirm that events from Ticmint reach Meta. In Events Manager, open your pixel, click Test events and copy the code from Confirm your server’s events are set up correctly. It looks like TEST12345. Click Copy next to it.
9. Paste the test code into Ticmint
Go back to your Ticmint dashboard: Website, Configure Website, then the Tracking tab. Paste the code into Test Event Code and save.
10. Check that events arrive
Keep the Test events page open in Events Manager. Open your Ticmint event page in another tab and go through checkout or sign-up. Events from Ticmint should appear on the Test events page with a Server source. They can take a minute or two.
Remove the test code when you're done Clear the Test Event Code field in Ticmint and save. While a test code is set, Meta treats the events as test events, so they don't count for your ads.
Common questions
If I generate a new token, does my old one stop working?
No. Generating a token doesn't cancel the ones you already made, so an integration using an older token keeps working. Meta also notes on that page that a new Dataset Quality API token gives permission to previously generated tokens. Only replace the token in Ticmint when you want to switch to the new one.
I closed the page and didn't copy the token. What now?
Repeat steps 3 and 4 to generate a fresh token. Meta can't show a token a second time.
My account has more than one pixel. Which do I pick?
Pick the one connected to your Ticmint events. Don't tick pixels you don't use with Ticmint, because the token can send events to every dataset you select.
I don't see a Conversions API section.
Check that you opened Settings for the right pixel and that your Meta account has admin access to it. If it still doesn't appear, contact Ticmint support and share the pixel ID, never the token.
Beta feature Meta Conversion API on Ticmint is still in beta. If you need help checking that it works, give Ticmint shared access to your Meta Business Manager. Our tech and growth team can then check the setup from the backend. Sharing access isn't required if you only need help with the setup steps. |
Was this article helpful?
That’s Great!
Thank you for your feedback
Sorry! We couldn't be helpful
Thank you for your feedback
Feedback sent
We appreciate your effort and will try to fix the article