Step 1: Log in to Meta Business
Please Sign Up to Meta/Facebook, validate(add the code to) the website with the pixel code, and follow the instructions:
Visit link: https://www.facebook.com/events_manager
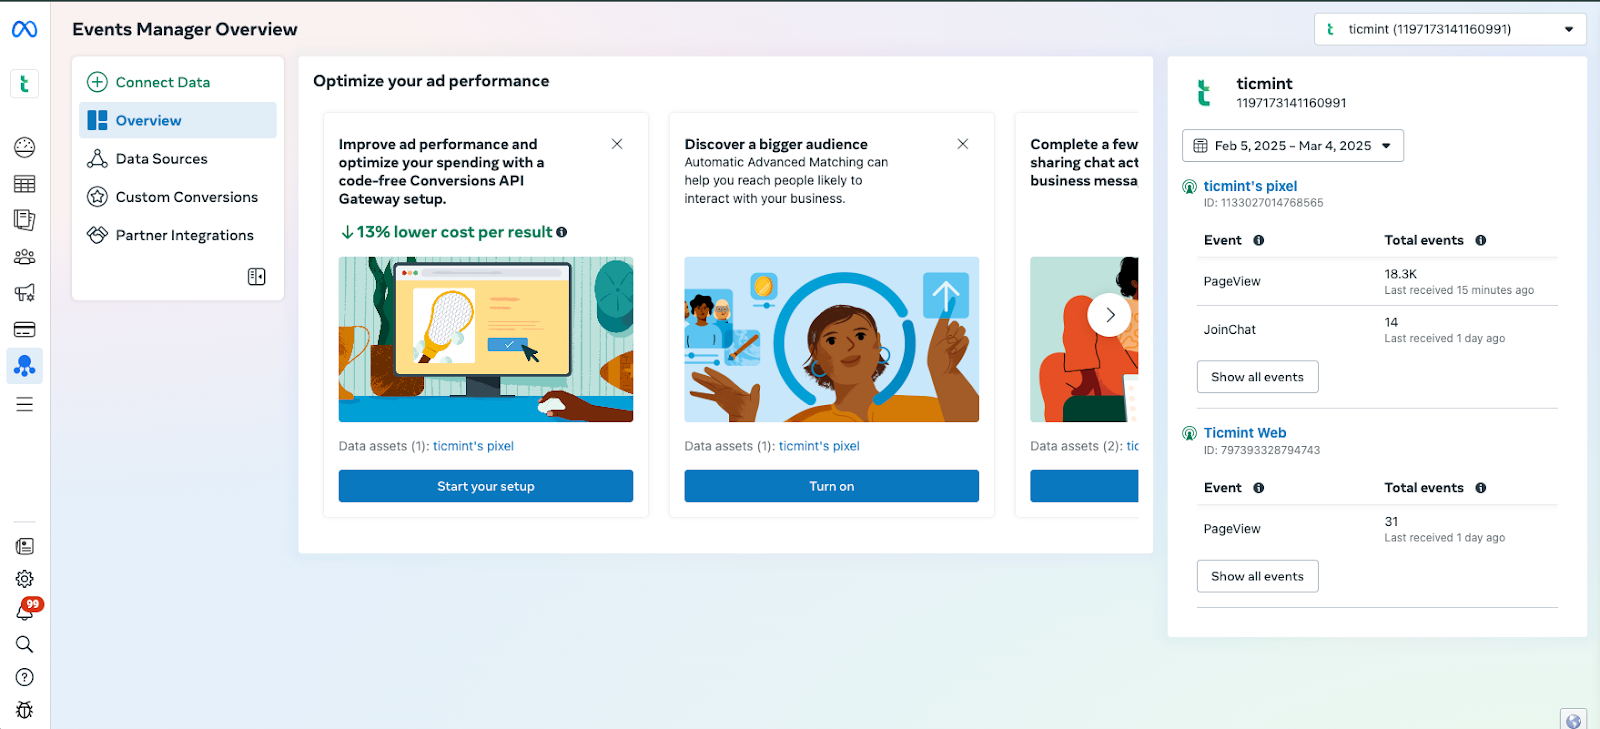
Step 2: Click on Data Source
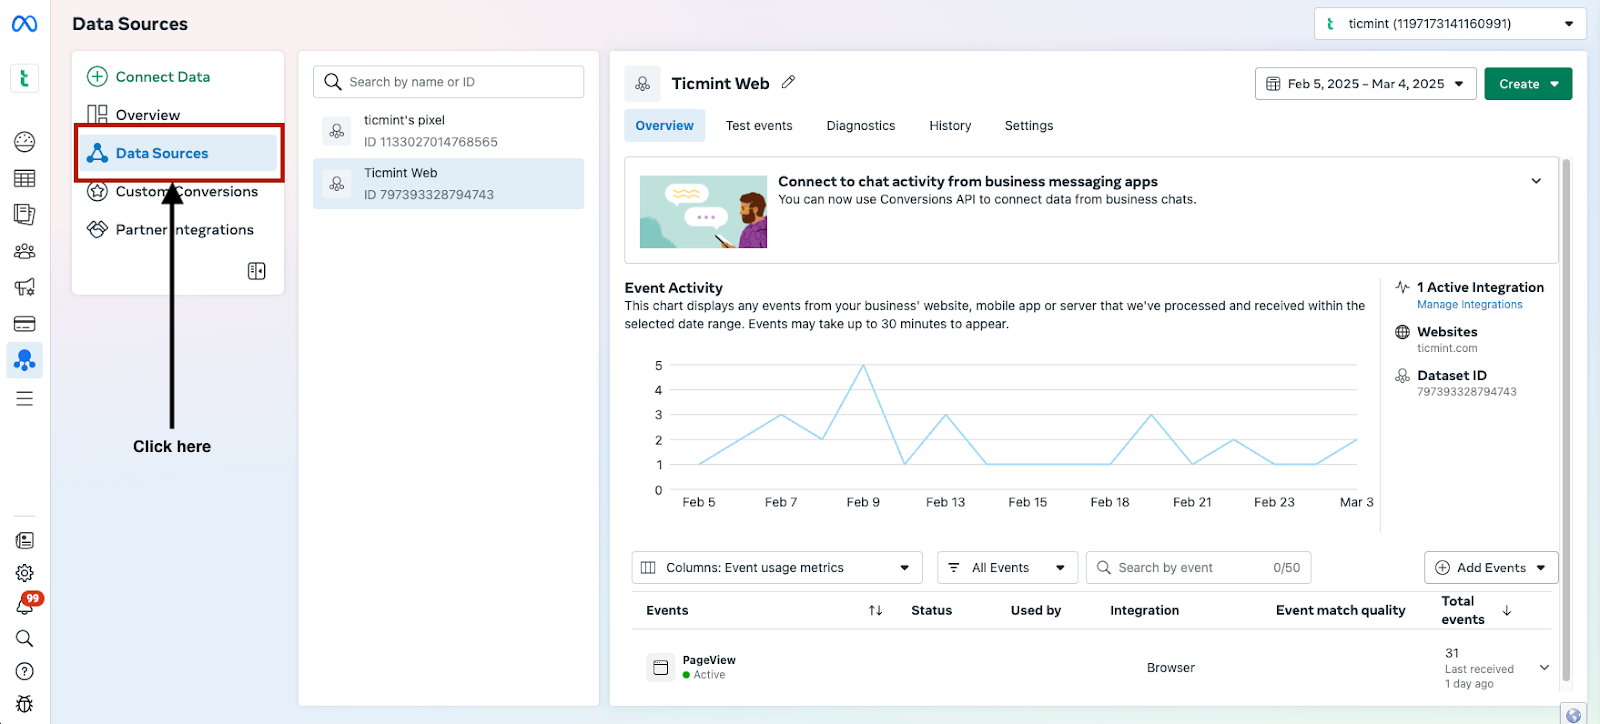
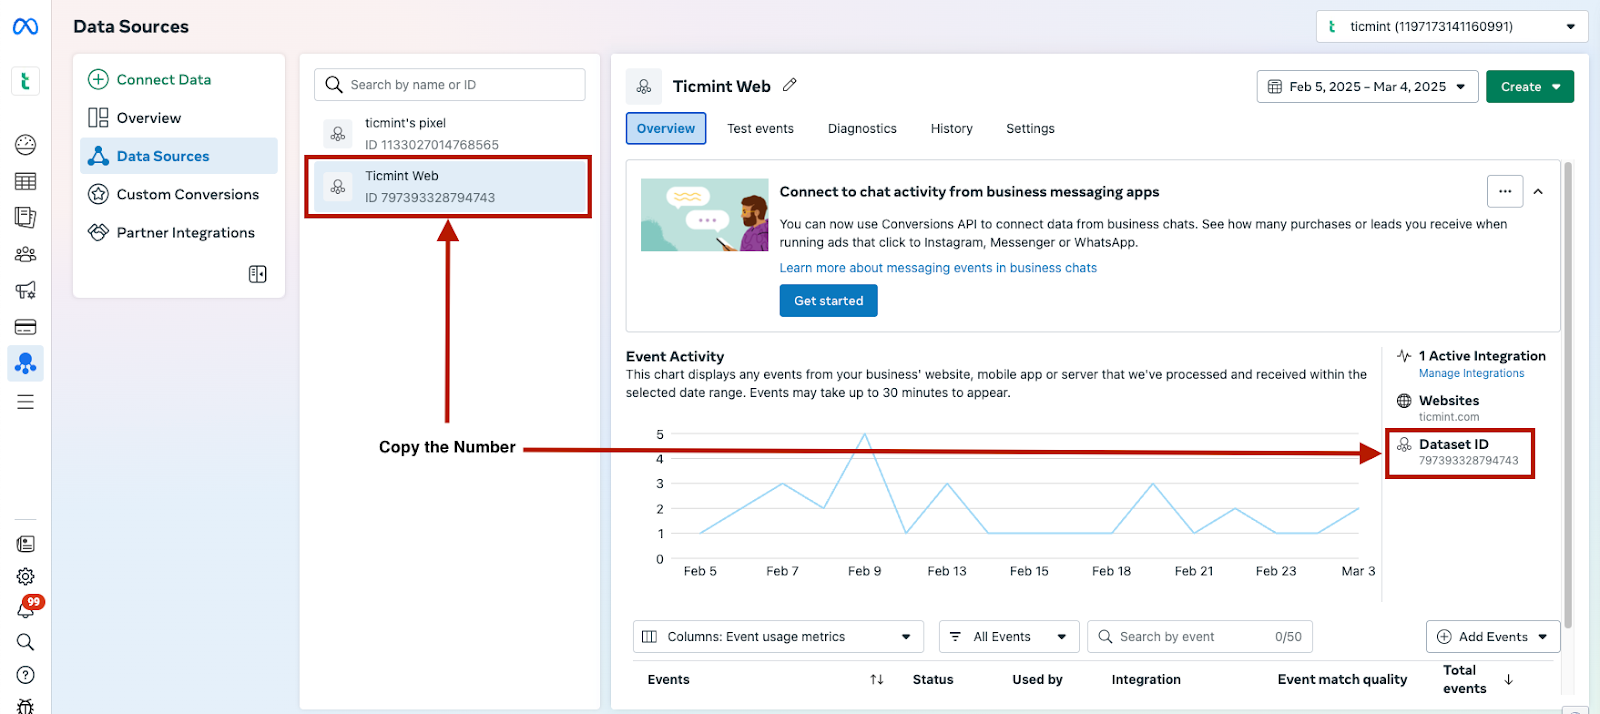
Step 3: Copy the Code
Step 4: Adding a Facebook Pixel
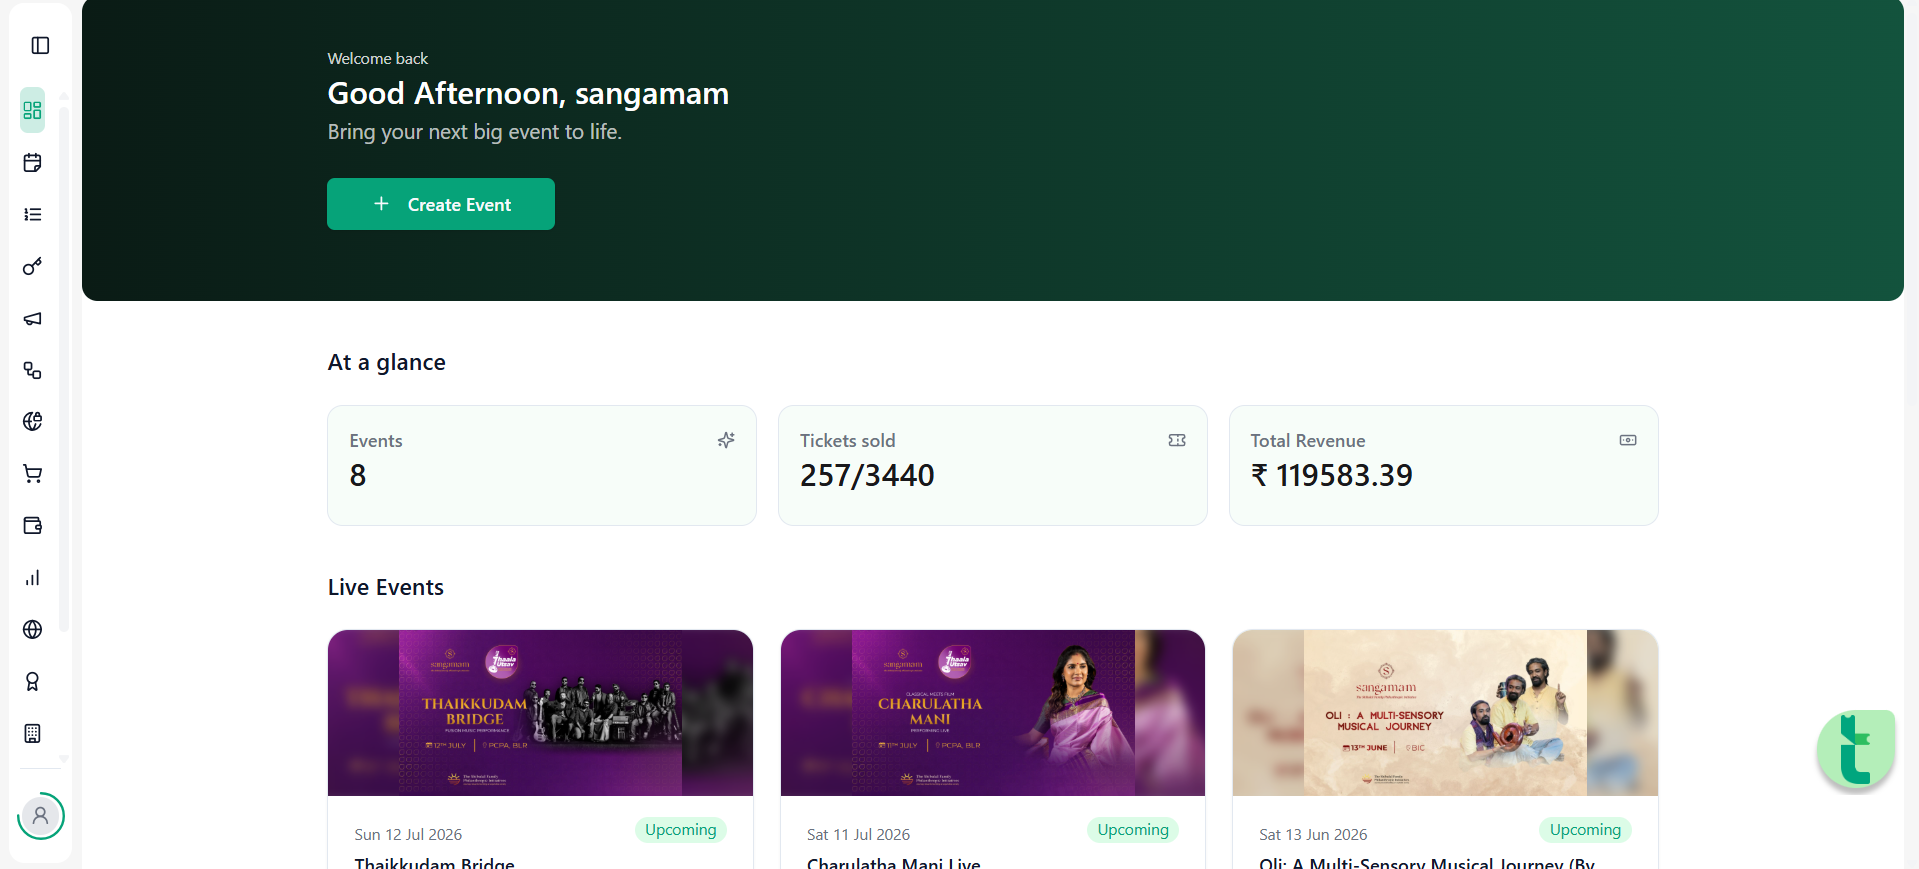
Log in to your Ticmint Partner Dashboard.
From the left-hand navigation menu, click on Website.
You will land on the website's overview page, where all created websites are listed.
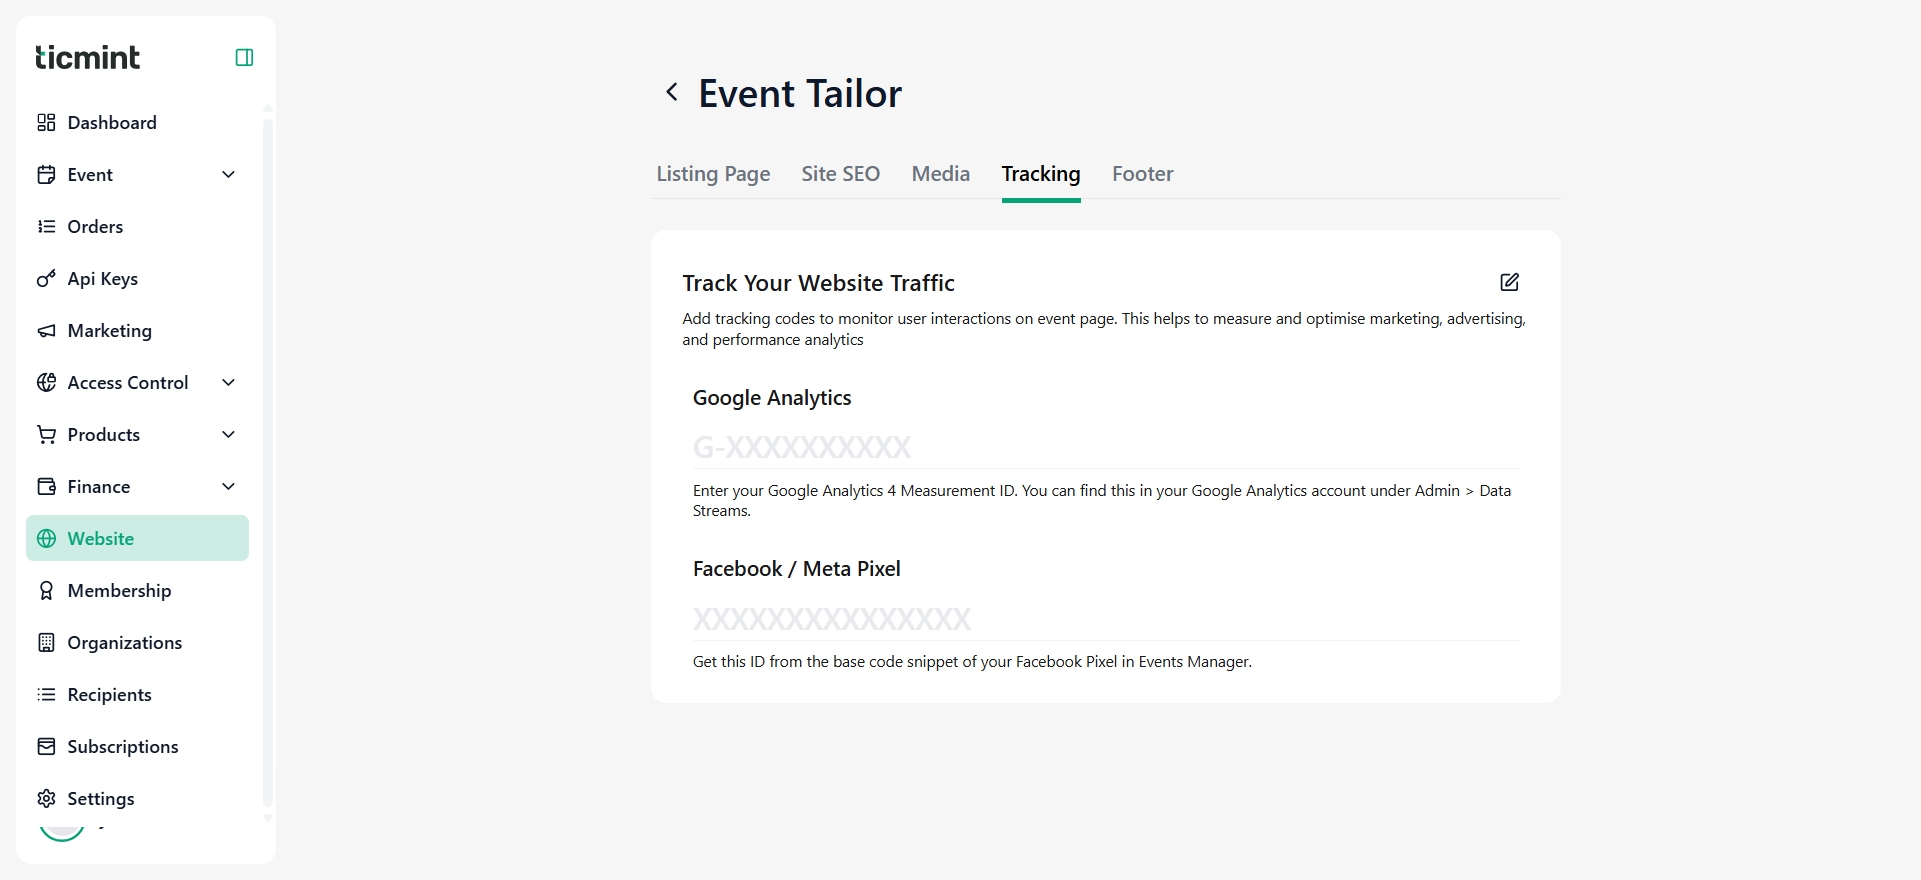
Step 5: Tacking
In the Tracking Pixels section, click on the edit button.
Enter your Facebook Pixel ID in the provided field.
(Tip: You can find your Facebook Pixel ID in the base code of your Facebook Pixel.Click Save to confirm and apply your changes.
Confirming Pixel Setup
After adding the pixels, you can verify their functionality by:
Testing Facebook Pixel using the Meta Pixel Helper browser extension.
Testing Google Analytics by checking for real-time data updates in your Google Analytics account.
Notes and Best Practices
Double-check that the Pixel IDs you input are correct to ensure accurate tracking.
If you are managing multiple websites or accounts, confirm you’re using the correct ID for the specific project.
For troubleshooting issues with Facebook Pixel or Google Analytics, consult their official documentation or support channels.
Was this article helpful?
That’s Great!
Thank you for your feedback
Sorry! We couldn't be helpful
Thank you for your feedback
Feedback sent
We appreciate your effort and will try to fix the article