Ticmint Ticket Ambassador Guide
Overview
The Ticket Ambassador feature helps you build a distributed ticket sales network by partnering with ambassadors who promote and sell tickets for your events.
Creating a Ticket Ambassador
Method 1: From Ambassador Module
Steps
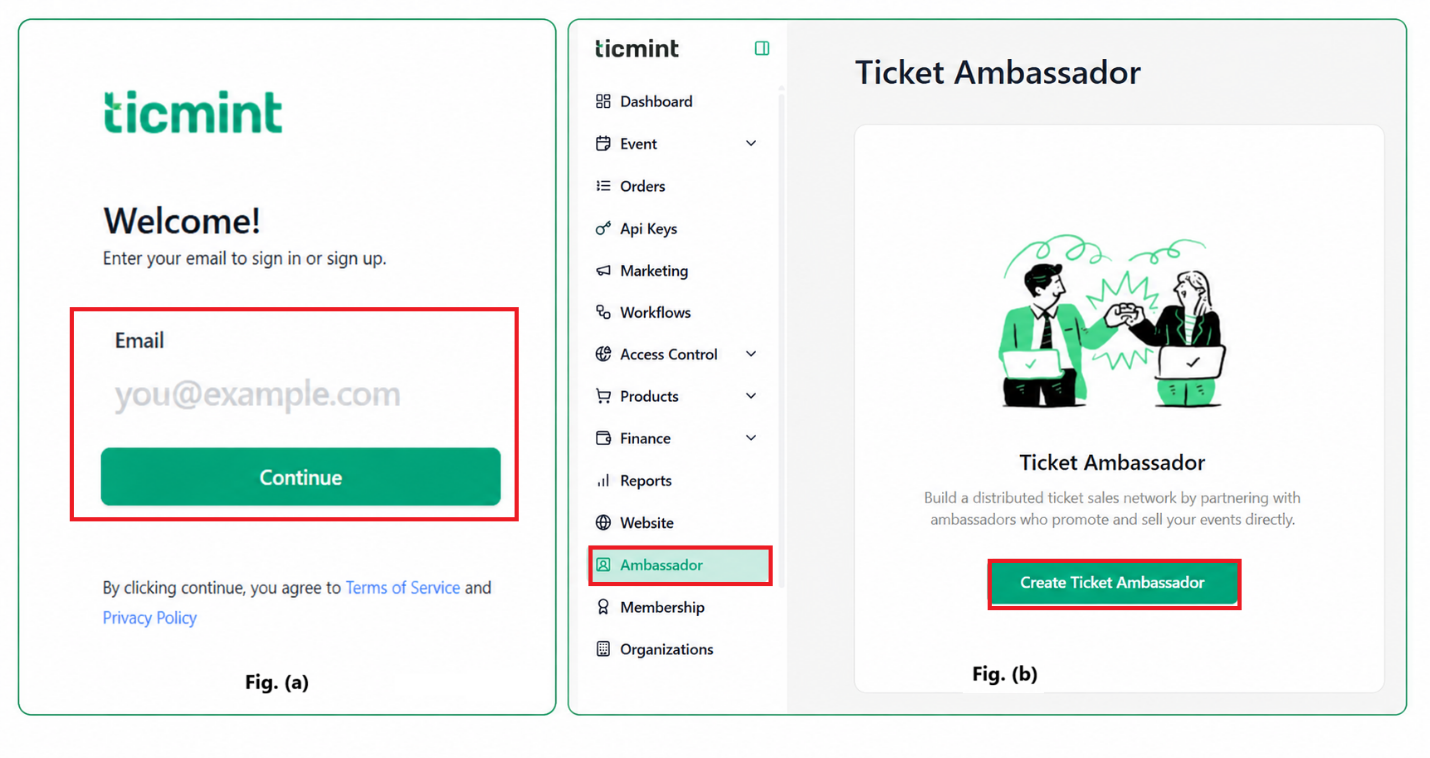
Log in to the Ticmint Dashboard as an Admin.
Navigate to Ambassador.
Click Create Ticket Ambassador.
Method 2: From Event Page
Steps
Log in to the Ticmint Dashboard as an Admin. Fig. (a)
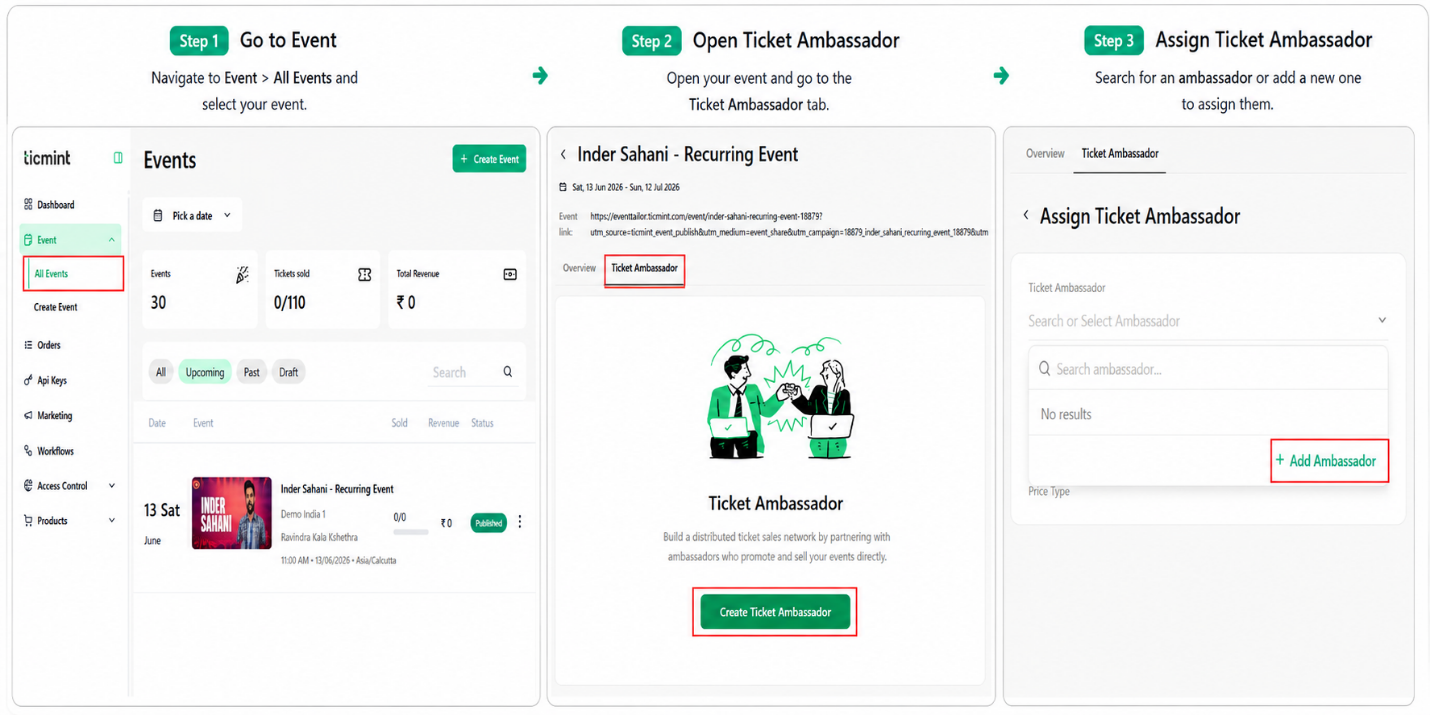
Navigate to Events.
Click All Events.
Select the event where you want to add a Ticket Ambassador.
Click Ticket Ambassador.
Click Create Ticket Ambassador.
Click the Ticket Ambassador dropdown.
Select + Add Ambassador.
Enter Ambassador Details
Fill in the following information:
After entering all details :
Click Create Ticket Ambassador.
To add additional ambassadors, click Create Ticket Ambassador again.
Note
⚠ The same email address cannot be used to create multiple Ticket Ambassador accounts.
Assigning a Ticket Ambassador to an Event
After creating an ambassador, assign them to an event.
Steps
Navigate to Events → All Events.
Select the required event.
Click Ticket Ambassador.
Click Create Ticket Ambassador.
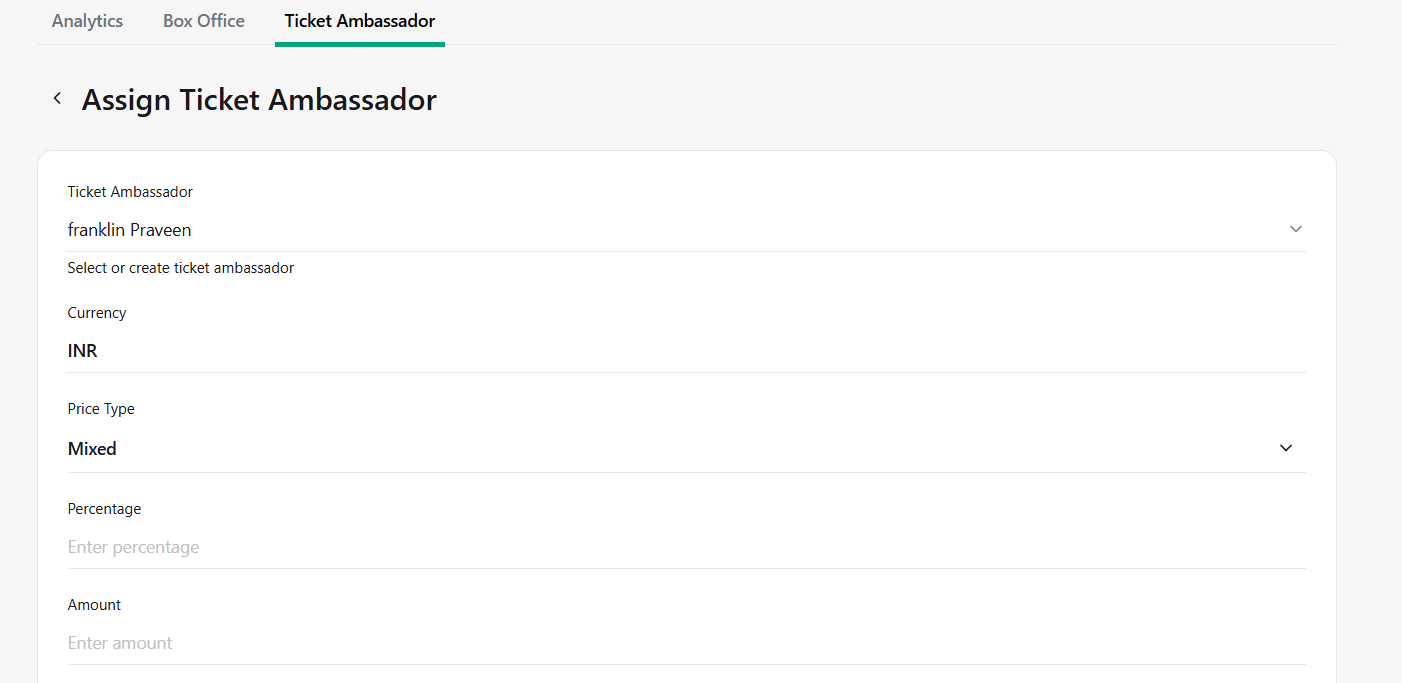
Select Ambassador
If the ambassador already exists, select them from the Ticket Ambassador Dropdown.
If not, create a new ambassador using the steps above.
Review the event currency. (Currency cannot be edited from this page. To change the currency, edit the event settings first.)
Commission Types
Select a commission/Price type from the dropdown:
☐ Percentage
☐ Flat
☐ Mixed
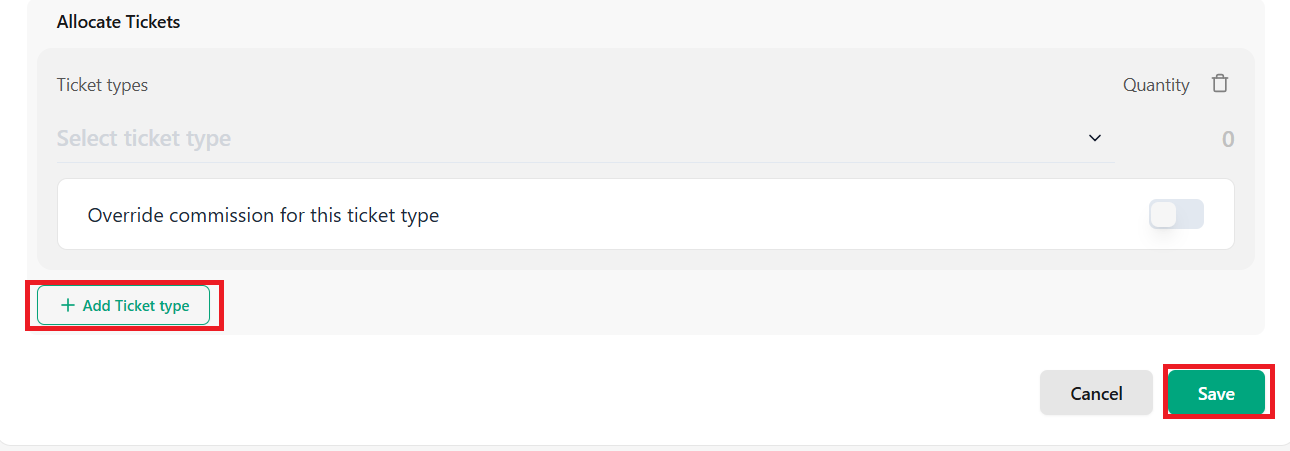
Ticket Allocation
Allocate tickets that the ambassador can sell.
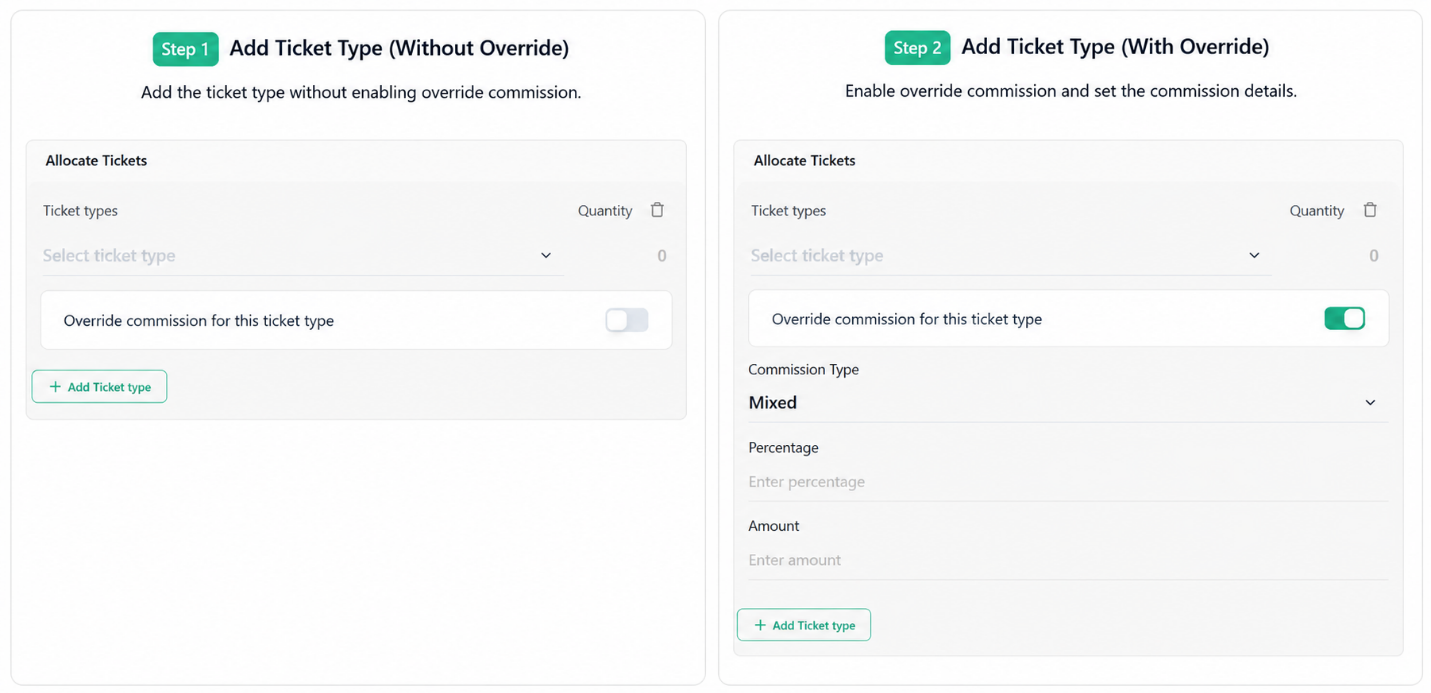
Step 1: Select Ticket Type
Select a ticket type from the dropdown.
Enter the ticket quantity.
Enable: Override Default Commission for this Ticket Type if required. If enabled enter below details,
Select a commission type:
☐ Percentage
☐ Flat
☐ Mixed
Step 3: Allocate Ticket Selling Slots
Click Allocate Tickets From and choose one of the following:
☐ All Slots
☐ All Slots From Selected Dates
☐ Specific Slots
Select the appropriate date or slot range.
Step 4: Add Additional Ticket Types & Save
To allocate more ticket categories:
Click + Add Ticket Type.
Repeat the allocation process.
Click Save to complete the ambassador assignment.
Ambassador Invitation & Login
Once assigned:
The Ticket Ambassador receives an email invitation.
The ambassador logs in using the registered email address.
After login, the ambassador can access the assigned event and begin selling tickets.
Event Acceptance Statuses
☐ Pending
☐ Accepted
☐ Rejected
Monitoring Ambassador Performance
Admins can track ambassador activity from the Ticket Ambassador dashboard.
Performance Metrics
Admins can view:
☑ Number of tickets allocated
☑ Number of tickets sold
☑ Commission details
☑ Ambassador status
☑ Event assignment information
Quick Checklist
Create Ambassador
☐ Navigate to Ambassador or Event Page
☐ Click Create Ticket Ambassador
☐ Enter Ambassador Details
☐ Save Ambassador
Assign Ambassador
☐ Select Event
☐ Choose Ambassador
☐ Configure Commission
☐ Allocate Tickets
☐ Configure Ticket Slots
☐ Save Assignment
Track Performance
☐ Check Invitation Status
☐ Monitor Tickets Sold
☐ Review Ambassador Performance
Was this article helpful?
That’s Great!
Thank you for your feedback
Sorry! We couldn't be helpful
Thank you for your feedback
Feedback sent
We appreciate your effort and will try to fix the article