Overview
Access Control allows event organisers to manage and control who can enter the event venue or specific areas within it. By using access control settings, organisers can ensure that only authorised ticket holders, staff, or volunteers are allowed entry.
This system improves security, crowd management, and attendee experience by enabling structured ticket validation and controlled entry points.
Navigate to Access Control
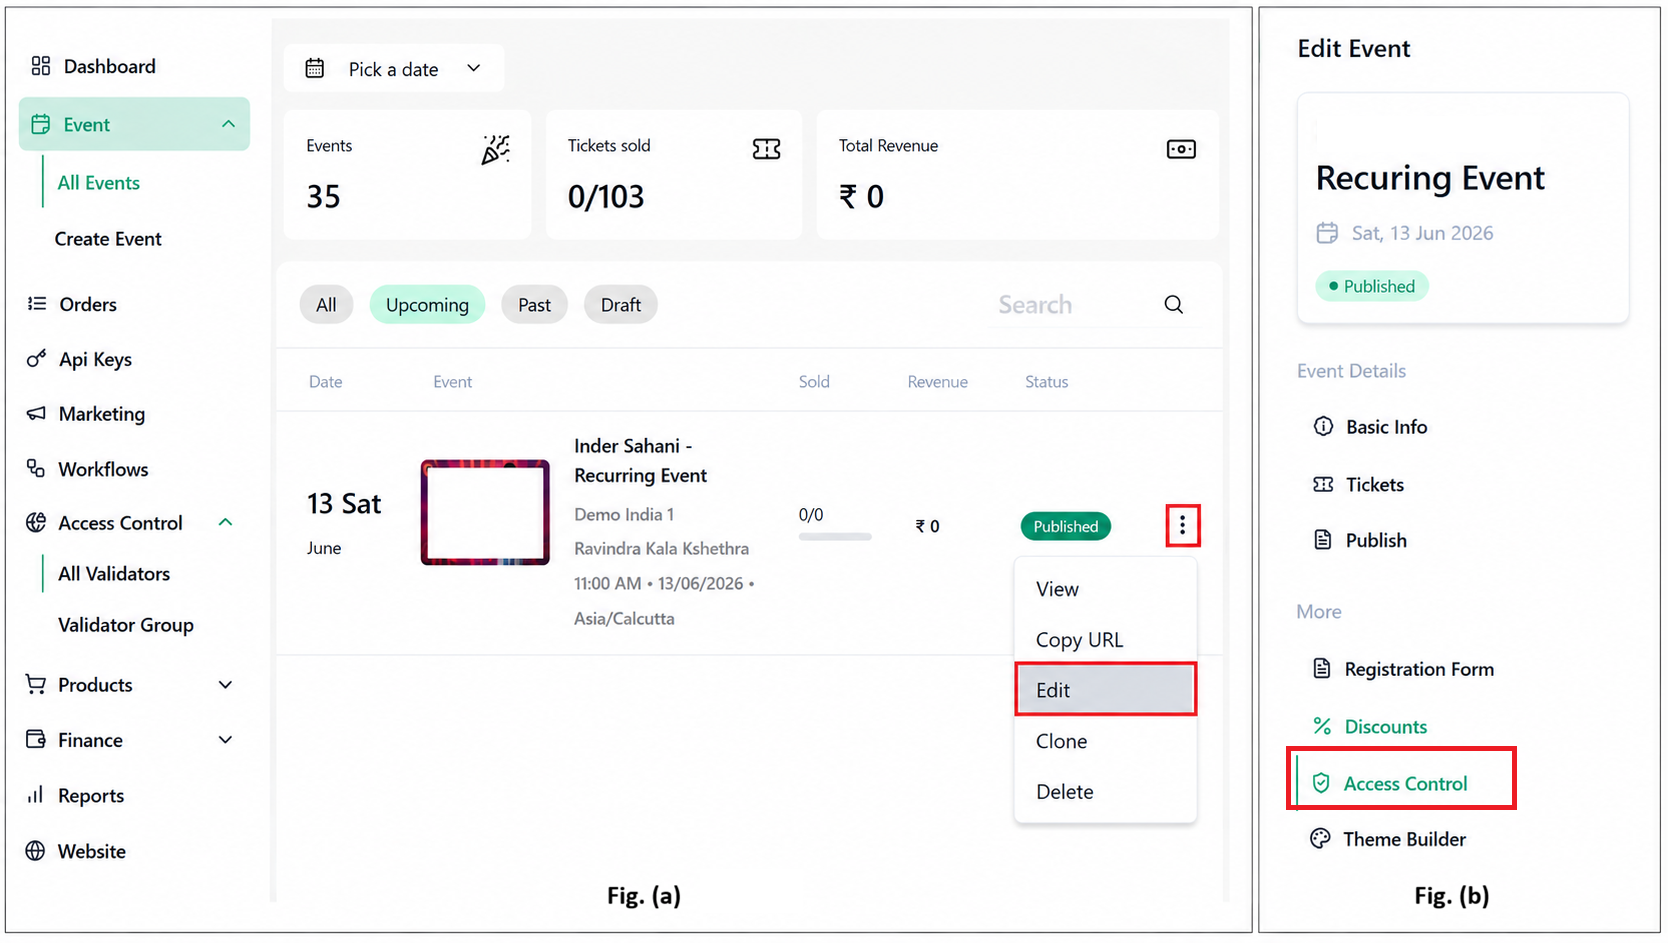
Navigate to Events.
Select the required event.
Click Edit.
If the event is already created, select Edit Event. Fig. (a)
If creating a new event, complete the Basic Information section and add tickets first, then navigate to the Access Control tab. Fig. (b)
Assign Validators to an Event
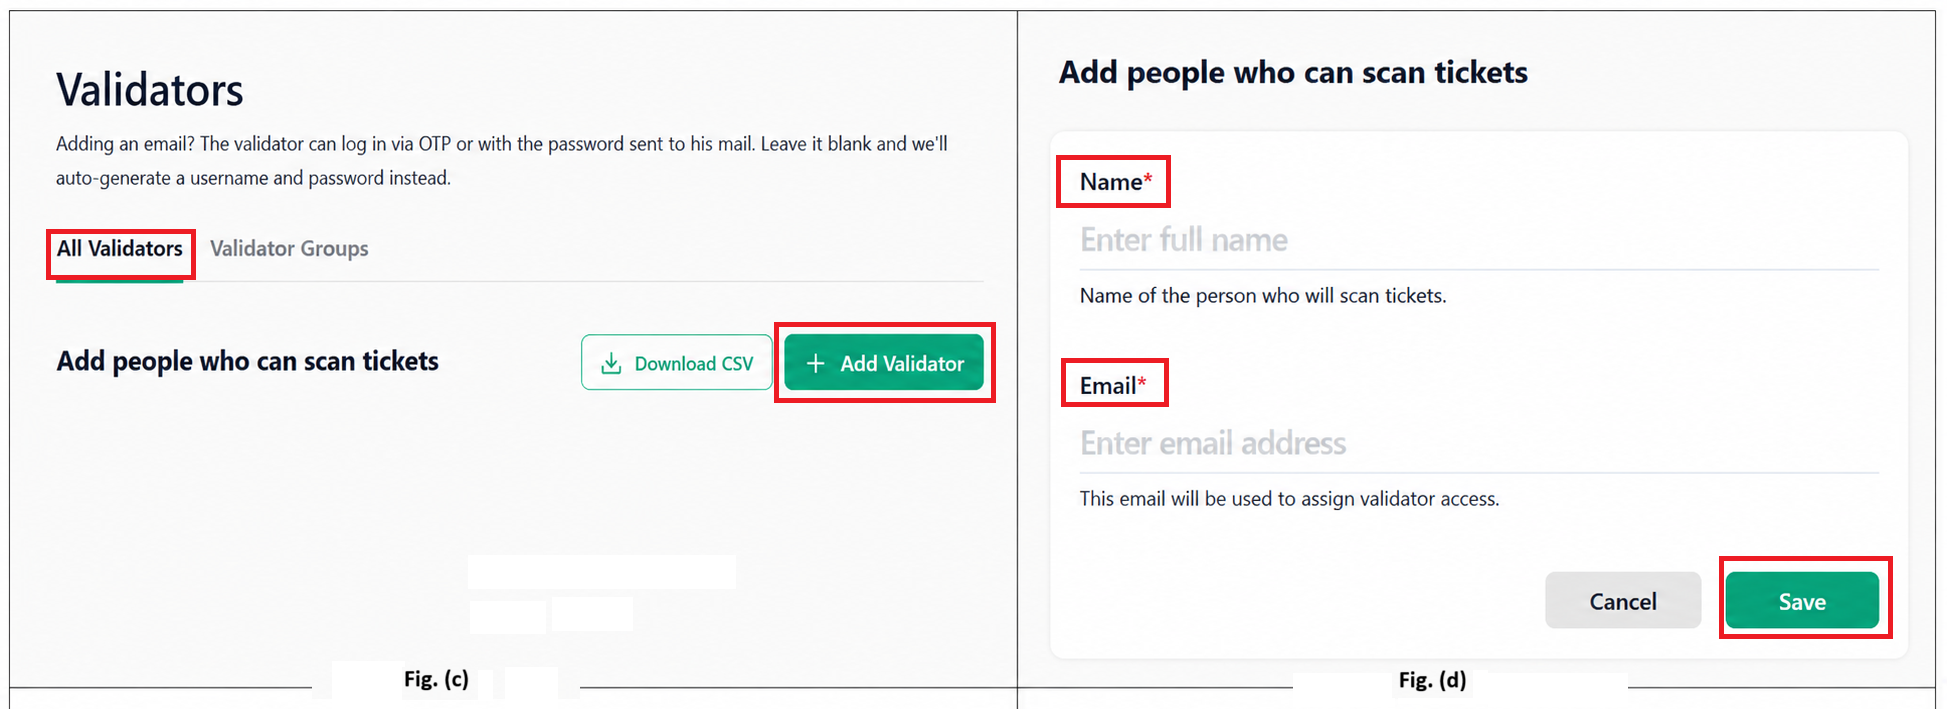
Click Validators. Fig. (c)
Search for a validator if it has already been created in the Dashboard validator list.
Alternatively, click + Add Validator.
Enter the validator's:
Name
Email Address
Click Save. Fig. (d)
Event Validation Rules
Validation Rules determine how tickets are validated during entry.
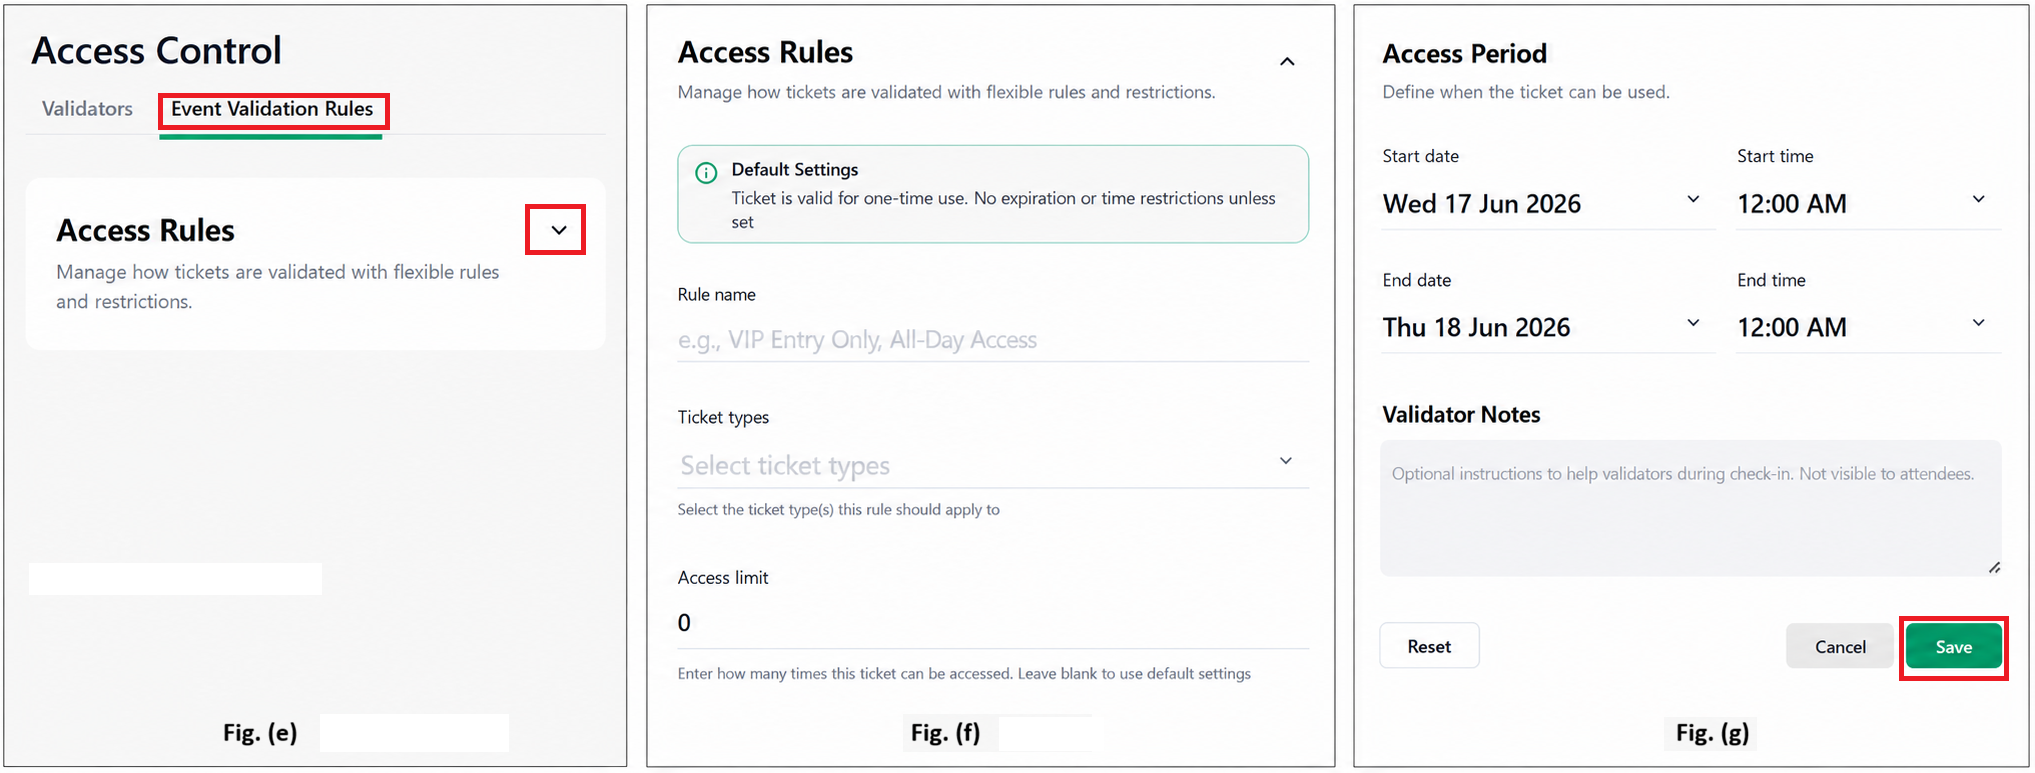
Default Rule
By default:
Tickets are valid for one-time use.
No expiration date or time restrictions are applied unless configured.
Create a Custom Validation Rule
Enter the Rule Name. Fig. (e)
Select the Ticket Types to which the rule applies. Fig. (f)
Enter the Access Limit.
Specify how many times the ticket can be used.
Leave blank to use the default setting.
Select the Start Date and Time and End Date and Time.
Define when the ticket can be used.
If required, add Validator Notes.
Click Save. Fig. (g)
Result
Validators can be assigned to events and grouped for easier management.
Access permissions can be controlled through custom validation rules.
Ticket validation becomes more secure and organised.
Event organisers can efficiently manage entry points and authorised personnel.
Was this article helpful?
That’s Great!
Thank you for your feedback
Sorry! We couldn't be helpful
Thank you for your feedback
Feedback sent
We appreciate your effort and will try to fix the article