Accepting an Event Invitation
When an ambassador is assigned to an event, an email notification will be sent containing the event details and invitation link.
Important Notes
☐ Review the commission details carefully before accepting the invitation.
☐ Accept or decline the invitation using the provided link.
☐ The invitation link will expire after 15 days.
Login Process
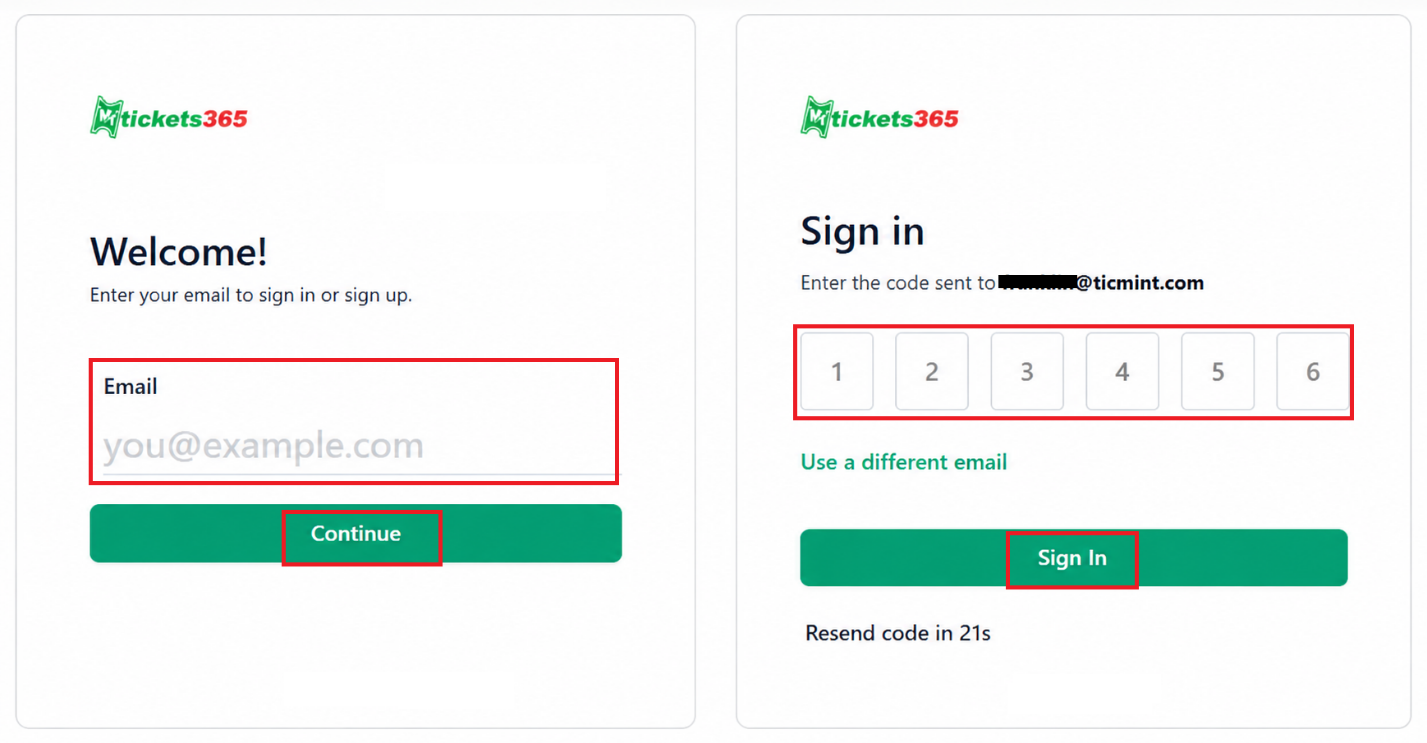
Click the invitation link received via email.
Enter the email click on continue and enter verification code sent to your registered email address and click on Sign In.
Ways to View Ambassador Invitations
Option 1: Immediate Login
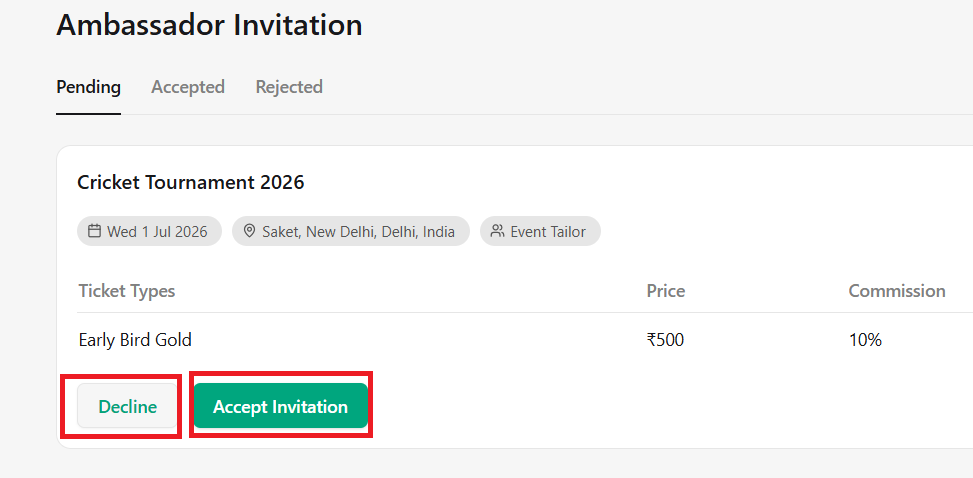
☐ Once you log in to your Ticmint account. An invitation notification will be displayed.
☐ Select Accept or Decline.
Option 2: Through Event Menu
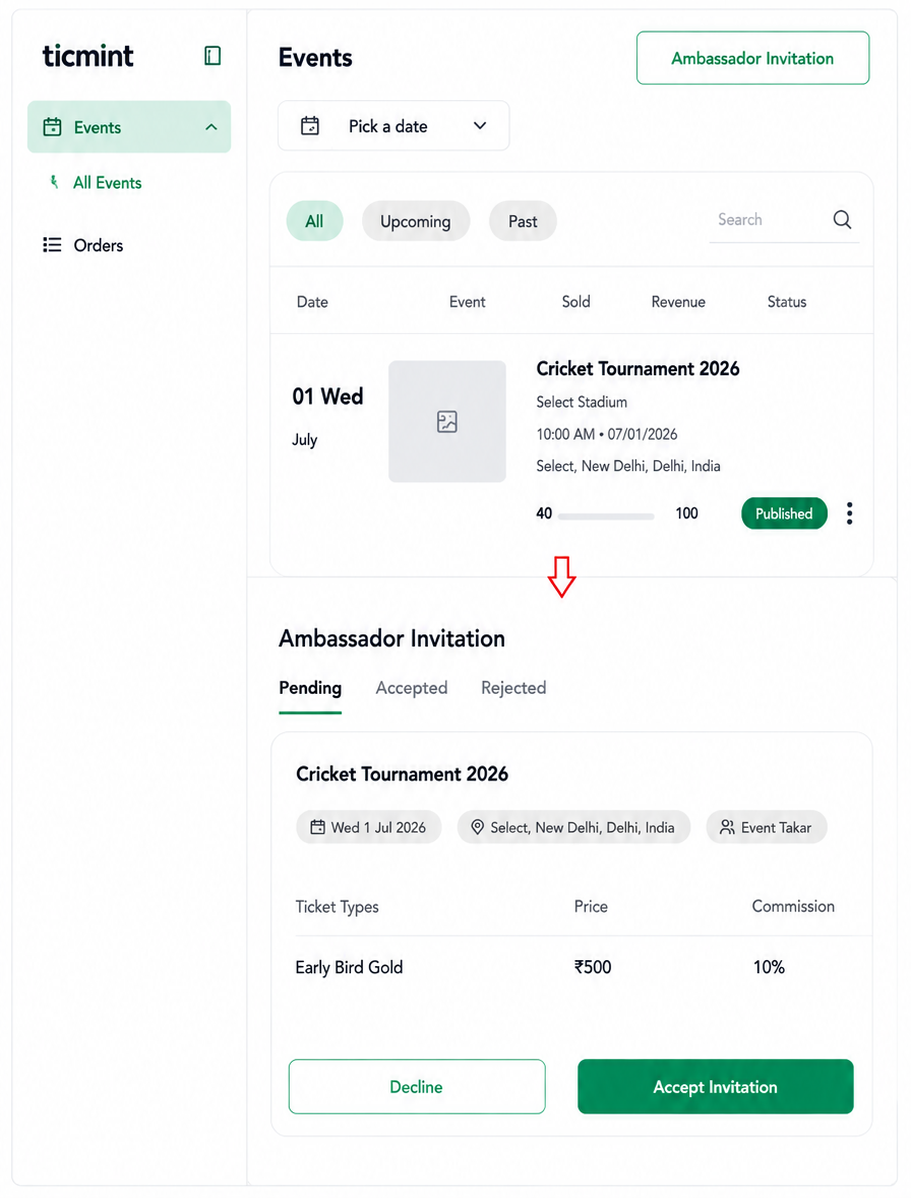
☐ Log in to Ticmint.
☐ Navigate to Events.
☐ Click All Events.
☐ Select Ambassador Invitations.
☐ Review and Accept or Decline the invitation.
Issuing Tickets (Box Office)
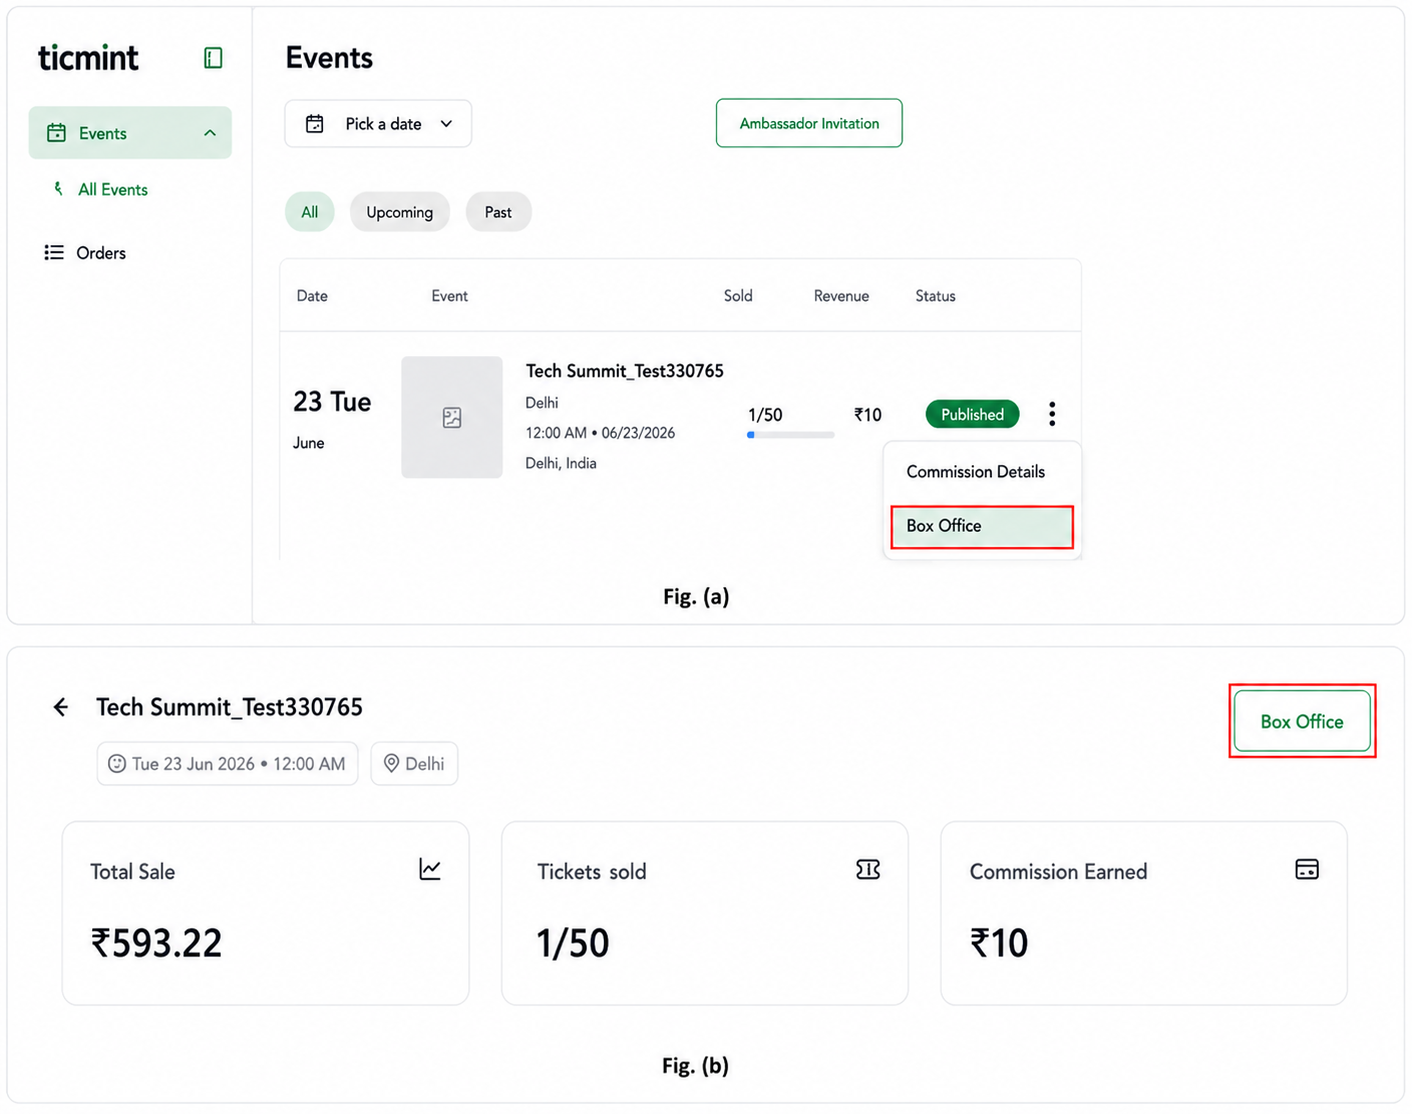
There are two ways to access the Box Office.
Option 1
☐ Click the three dots (…) next to the event and Select Box Office. Fig. (a)
Option 2
☐ Open the event and Click Box Office. Fig. (b)
Ticket Issuance Steps
☐ Select ticket quantity.
Click + to increase quantity.
Click − to decrease quantity.
☐ Click Continue.

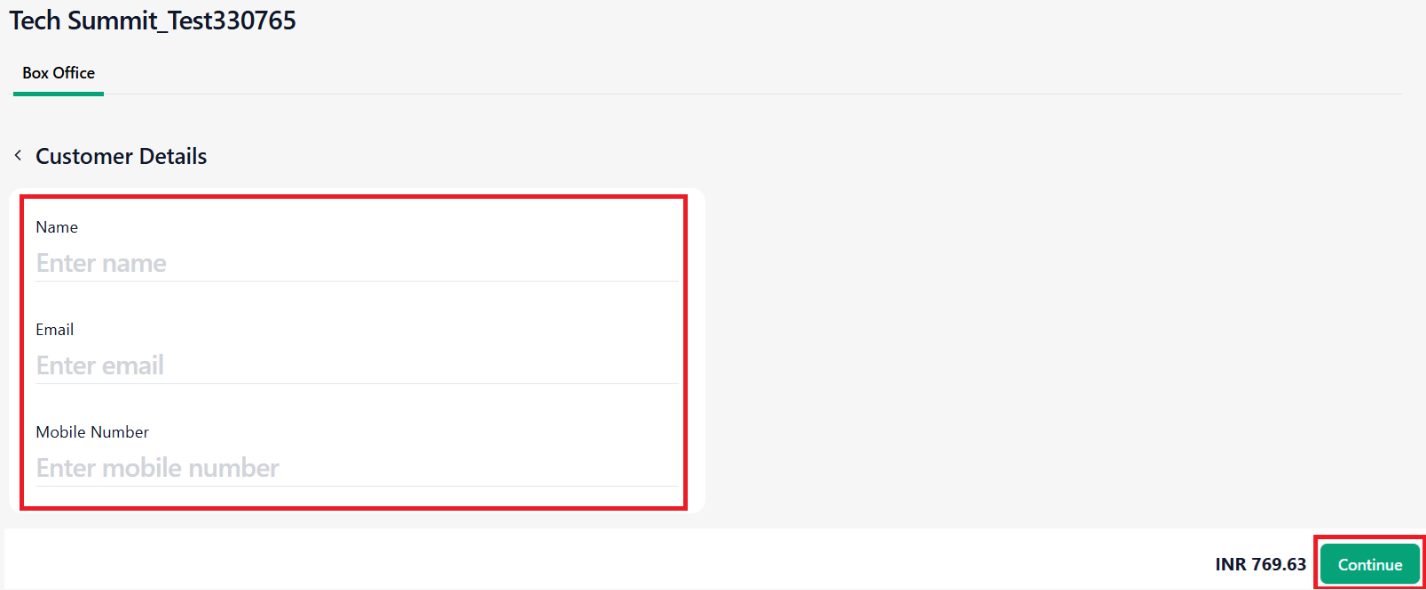
Enter Customer Details
Required Fields:
☐ Name (Mandatory)
☐ Email Address (Mandatory)
Optional Field:
☐ Phone Number
☐ Click Continue.
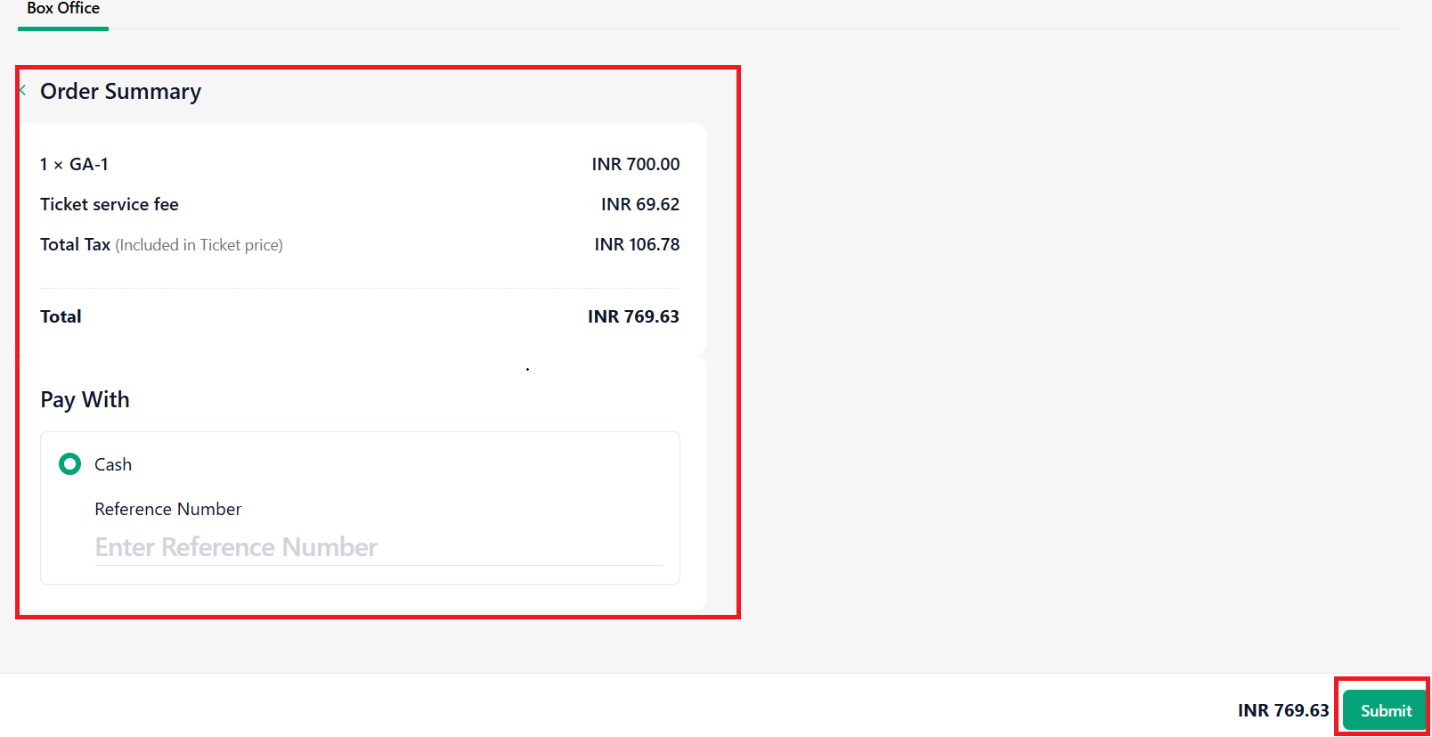
Review and Submit
☐ Verify the Order Summary.
☐ Click Submit.
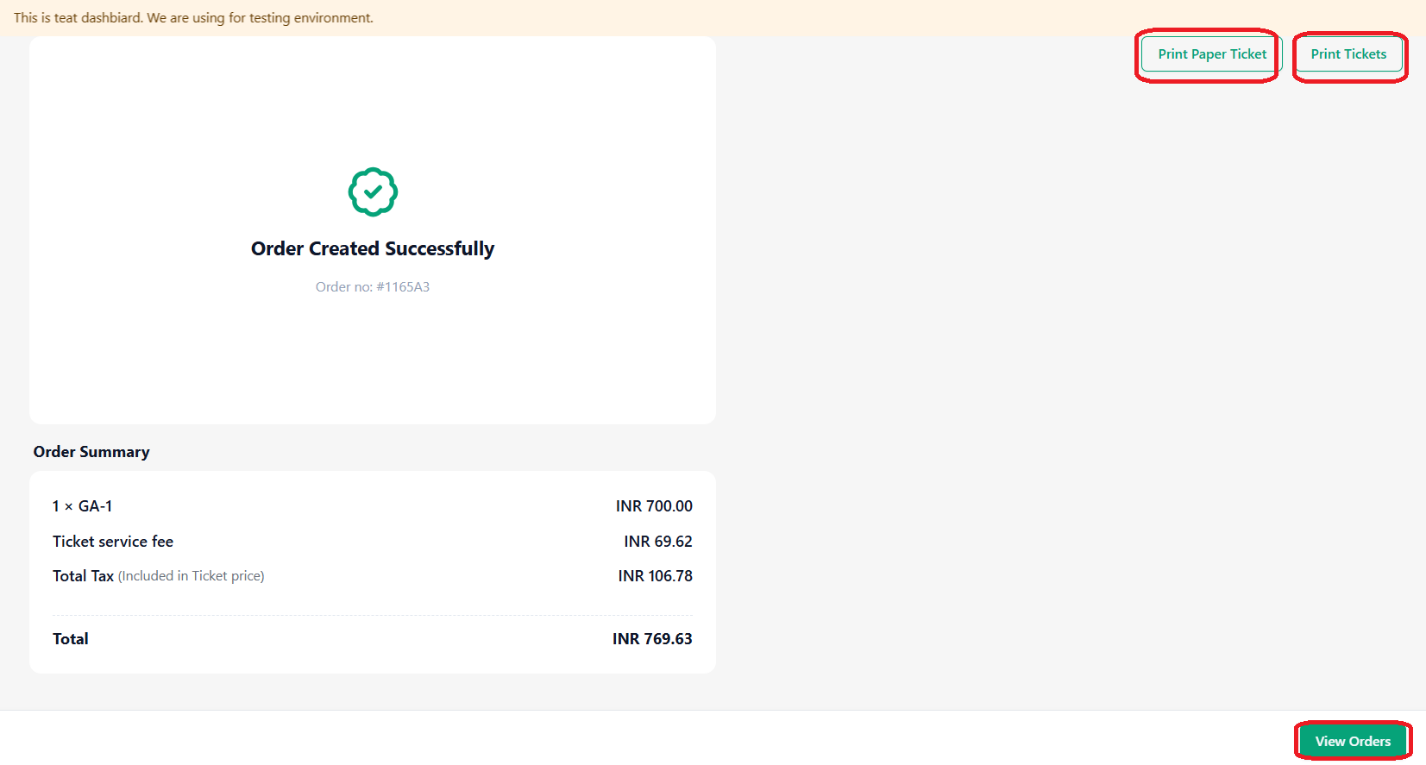
Ticket Generation
After submission, tickets will be generated.
Available options:
☐ Print Paper Tickets
☐ Download Tickets
Important Note
Sometimes ambassadors may receive the following error:
“Paper ticket is not configured for this order.”
If this error occurs:
☐ Contact the Event Administrator.
☐ Request paper ticket configuration for the event.
Checking Order Details
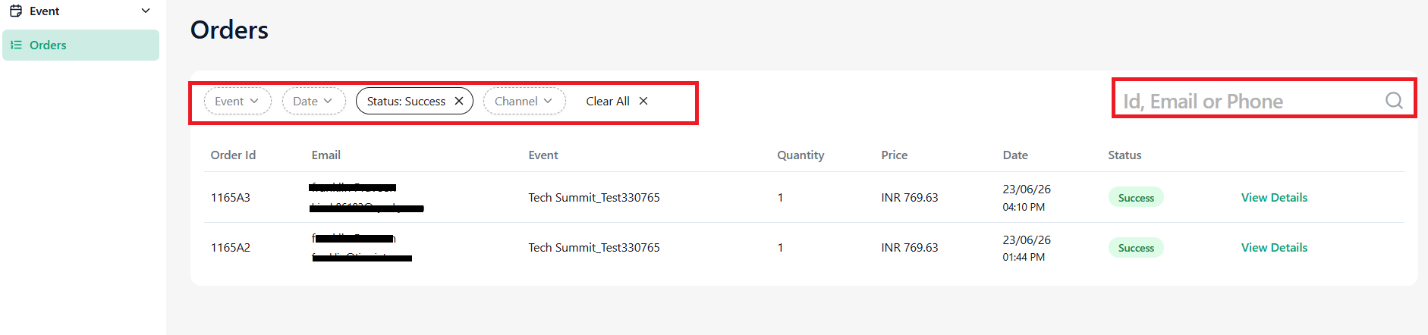
Access Orders
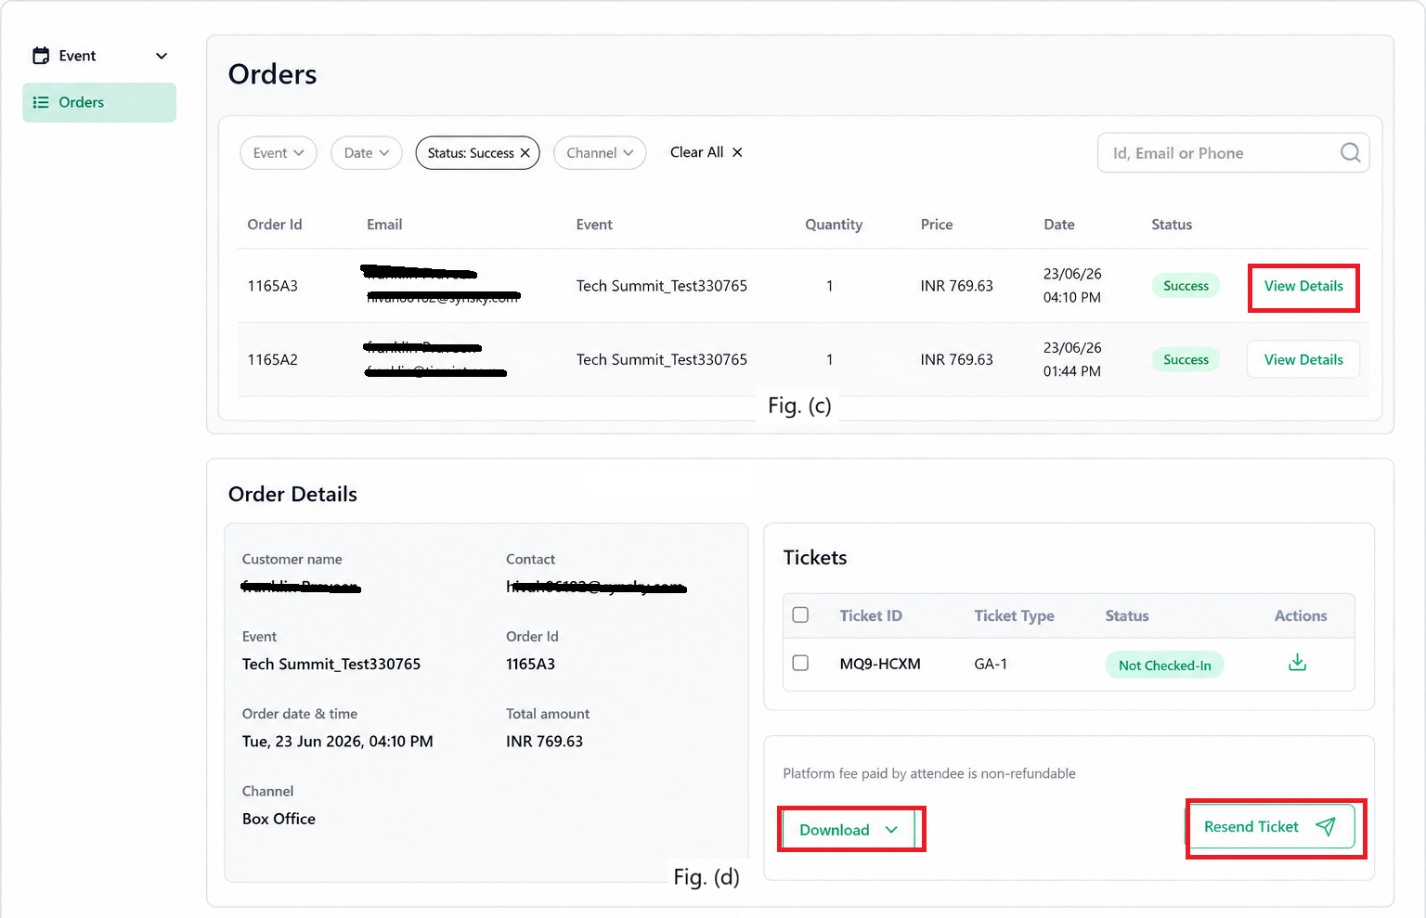
☐ Click Orders from the dashboard or click on view order after generating ticket as mentioned in above image
Filter Orders
Use available filters:
☐ Search Keyword
☐ Event
☐ Date
☐ Order Status
☐ Sales Channel
View Order Information
☐ Click View Details. Fig. (c)
You can:
☐ Review purchaser information.
☐ Check ticket details.
☐ Select specific tickets.
Resend Tickets
☐ Click Resend Ticket. Fig. (d)
Tickets can be resent to:
Purchaser / Ticket Buyer
Download Options
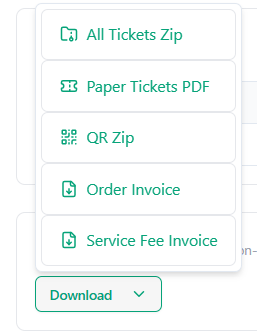
Available downloads include:
☐ All Tickets ZIP
☐ Paper Tickets PDF
☐ QR Codes ZIP
☐ Order Invoice
☐ Service Fee Invoice
Was this article helpful?
That’s Great!
Thank you for your feedback
Sorry! We couldn't be helpful
Thank you for your feedback
Feedback sent
We appreciate your effort and will try to fix the article