The Create Event process in Ticmint is designed to be quick and intuitive, guiding organizers through everything from entering event details to publishing and promoting the event. Each step is broken into sections for clarity.
Once logged in, organizers can begin creating an event, progress through each step using the Next button, and review details before publishing. At any point, organizers can save or make edits before making the event live.
Step 1: Access Event Creation and Adding Basic Info
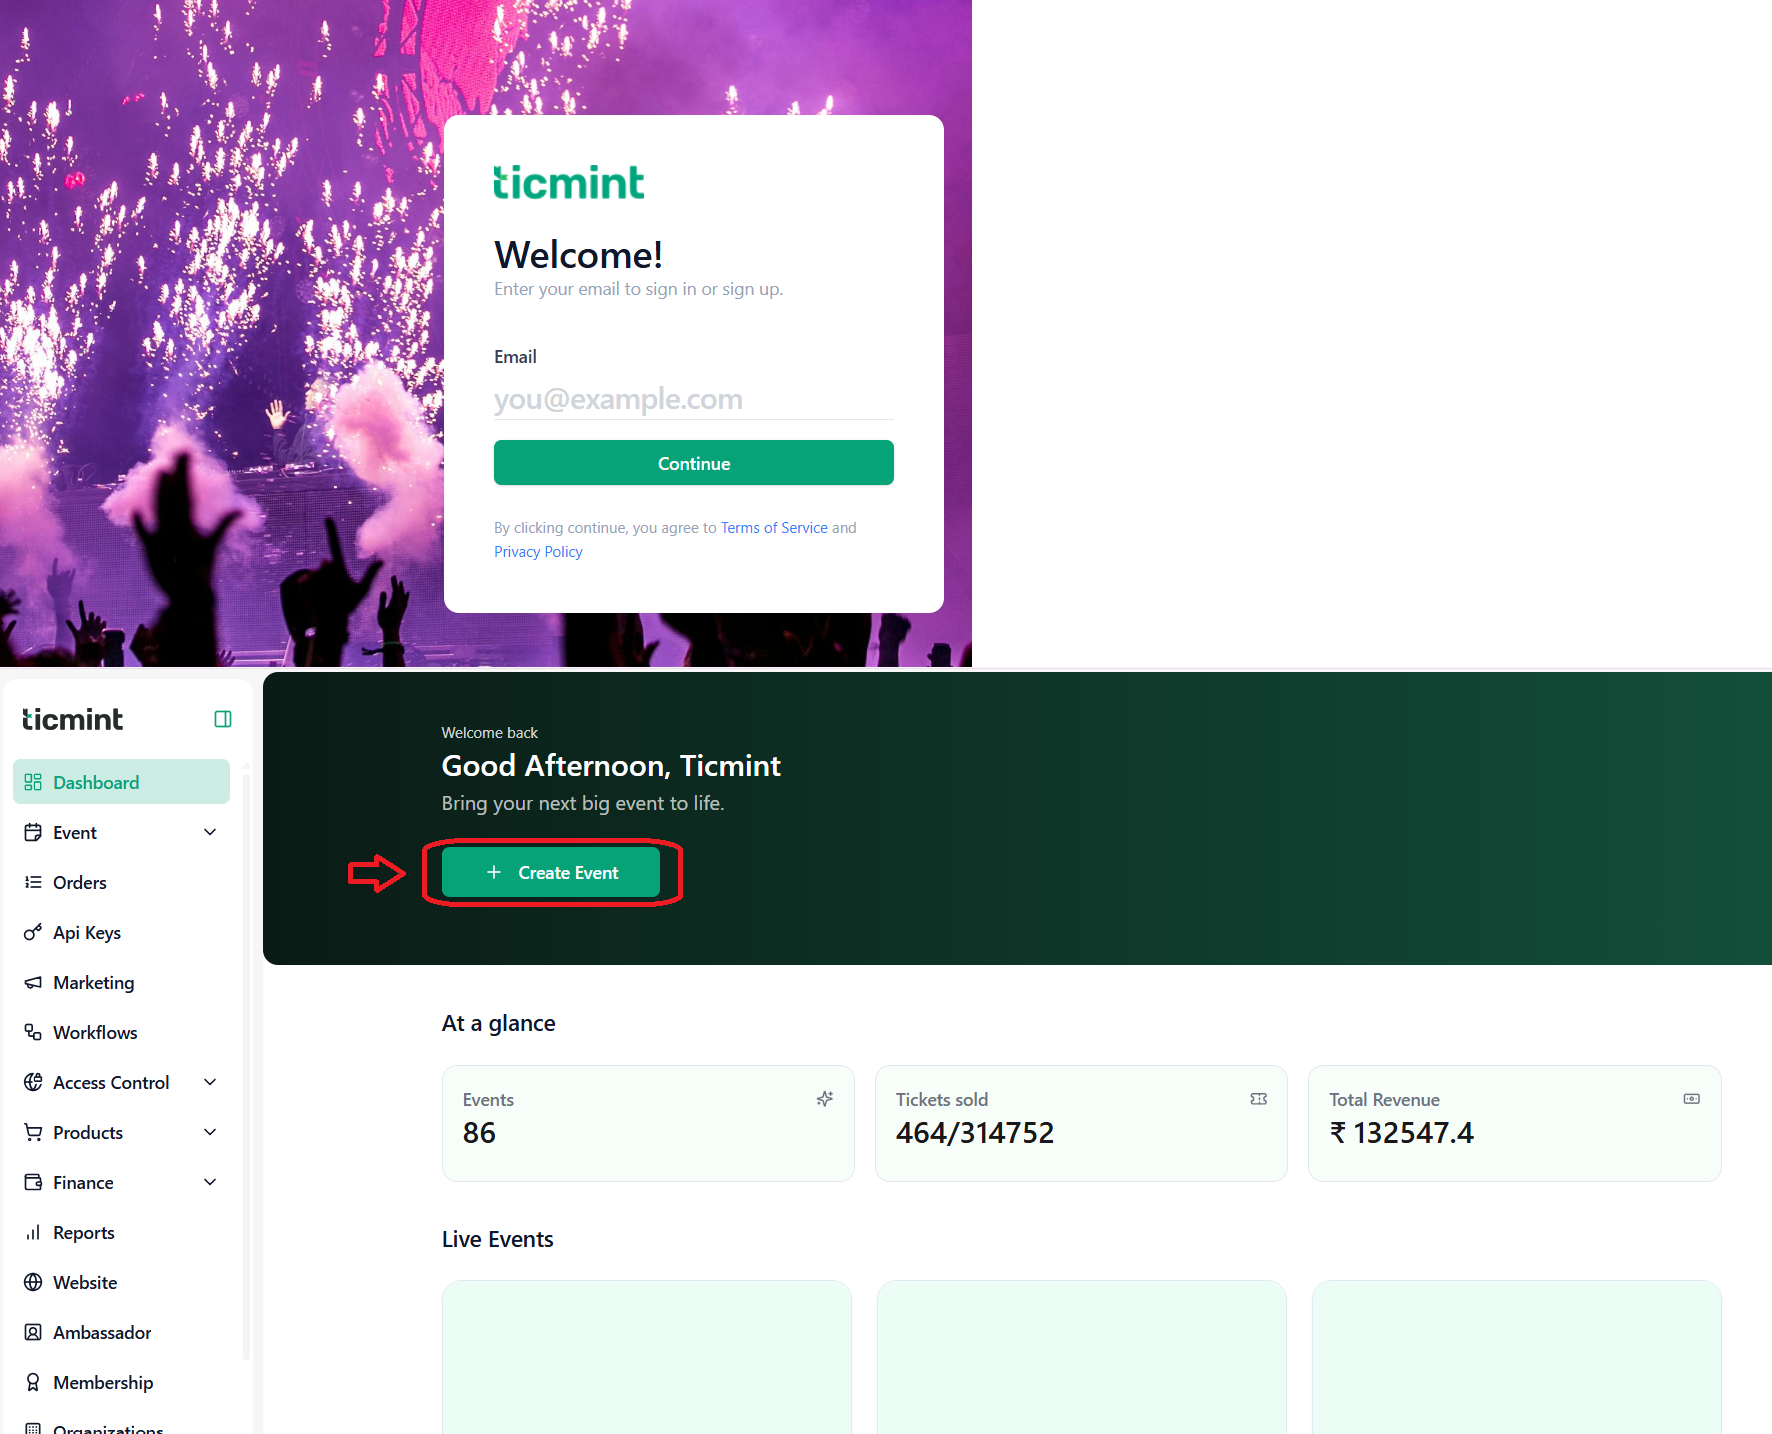
Login to the Ticmint Dashboard and click Create Event.
Step 2: Upload Event Image
Click + Add an Image and upload an event banner or promotional image.
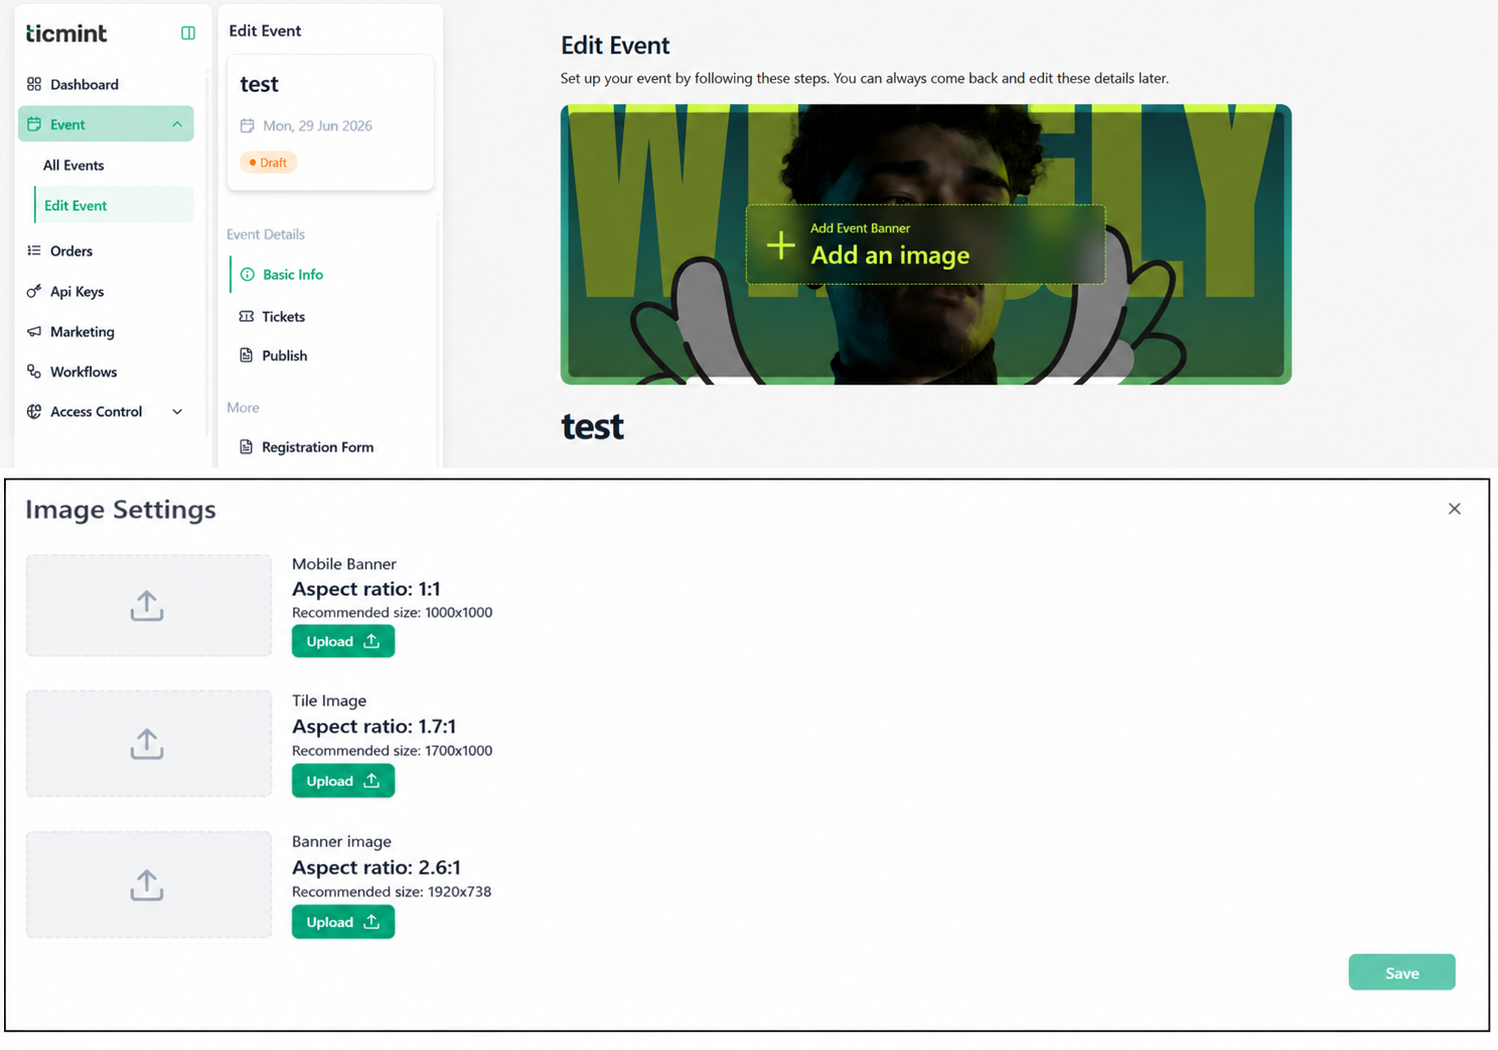
- Banner image (Web): 1920 x 738 px
- Banner image (Mobile): 1000 x 1000 px
- Tile image (Listing Page): 1700 x 1000 px
Step 3: Enter Event Details
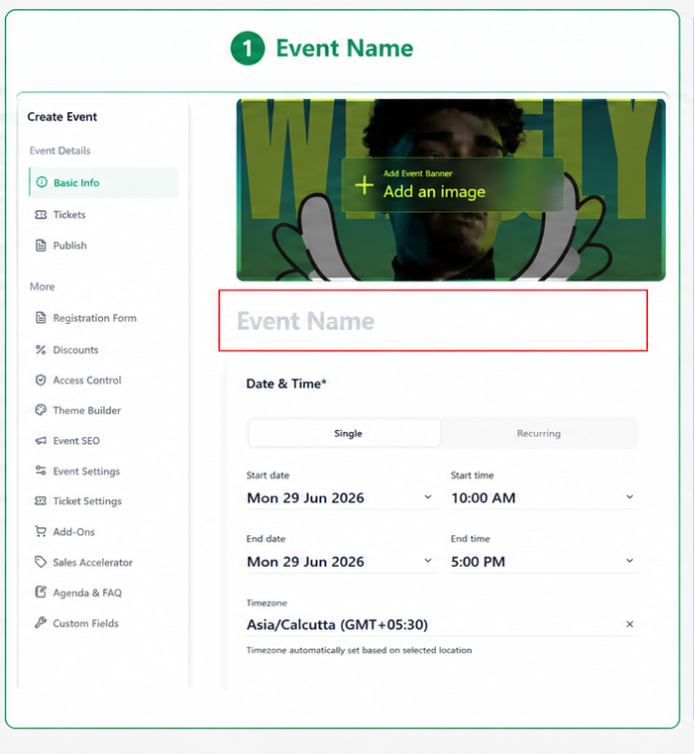
· Enter the Event Name.
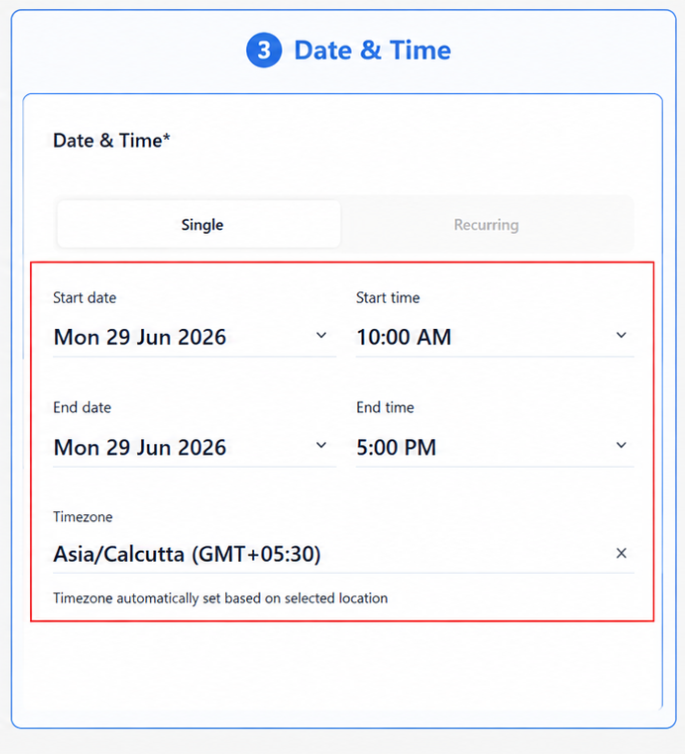
· Select the Event Date and Time.
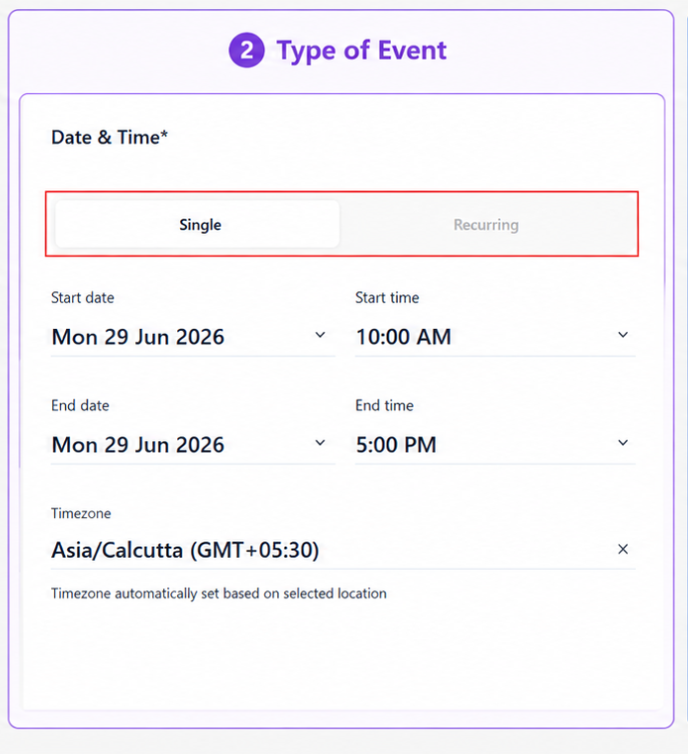
· Choose the Event Type:
o Single Event – Occurs once on a specific date.
o Recurring Event – Repeats based on a schedule.
Step 4: Set Event Location
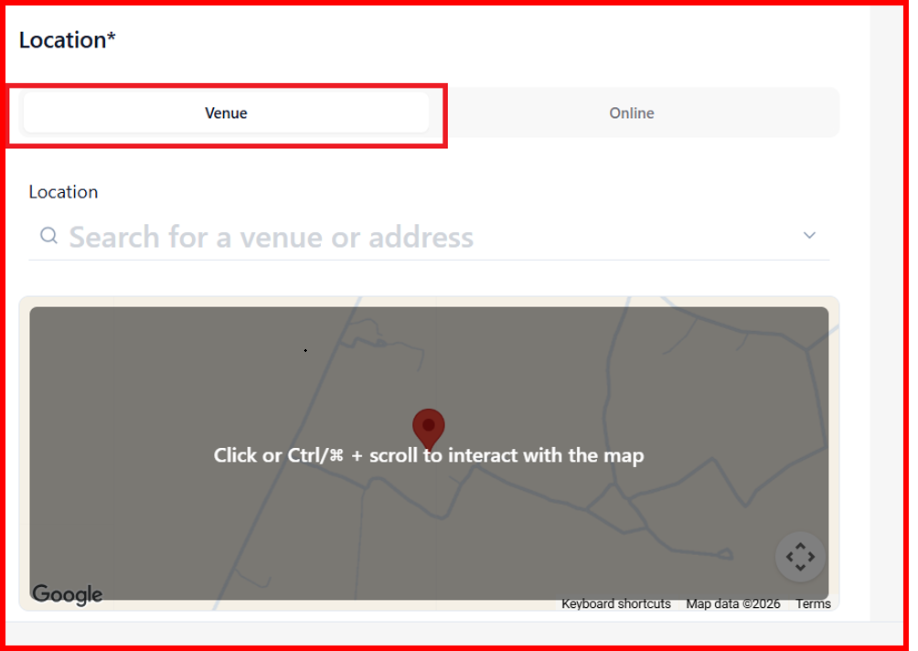
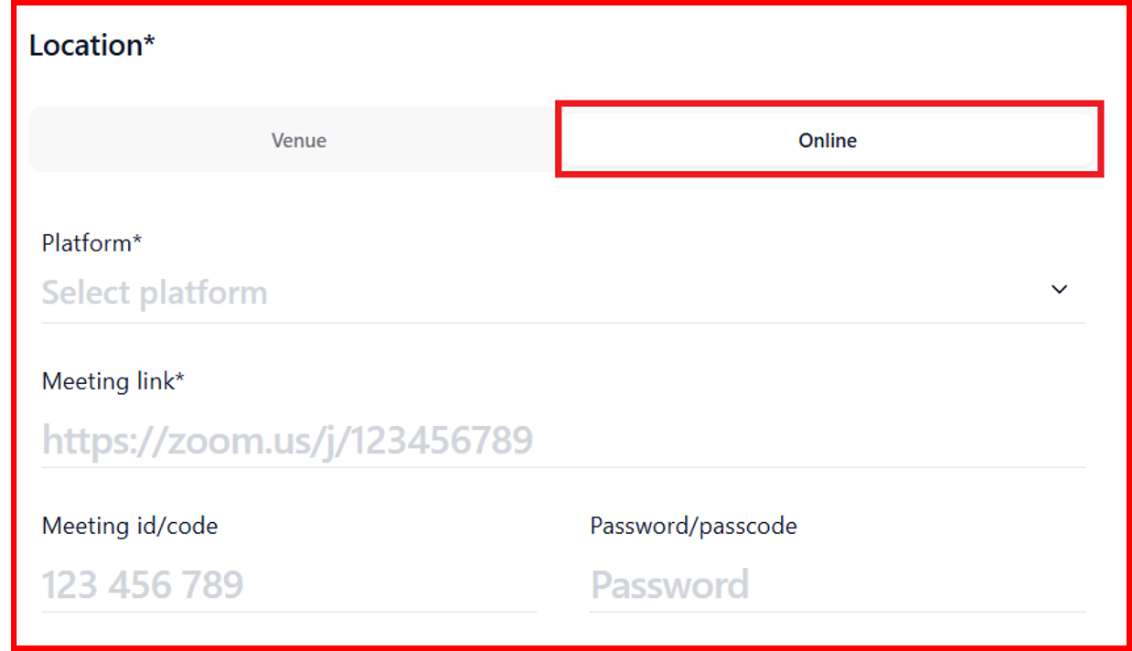
Choose the appropriate event location type:
- Venue – Select Venue and search for the event location by entering the venue name, address, or location details. Then select the appropriate venue from the search results.
- Online – Select Online if the event will be conducted virtually. Choose the preferred platform, then enter the Meeting Link, Meeting ID, and Passcode (if applicable) to allow attendees to join the event easily.
Step 5: Add Event Description
Enter details about your event. Use the available editor options to:
· Use the editor tools to format content, undo/redo changes, generate AI content, add links, images, and lists, and customize text styling.
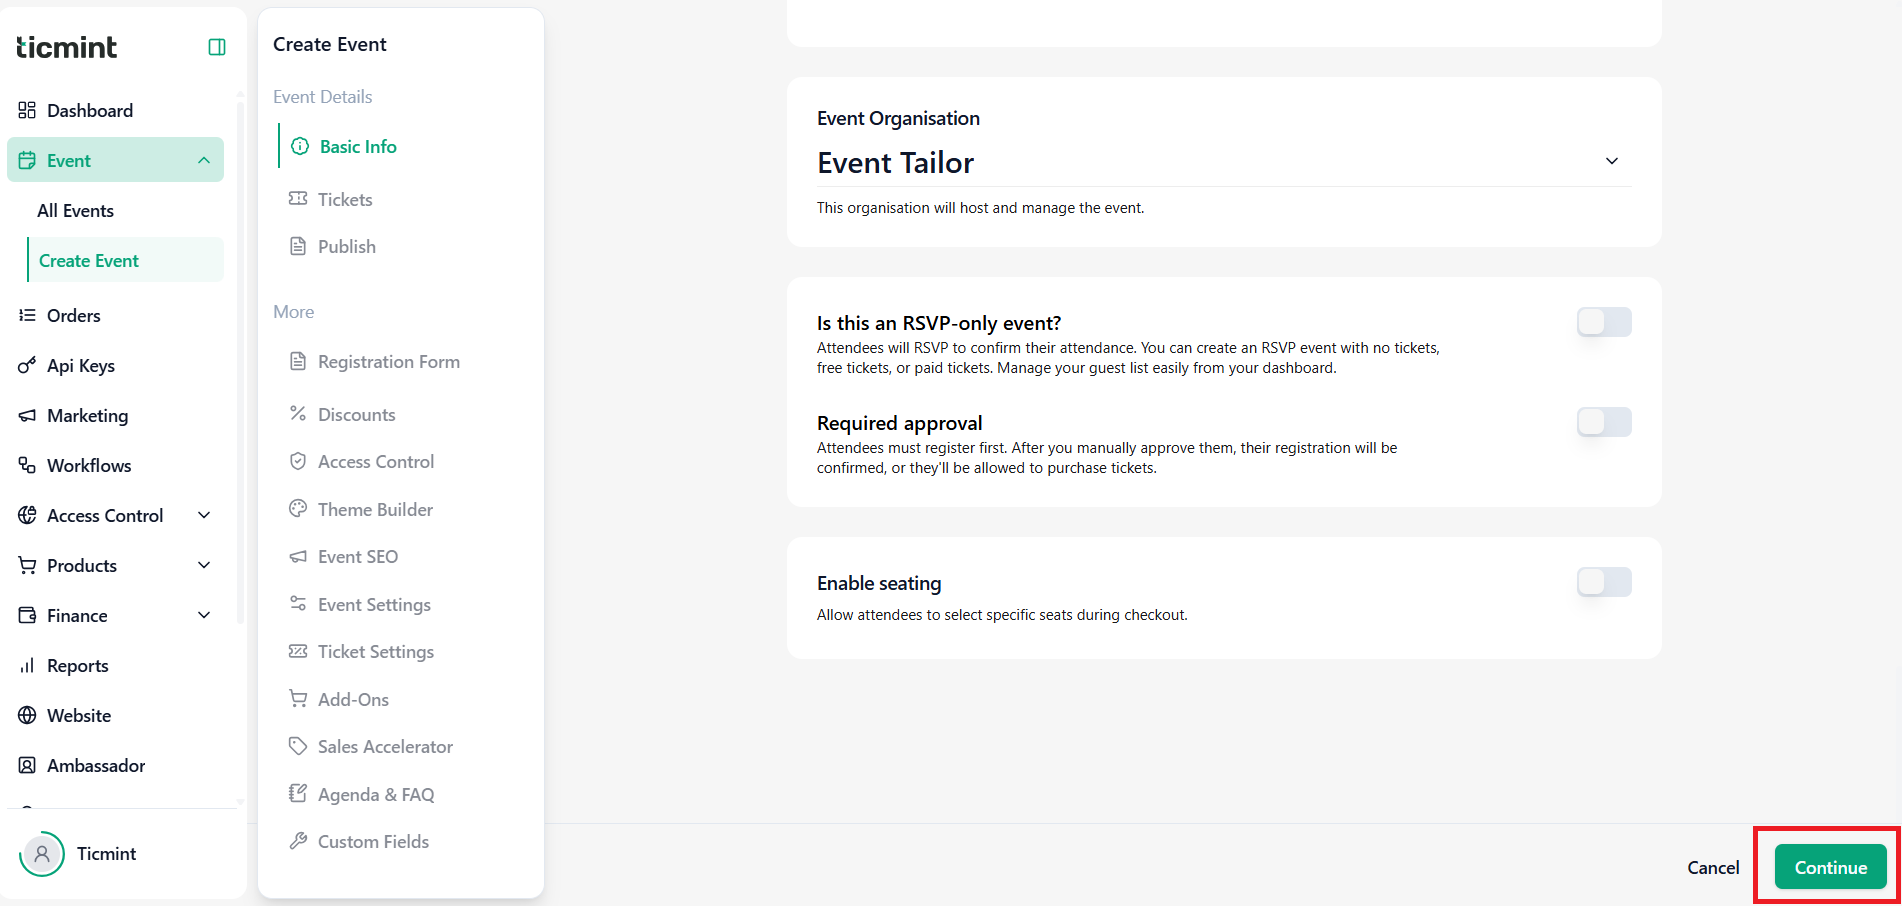
Step 6: Select Organization
Choose the organization that will host the event.
Optional Settings
RSVP-Only Event
Enable this option if attendees need to RSVP to confirm attendance. RSVP events can be created with:
· No tickets, Free tickets,Paid tickets
Required Approval
Enable this option if attendee registrations require manual approval before confirmation or ticket purchase.
Enable Seating
Enable this option to allow attendees to select specific seats during checkout.
Review all event information and click Continue to save the event.
Sections and Tickets
Sections help organize ticket types under a common category such as General Admission, VIP, or Early Bird. If grouping is not required, you can skip the section name and simply set the capacity before creating ticket types.
Creating a Section and Ticket Types
Step 1: Create a Section
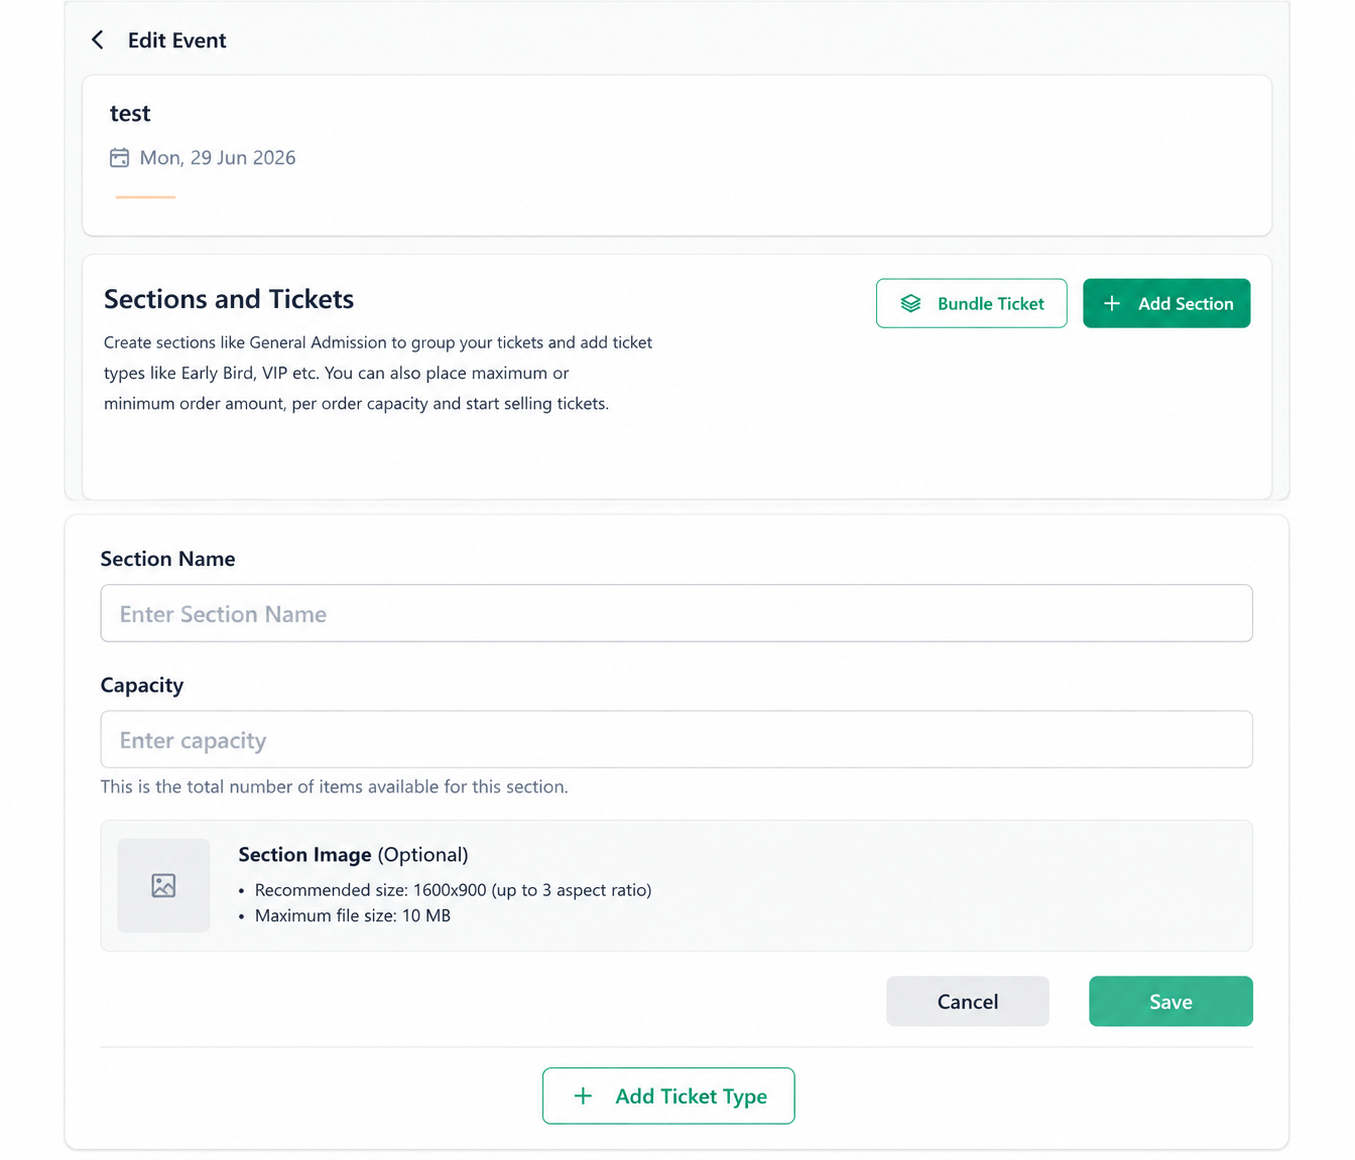
- Click on +Add Section
- Enter the Section Name.
- Enter the Section Capacity.
- Upload a Section Image (Optional).
- Click Save.
Step 2: Add a Ticket Type
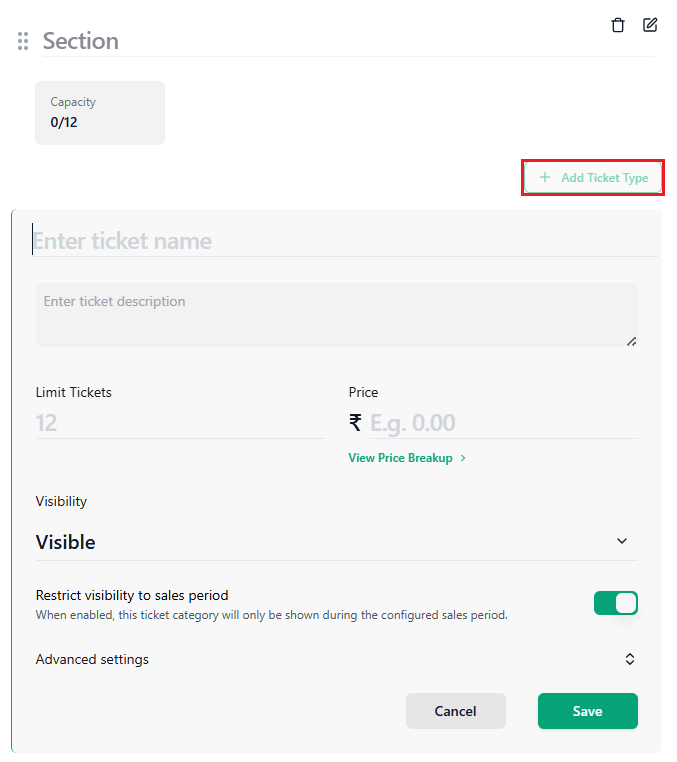
- Click Add Ticket Type.
- Enter the Ticket Name.
- Enter the Ticket Limit.
- Enter the Ticket Price.
- Click View to see the price breakdown.
- Select the required Visibility from the dropdown.
Step 3: Configure Advanced Settings
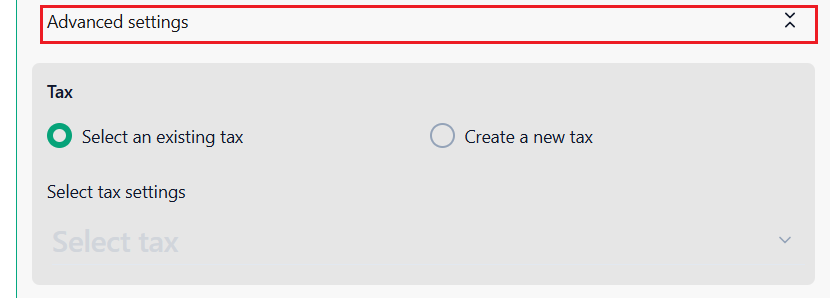
Click Advanced Settings and configure the following options.
Tax Configuration
Choose one of the following options:
Use Existing Tax
- Select Existing Tax.
- Choose the required tax from the Select Tax dropdown list.
Create New Tax
- Select Create New Tax.
- Select the Region.
- Enter the Tax Label.
- Enter the Tax Rate (%).
Additional Ticket Settings
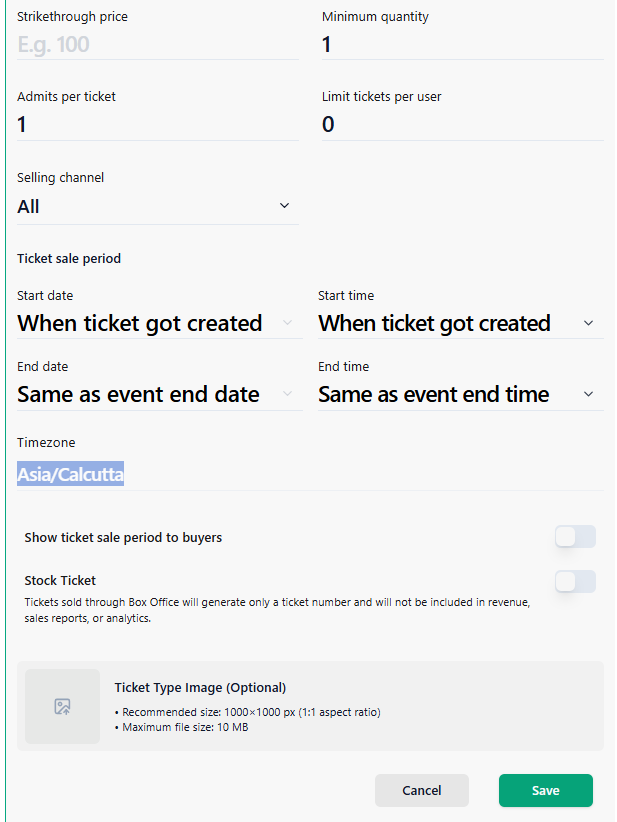
Configure the following fields as required:
- Strikethrough Price
- Minimum Quantity
- Maximum Quantity
- Admits Per Ticket
- Limit Tickets Per User
- Selling Channel
- Sale Start Date and Time
- Sale End Date and Time
- Enable Show Ticket Sale Period to Buyers to display the ticket sales period to customers.
- Enable Stock Ticket to manage and track ticket inventory separately.
Note: Stock Tickets help organizers control ticket availability and monitor the remaining ticket quantity throughout the sales period.
- Upload a Ticket Type Image(optional).
Recommended Specifications:
- Image Size: 1000 × 1000 px (1:1 aspect ratio)
- Maximum File Size: 10 MB
Click on Save
Step 4: Create Additional Sections (Optional)
If multiple sections are required:
- Click + Add Section located at the top-right corner.
- Repeat the above steps to create additional sections and ticket types.
Publishing an Event
After creating your event and adding tickets, you can publish the event by following the steps below.
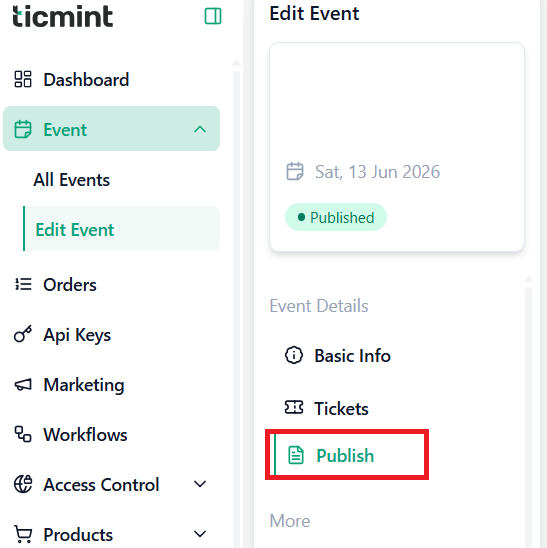
Click on Publish.
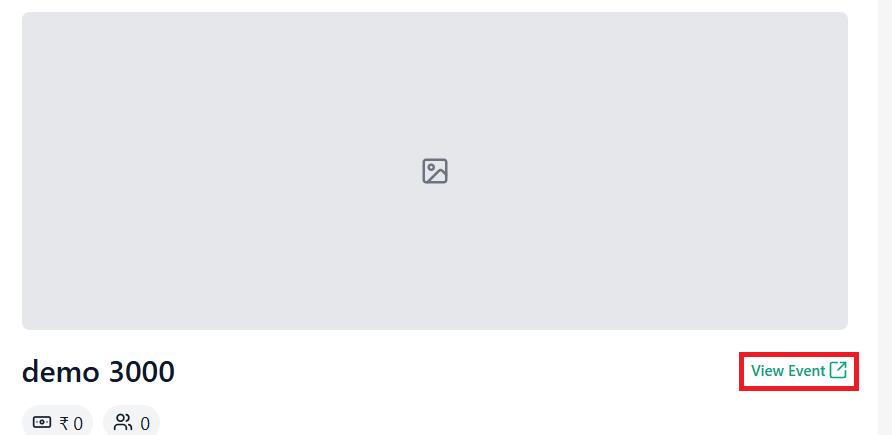
Preview Your Event
Before publishing, click View Event to preview how your event will appear to attendees.
Make sure the following are configured correctly before publishing:
- Promo Codes
- Add-ons
- Ticket Upgrades
- Validators (Check-in Management)
Publish Event
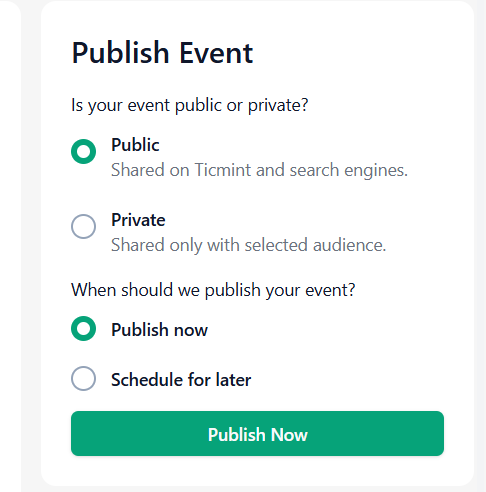
Choose Event Visibility
Public
- Event will be listed on Ticmint.
- Event can be discovered through search engines.
Private
- Event will only be accessible to the selected audience.
Choose Publishing Time
Publish Now
Click Publish Now to make the event live immediately.
Schedule for Later
Click Schedule for Later and select the desired start date and time.
You can also enable Schedule Unpublish Date, which automatically unpublishes the event after the selected date and time.
Once configured, click Publish Later.
After Publishing
Your event can be shared through:
- Event Link
- QR Code
- X (Twitter)
You can also:
- Send event invitations via email
- Use the iFrame code to embed the event on your website
Supercharge Your Event
Enhance event performance using:
- WhatsApp Marketing
- Cart Abandonment Recovery
- Email Marketing
- Affiliate Programs
- Promo Codes
- Add-ons
- Ticket Upgrades
- Validators (Check-in Management)
Managing Published Events
You can click Publish Settings at any time to:
- Unpublish the event
- Modify publishing settings
- Update visibility and scheduling options
Pro Tips for Successful Events
Use a high-quality cover image for strong first impressions.
Create your event early, giving attendees time to register.
Keep details updated — especially links, times, and access instructions.
Try AI-powered Quick Start on your dashboard for faster setup.
Your event is now live and ready to welcome guests!
Was this article helpful?
That’s Great!
Thank you for your feedback
Sorry! We couldn't be helpful
Thank you for your feedback
Feedback sent
We appreciate your effort and will try to fix the article