Overview
The Add-Ons feature in Ticmint allows event organisers to sell additional products or services alongside event tickets.
You can offer items such as:
Food and beverage packages
Event merchandise
VIP upgrades
Parking passes
Other additional services
Add-Ons provide attendees with the option to purchase additional products during their event booking.
Step 1: Navigate to Add-Ons
Log in to your Ticmint account.
Navigate to Add-Ons.
Select the required event and click Edit.
Open the Add-Ons tab.
For new events: Complete the Basic Information section and proceed to the Add-Ons tab.

Step 2: Select Product Category & Subcategory
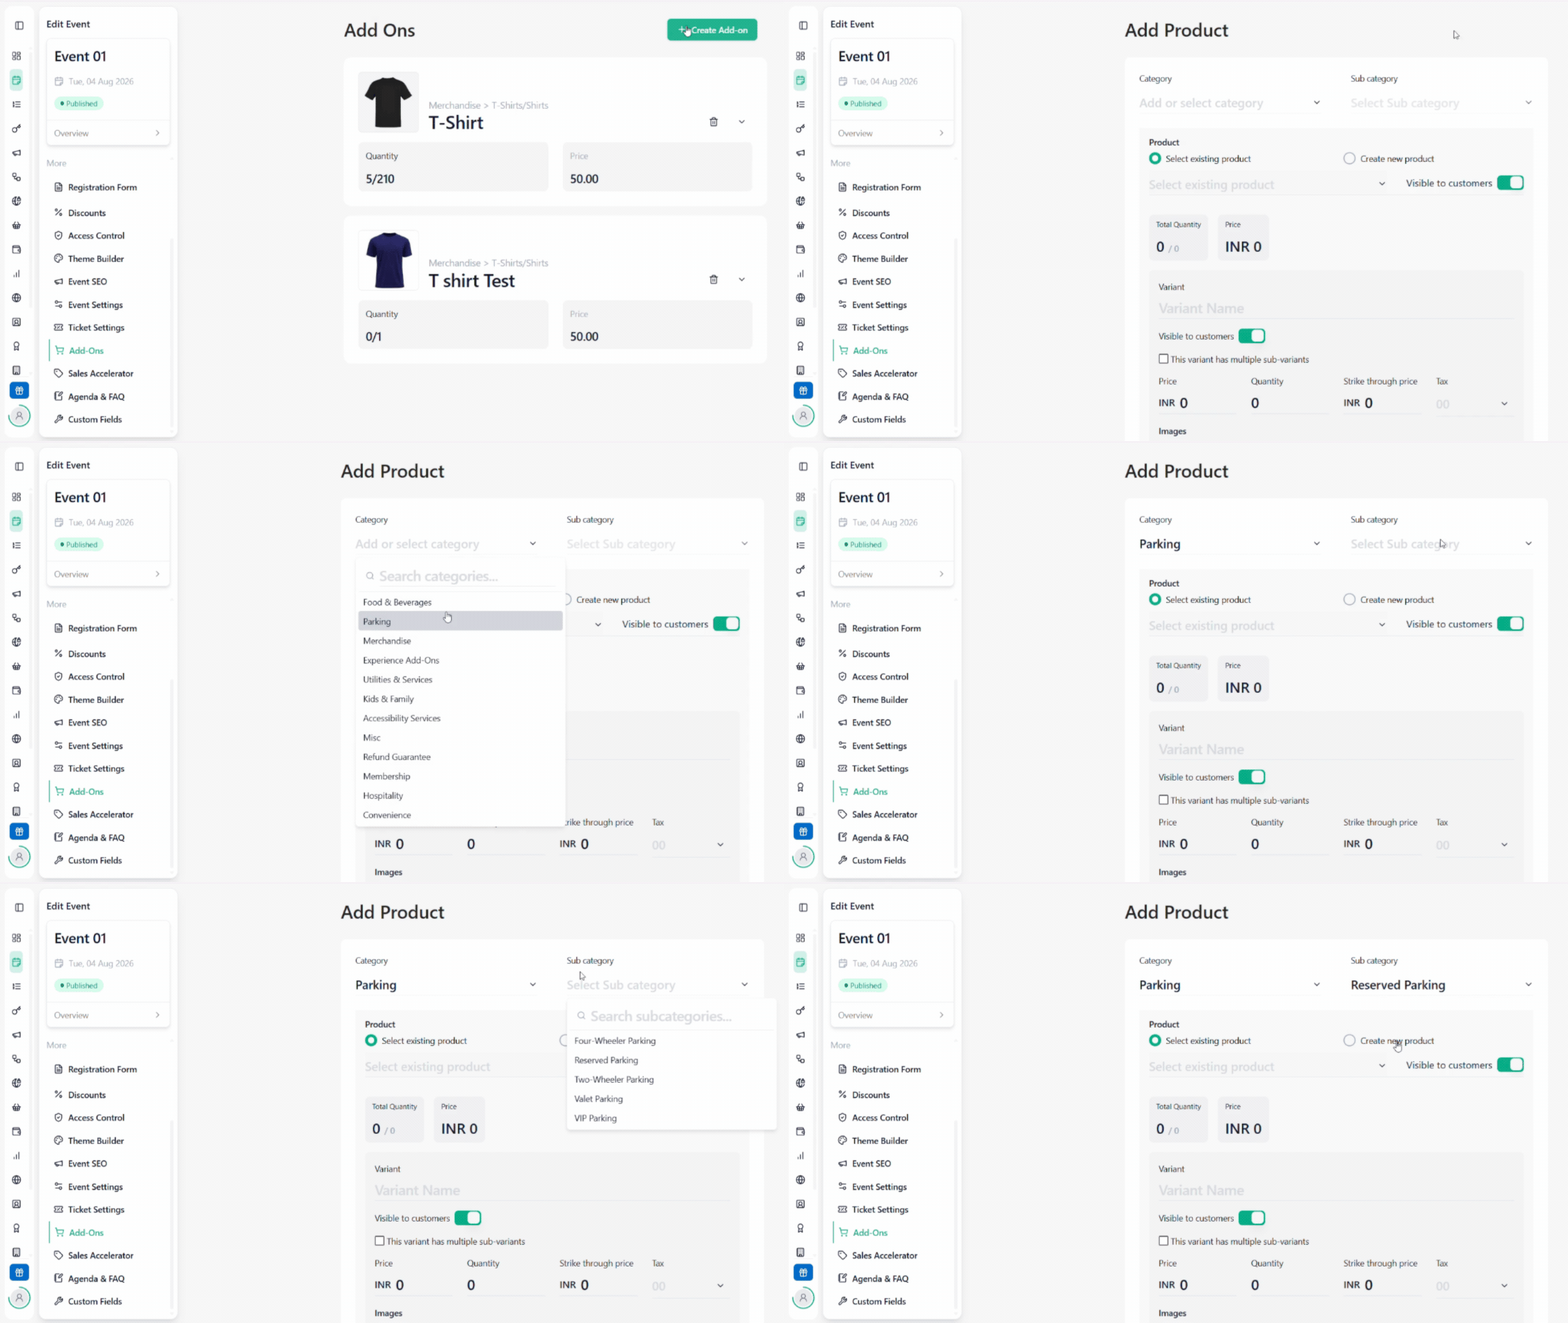
Before adding a product, select its category and subcategory.
On the Add Product page, select the required Category from the dropdown.
Select the corresponding Subcategory.
Note: If the required category or subcategory is not available, create it under:
Dashboard → Products → Category
Make sure the required categories are created before proceeding.
Step 3: Select or Create a Product
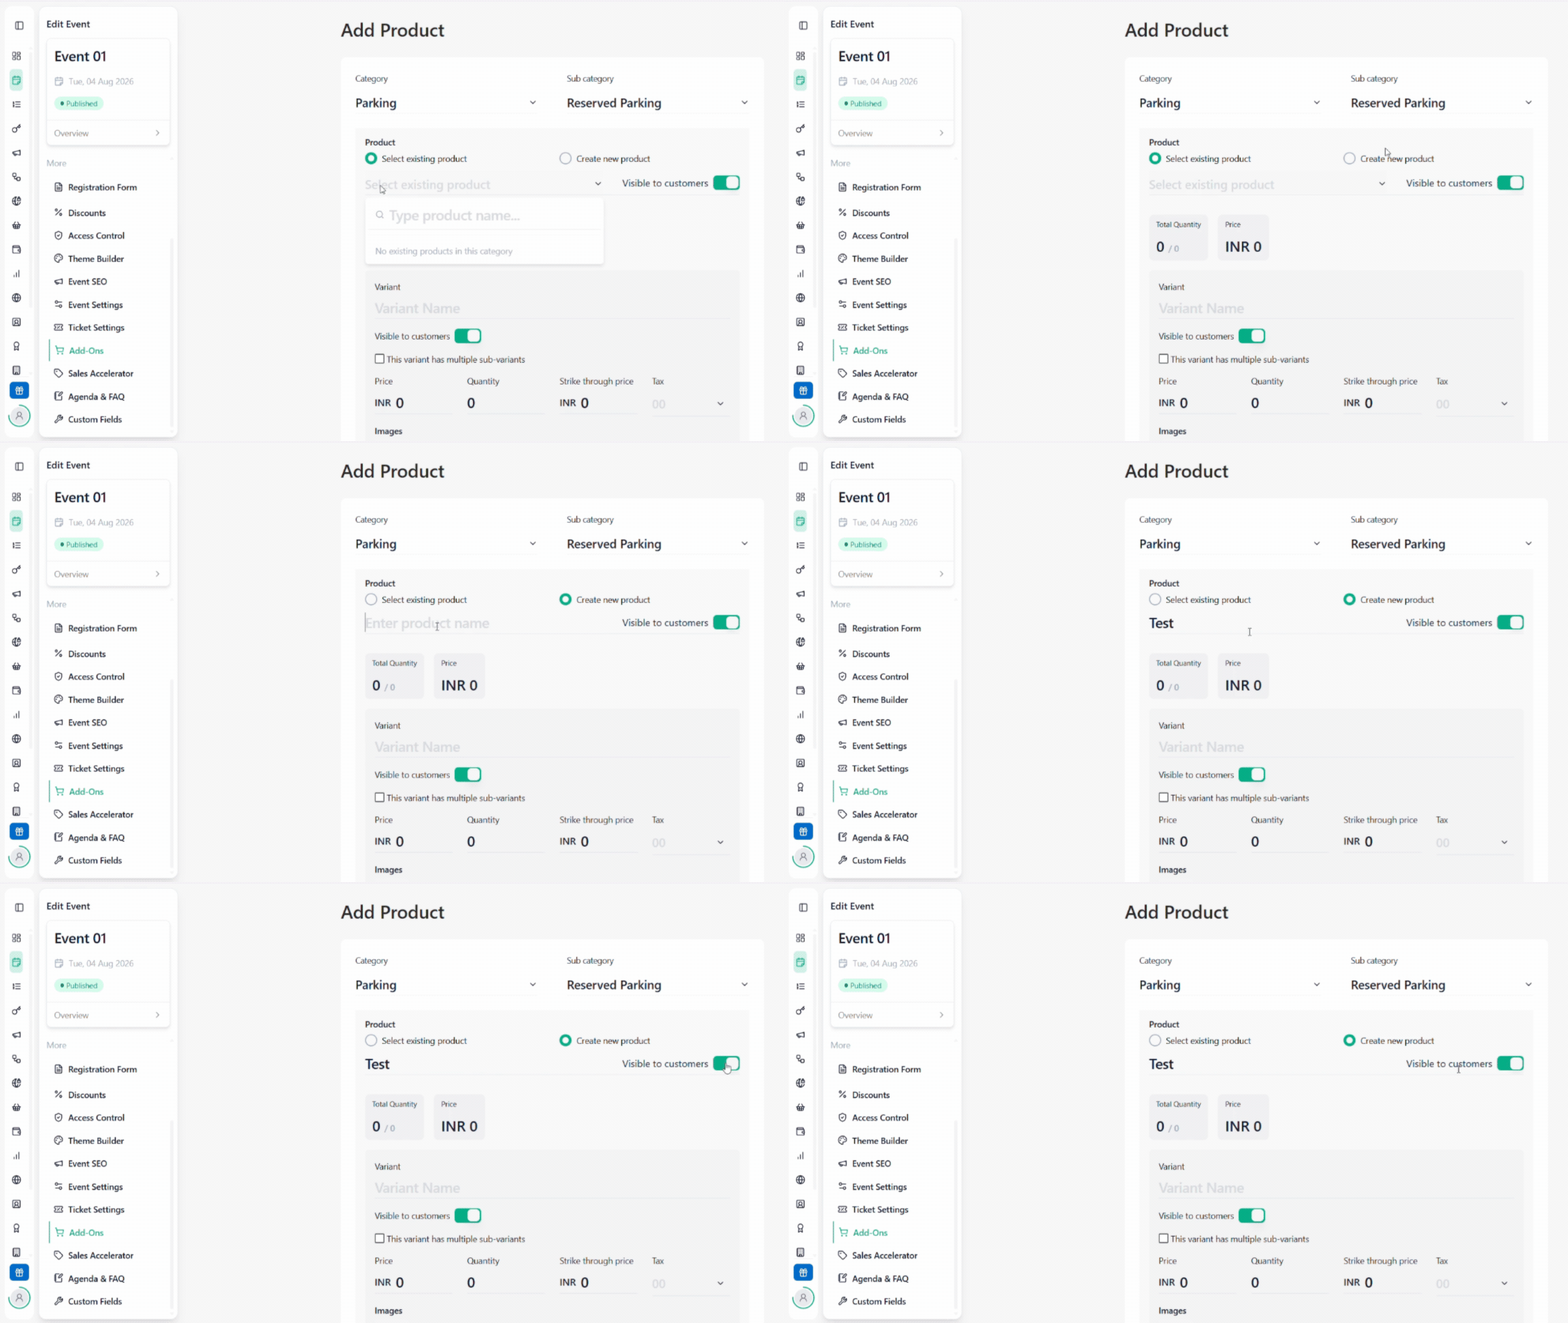
You can add an existing product or create a new product.
Option 1: Add Existing Product
Select Existing Product.
Choose the required product from the dropdown.
Note: Products can be created under Dashboard → Products → Products. Ensure the required product is available before selecting it.
Option 2: Create New Product
Select Create New Product.
Enter the Product Name.
Enable Visible to Customer if you want customers to view and purchase the add-on.
Step 4: Add Variants & Configure Pricing
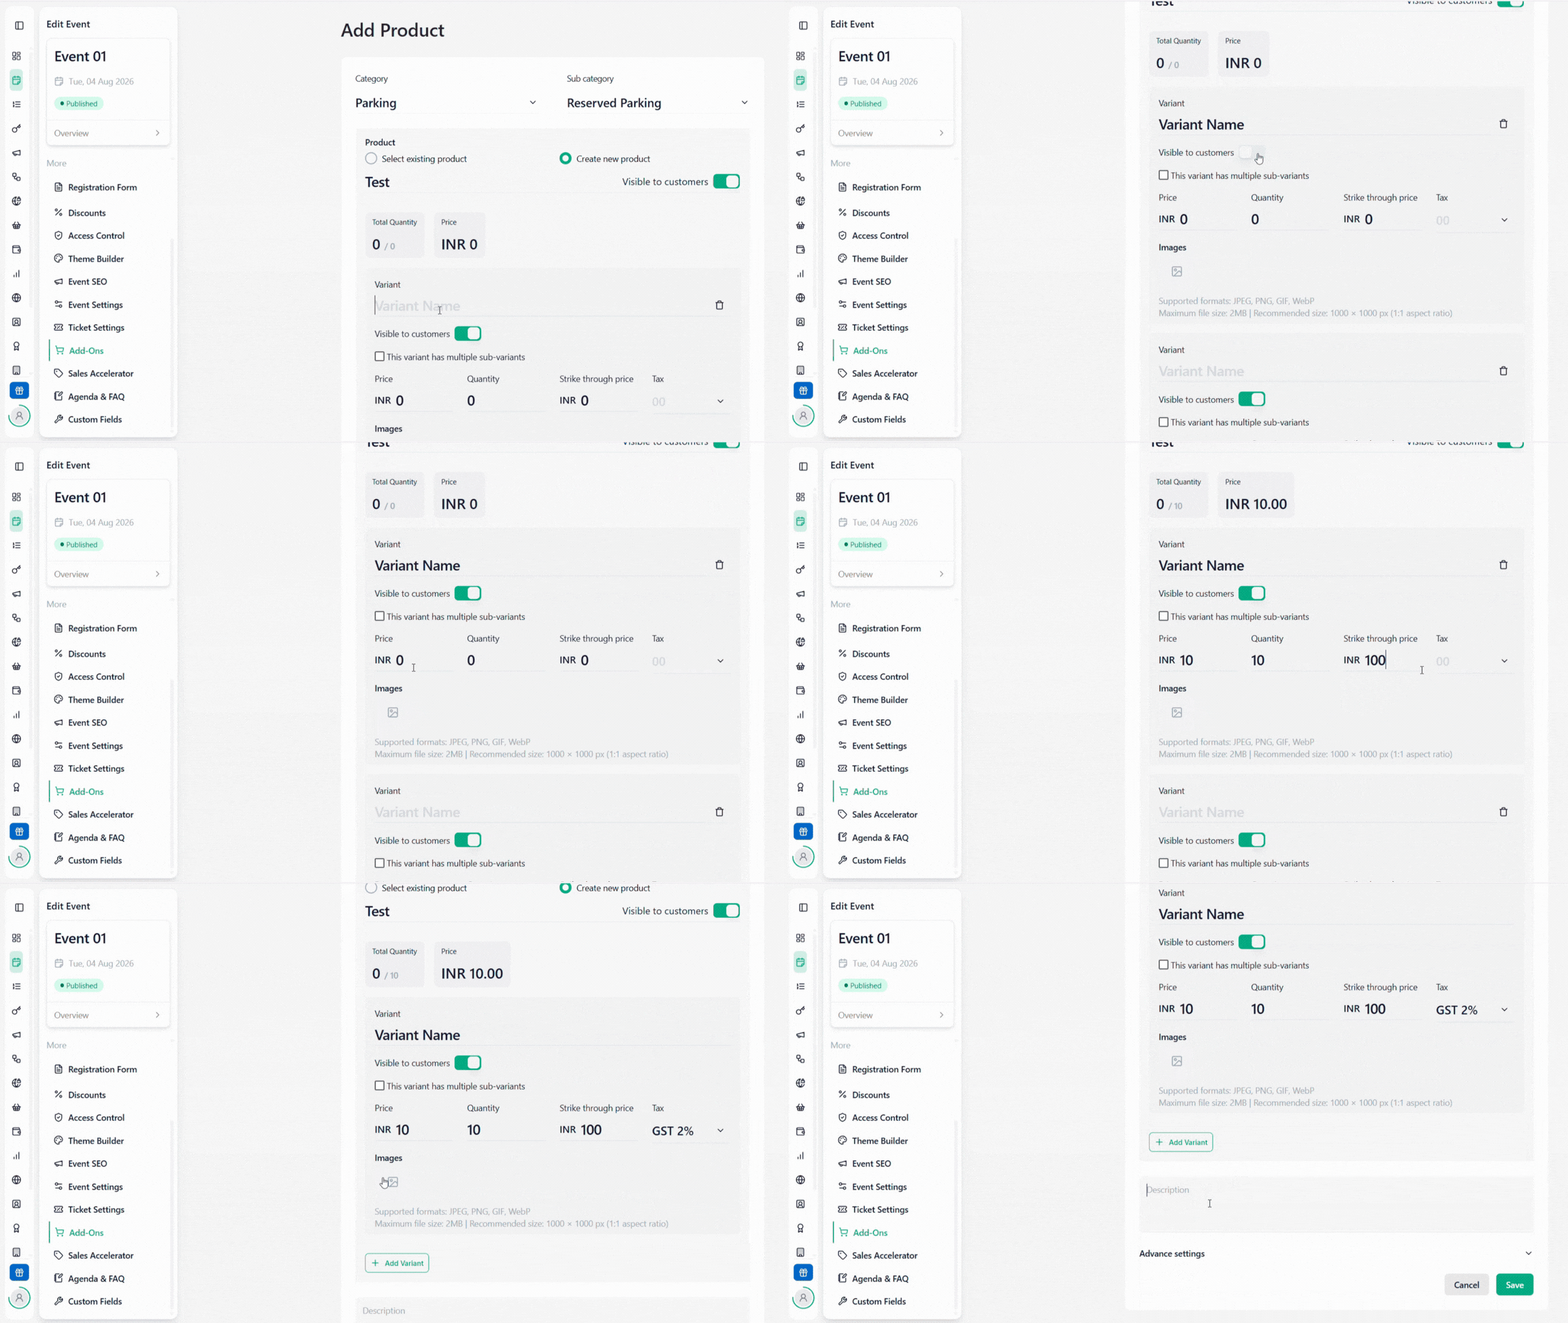
Variants allow you to offer different options for the same product.
Enter the Variant Name.
Enable Visible to Customer if required.
Configure the variant based on whether it has sub-variants.
Option A: Variant with Multiple Sub-Variants
Enable This Variant Has Multiple Sub-Variants.
For each sub-variant, configure:
Sub-Variant Name
Price
Quantity
Strikethrough Price
Tax
Image (optional)
Click + Add Sub-Variant to add more options.
Option B: Variant without Sub-Variants
If multiple sub-variants are not enabled, configure:
Price
Quantity
Strikethrough Price
Tax
Image (optional)
Click + Add Variant to create additional variants.
You can also enter a Description if required.
Step 5: Configure Advanced Settings & Save
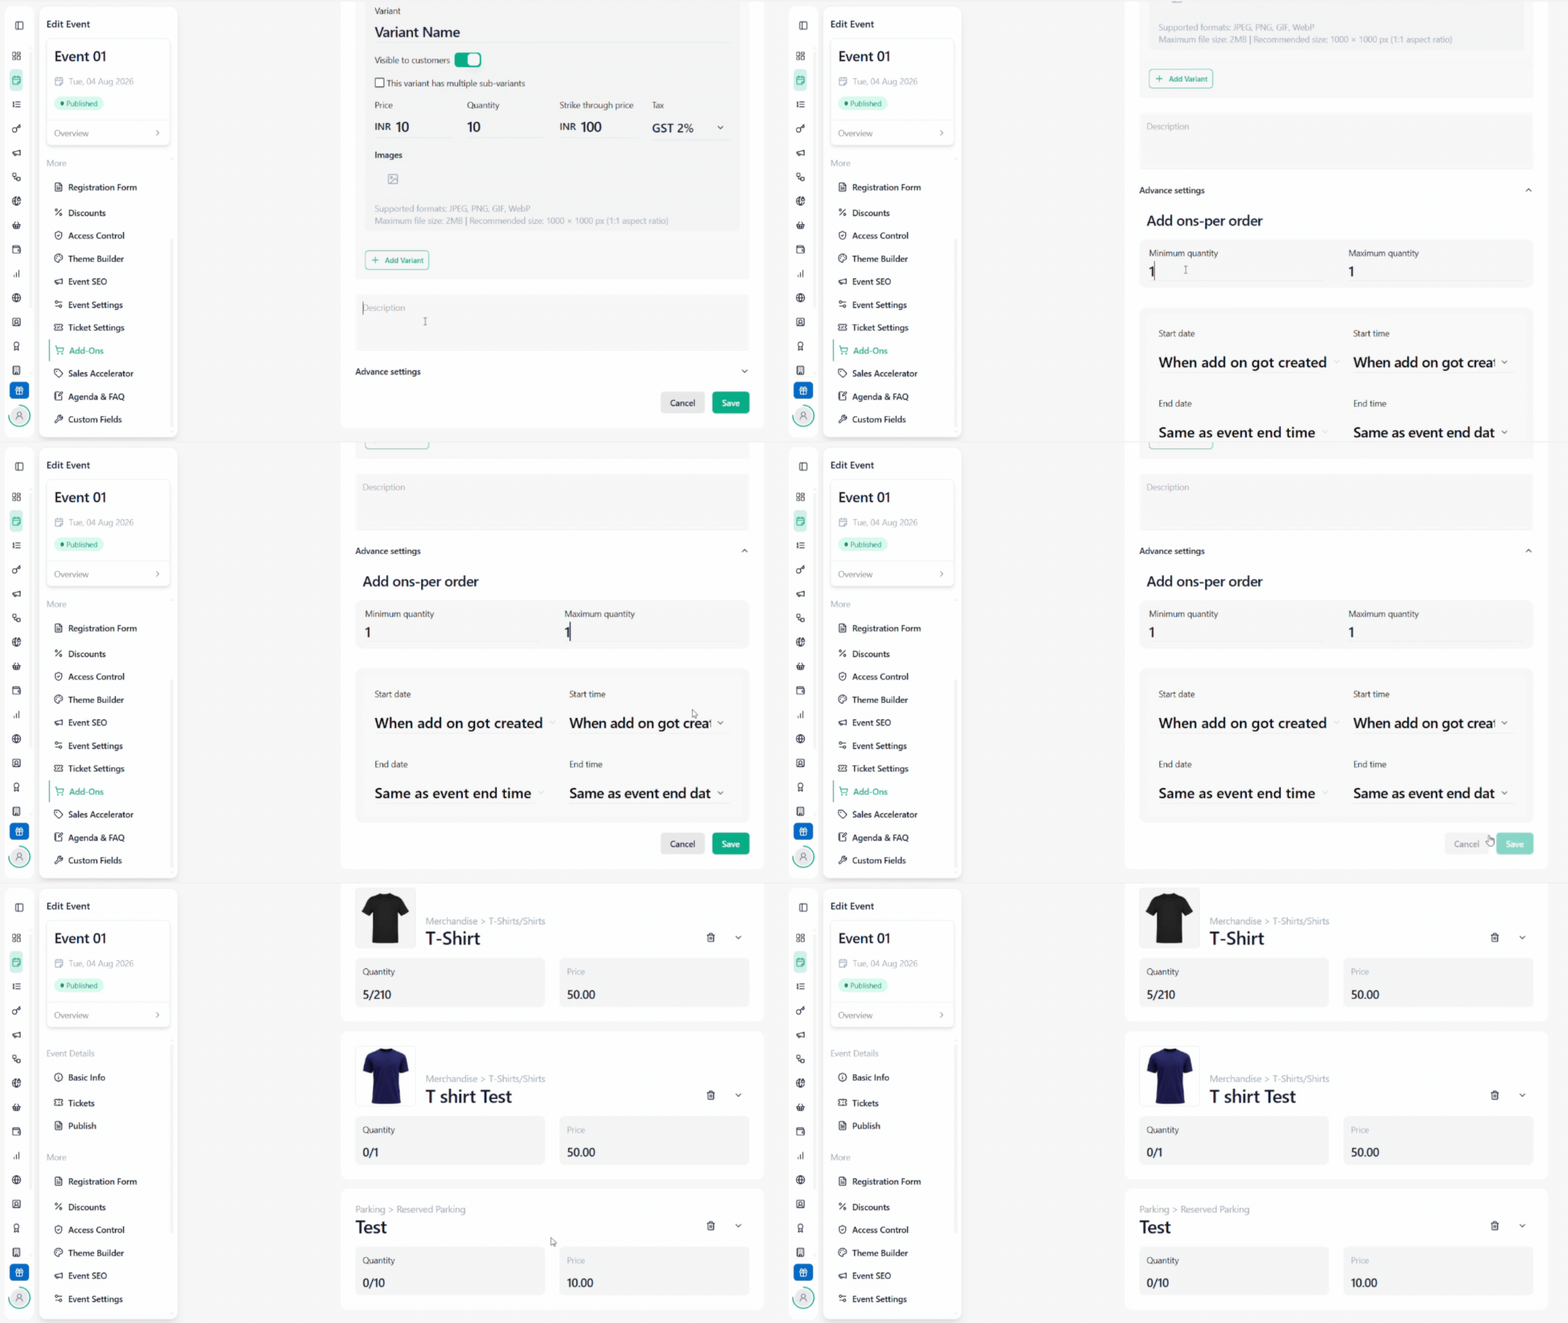
Click Advanced Settings to configure the add-on availability.
Configure the following options:
Minimum Add-Ons Per Order: Set the minimum number of add-ons customers can purchase per order.
Maximum Add-Ons Per Order: Set the maximum number of add-ons customers can purchase per order.
Availability Start Date & Time: Set when the add-on becomes available.
Availability End Date & Time: Set when the add-on stops being available.
Once all configurations are complete:
Review the product, variants, pricing and availability.
Click Save to create the add-on.
Best Practices
Use clear and descriptive product names.
Organise products under the appropriate categories.
Add relevant variants and sub-variants.
Keep product prices and quantities accurate.
Enable Visible to Customer for products you want to offer to attendees.
Configure availability periods according to your event requirements.
Review all details before saving.
Conclusion
Your Add-Ons are now configured.
You can use this feature to offer additional products and services alongside event tickets, giving attendees more purchasing options while creating additional revenue opportunities for your event.
Was this article helpful?
That’s Great!
Thank you for your feedback
Sorry! We couldn't be helpful
Thank you for your feedback
Feedback sent
We appreciate your effort and will try to fix the article